Script Wake on lan Gladys 4?

Hello,

In Gladys 3, we could create Java scripts, which was very convenient as I could start and shut down my PC.
I had created 2 devices. 1 executing my boot bash script and 1 executing my shutdown bash script on my Raspberry. (ex: Device1 with identifier « sh /home/pi/script/shutdown.sh » and device2 with identifier « sh /home/pi/script/boot.sh »)
I had also created a script that ran when I left and returned home:

let PcOnDevice = {
devicetype: 4,
value: 1

};

let PcOffDevice = {
devicetype: 3,
value: 1

};

gladys.deviceType.exec(PcOffDevice) ;

setTimeout(function(){
gladys.deviceType.exec(PcOnDevice);
},2000) ;

Is it possible to do the same thing in Gladys 4? If so, how? If not, is it planned to be able to run scripts or is a WOL integration planned?
I saw on other posts that there have already been some discussions about being able to run scripts but no real answer.

Thank you in advance for your responses.

In its current state, it is not possible to execute scripts… But you can create a mini web server that triggers your script. All you have to do is make an HTTP call and that’s it!

Check this out, it might be interesting for you https://jacobsalmela.com/2020/09/15/introducing-sampo-a-bash-api-server-that-runs-your-shell-scripts/

Ha, thanks for this solution. I’ll have a look at it.

Thanks for adding a link as I don’t know anything about it, so this will really help me!

Hello, don’t hesitate to make a small tutorial if you manage to do what you want, it could be useful for others :wink:

Of course.
But it looks bad because right now, I don’t understand SAMPO at all, so I’ll have to find something else that I understand a little better, but it’s tough when you know nothing about it…

I don’t particularly know about this project, there is surely another one that will be more suitable and easier to use.

The idea is to have a Web API server that will allow you to run a script with a simple call. For example, http://myip/myscript1 triggers a particular bash script.

Well, it’s 3 AM, but I finally have a solution.
If you have an easier solution, I’m all ears!
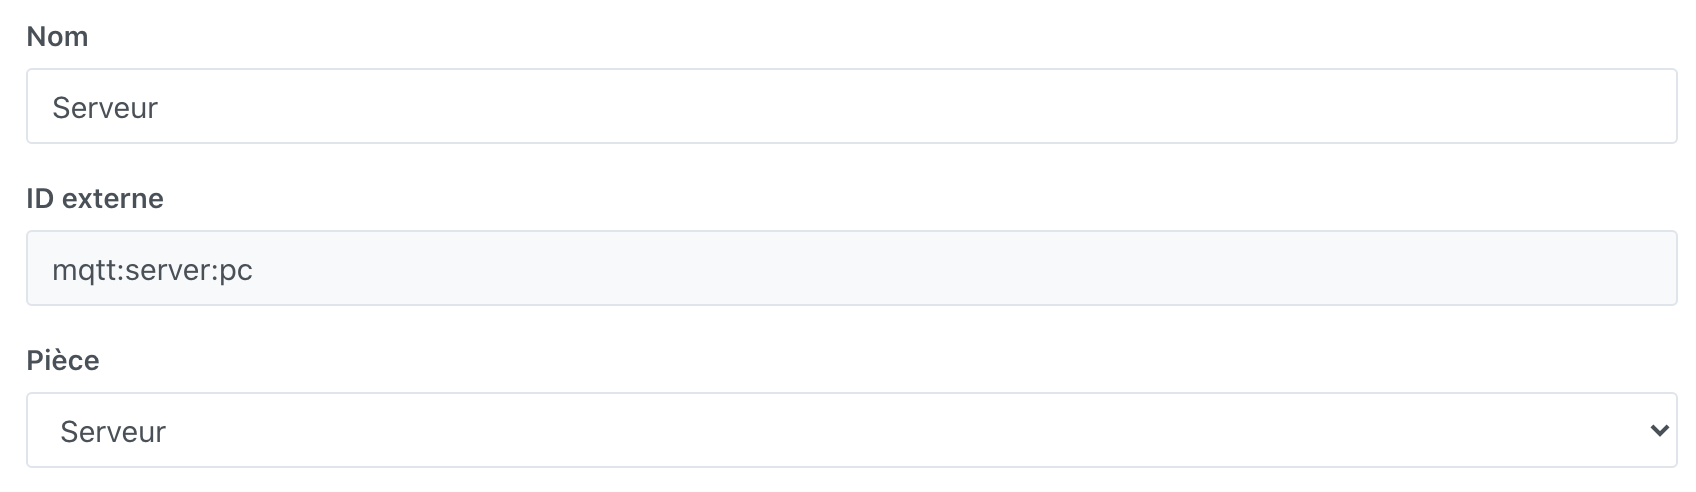
(Gladys runs on a raspberry pi)

ON THE RASPBERRY PI:
#################

  1. We update the raspberry:

sudo apt-get update
sudo apt-get upgrade

  1. We install apache and modify the port so that it does not use the same one as gladys:

sudo apt-get install apache2 -y
sudo nano /etc/apache2/ports.conf

  • modify the line « Listen 80 » to « Listen 90 » (I put 90 as the port but you can put the port you prefer)
  1. We install PHP:

sudo apt-get install php -y

  1. We enable the apache service at OS startup and start the apache service:

sudo systemctl enable apache2.service
sudo systemctl start apache2.service

  1. We install the services to shut down and start the remote PC:

sudo apt-get install samba-common -y
sudo apt-get install samba-common-bin
sudo apt-get install etherwake -y

  1. We create the PHP script file to start the remote PC via Wake-On-Lan:

sudo nano /var/www/html/boot.php

  1. We add the following code to it:
<?php exec("etherwake -D MACADRESSEDUPC"); ?>

(replace MACADRESSEDUPC with the MAC address of the remote PC)

  1. Then we add permissions to it:

sudo chmod 700 /var/www/html/boot.php
sudo chown www-data:www-data /var/www/html/boot.php

ON THE REMOTE WINDOWS PC:
###########################

Launch regedit and go to this location:
HKEY_LOCAL_MACHINE\SOFTWARE\Microsoft\Windows\CurrentVersion\Policies\System
Add a new DWORD32 key named « LocalAccountTokenFilterPolicy » and set the value to « 1 » if it does not exist.

Launch Services.msc, set the « Remote Registry » service to « Automatic » and start it.

In the Windows firewall, allow « Windows Management Infrastructure (WMI) » (personally, I did not have to do this)
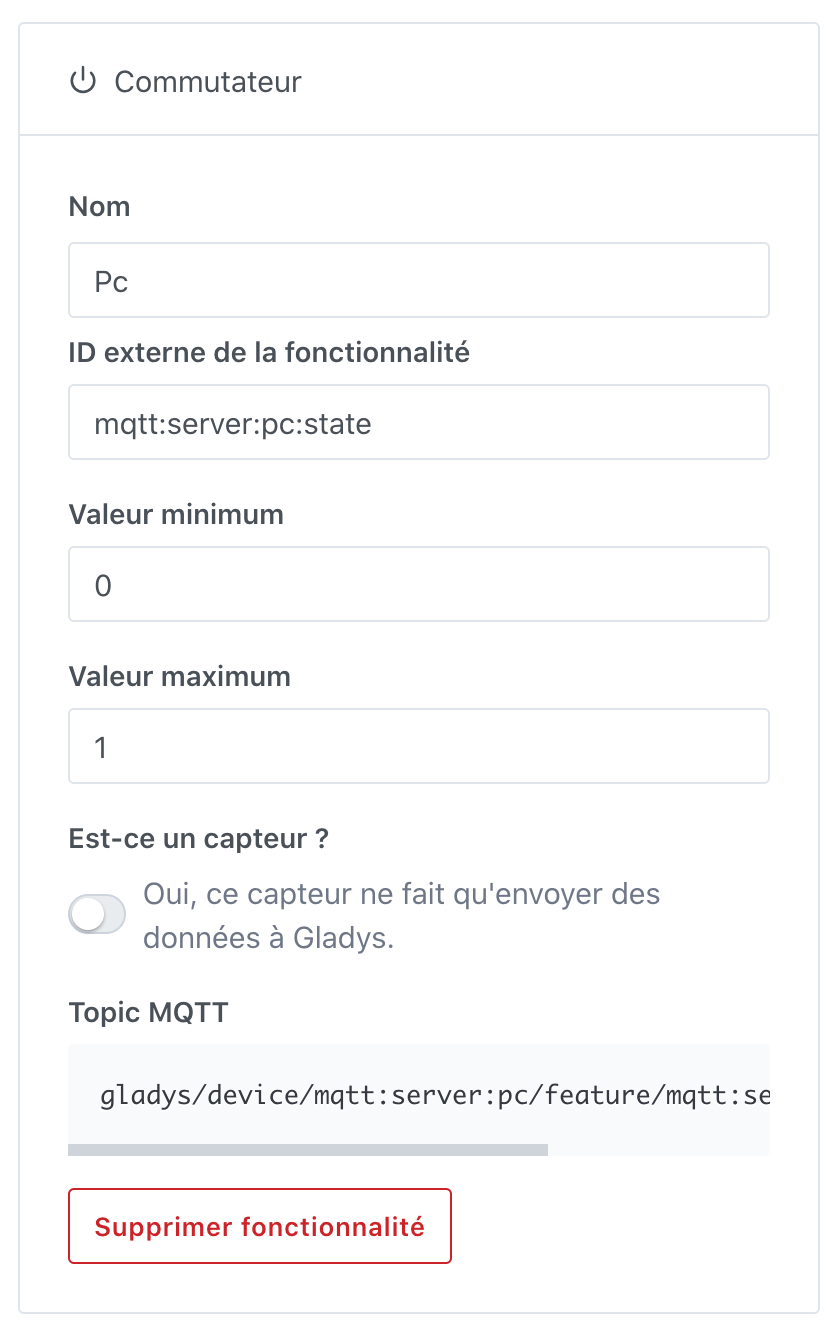
IN GLADYS4:
#############

Create a new Scene.
As a trigger, choose the one you prefer. (for my part, I chose « return home », so that my pc turns on when I get home.)
As an action, choose « Make an HTTP request », method = « POST » and URL = « http://IPDURASPBERRY:90/boot.php ». Leave the rest empty and save the scene.
(replace IPDURASPBERRY with the IP address of the raspberry pi)

You can test the operation by pressing the « Start » button on the scene you just created.
To cancel a shutdown under Windows, open a CMD and type « shutdown -a »

.
.
.
.
.
.
To shut down the remote PC, we repeat steps 6 to 8 as follows:
6) We create the PHP script file to shut down the remote PC:

sudo nano /var/www/html/shutdown.php

  1. We add the following code to it:
<?php exec("net rpc shutdown -f -I IPDUPCDISTANT -U UTILISATEUR%MOTDEPASSE"); ?>

(replace IPDUPCDISTANT with the IP address of the remote PC, UTILISATEUR with your username of the remote PC and MOTDEPASSE with the password of the user of the remote PC)

  1. Then we add permissions to it:

sudo chmod 700 /var/www/html/shutdown.php
sudo chown www-data:www-data /var/www/html/shutdown.php

Of course, you still have to make a scene in Gladys like for the boot but by choosing « leaving home » as a trigger for example and as an action, choose « Make an HTTP request », method = « POST » and URL = « http://IPDURASPBERRY:90/shutdown.php ». Leave the rest empty and save the scene.

Great if you found a solution!

Otherwise, another solution was to go through the MQTT integration and create a small script (in any language: Node.js, Python, doesn’t matter) that listens on an MQTT topic and reacts to receiving an MQTT message on that topic.

The MQTT API of Gladys is described in this documentation:

I also made a video on the subject:

But your solution works very well!! :smiley:

Attention to two things regarding security

You are allowing others on the file, a chown www-data and a 700 on the file should suffice :slight_smile:

The PHP exec is also quite dangerous, especially if your Gladys is accessible in your LAN :stuck_out_tongue:

You can limit adding in the vhost a Require ip 127.0.0.1 to only authorize Gladys

I upvote @Totof for the security aspect

Thanks people for the help!

I changed the chmod to 701 and 700 in the small tutorial above and on my raspberry. 701 for boot.php otherwise it doesn’t work.

→ I will try to do that this week if I have time.

I also need to look into MQTT integration but it scared me a bit. With the tutorial, it might reassure me and who knows, I might dive into it when I have 2-3 days off.

I’ll get back to you if I manage to do this VHOST thing.

Hello,

So I can propose a solution made in nodejs that I use. It’s an API that I quickly developed to meet my needs in addition to gladys.

If you want, I have put a public repo: GitHub - JeuFore/control-node · GitHub
A Docker Hub too: https://hub.docker.com/r/jeufore/control-node

In short, there are many things not necessarily useful for you, but you can check the repo, or run in a container.

Among other things, there is:

  • An API
  • Alexa support
  • MQTT support
  • Support for various devices

For just the use of wol, you need to create a device.js file

const WolDevice = require('../utils/WolDevice');

module.exports = [
    {
        deviceName: 'Pc', // for example
        deviceMQTTName: 'pc', // for example
        deviceRoom: 'server', // for example
        deviceParam: { mac: '00:00:00:00:00:00' },
        deviceInstance: WolDevice,
        features: [
            'state'
        ],
        children: []
    }
]

Then create an MQTT device in gladys


Then add a feature

Finally, to do a docker run:

docker run -d \
--network=host \
--name control-node \
-e MQTT_HOST=HOST \
-e MQTT_USER=USER \
-e MQTT_PASSWORD=PASSWORD \
-v ./device.js:/usr/src/app/const/device.js \
jeufore/control-node

Hopefully this can help people :slight_smile:

701 =  -rwx-----x

So execution for everyone

Did you run the command below?

chown www-data:www-data boot.php

For the require ip in the vhost, you should have in this directory: /etc/apache2/sites-enabled/ a file type default and you have the syntax below :slight_smile:

Oh, no, not at all. What does it do exactly? (I don’t know anything about it, I keep repeating myself)

You just saved me 2 days of research :smiling_face_with_three_hearts:

www-data is the user that runs a website. The chown command allows you to change the file ownership to www-data:www-data

For example, this HTML file

-rw-r--r-- 1 root root 10701 Nov 21  2020 index.html

It is owned by root:root with 644 permissions, so others can read it and the web server will be able to display it

If I change it to 640, the file will not be displayed

-rw-r----- 1 root root 10701 Nov 21  2020 index.html

By running a chown

chown www-data:www-data index.html

Here is the result

-rw-r----- 1 www-data www-data 10701 Nov 21  2020 index.html

In this case, it will be displayed :slight_smile:

I could give you a hand with the require ip if it doesn’t work ^^

Ah ok.
Thanks for the quick lesson, it’s clearer now!
Indeed, it’s much better in terms of security.

For the require ip, it will be fine with the information you already provided earlier.
Thanks again @Totof

Edit 01/2022:
Since the shutdown script has not been working for some unknown reason for a while, I looked into it and realized that the « net » command (useful for shutting down the Windows PC from the Raspberry) was no longer recognized.
net: command not found

I had to install samba-common-bin
sudo apt-get install samba-common-bin -y

The Windows PC shutdown is working again.

I modified the solution with this change (see post 7 - Script Wake on lan Gladys 4? - #7 par djokoss22)