Introduction:
I will explain how to flash a Sonoff relay in a few minutes with the Tasmota firmware in order to use it with Gladys.
You will ask me why, there are plenty of topics, tutorials, and others on the net.
- Because I will detail the procedure as much as possible for beginners.
- Because I tested several procedures and read a lot of tutorials, but each time I had an error at one point or another.
This procedure applies to Sonoff brand relays, for this one I use the basic model « Sonoff Basic », for the « Sonoff Dual R2 » it also works.
Prerequisites:
- An FT232RL FTDI USB module or an FT232R 3V3 USB cable that you can find for example HERE or HERE.
- A soldering iron
- Electrical wire or directly male-female cables
- The ESPtool software and the Tasmota firmware in French version HERE
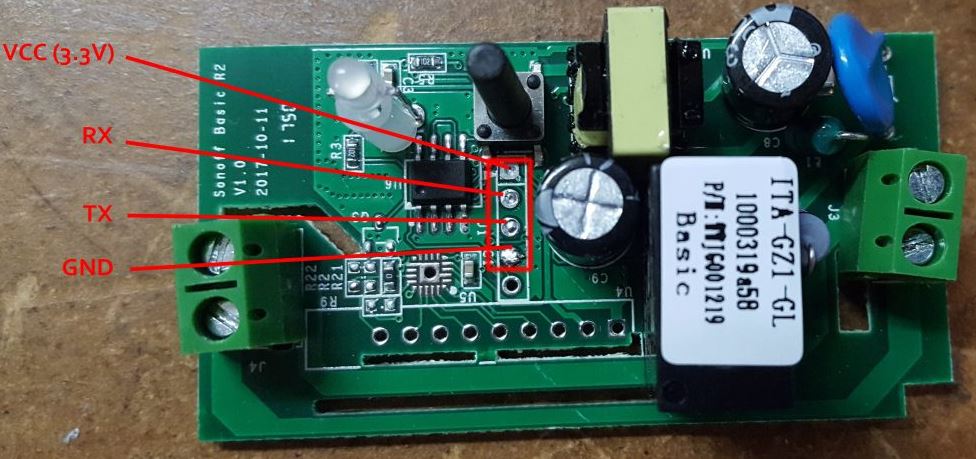
Relay Preparation:
Warning, do not connect to 220V!!!
To flash the relay, you will need to solder 4 wires or a connector on the 4 pads.
- VCC 3V3
- RX
- TX
- GND
For the FT232RL module
Connect the cables to the FTDI module terminals (it is indicated directly on the PCB what the terminals correspond to) by reversing the TX and RX pins.
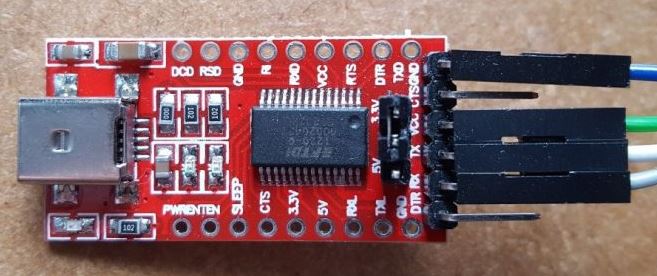
Position the FTDI module jumper on 3.3V
For the USB TTL232R 3V3 cable
Connect the cables to the terminals as indicated:
- Yellow TX: on RX
- Orange RX: on TX
- Red: on 3V3
- Black: on GND

Connect the FTDI module to a PC via a micro USB cable or your USB cable while keeping the ON/OFF button pressed for the « sonoff Basic » press and release after a few seconds.
For the « Sonoff Dual R2 » you need to connect the GND and button 0 terminals together.
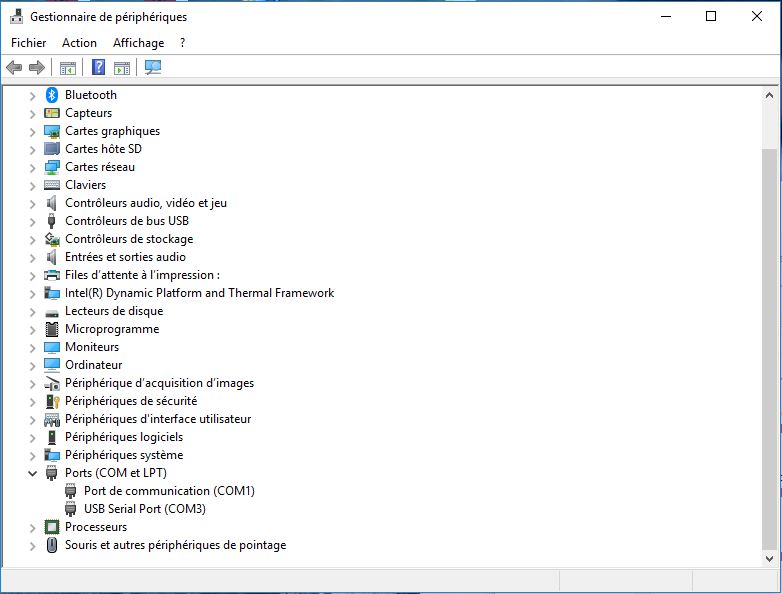
Open your device manager to check that the module is recognized and note the corresponding COM port number.
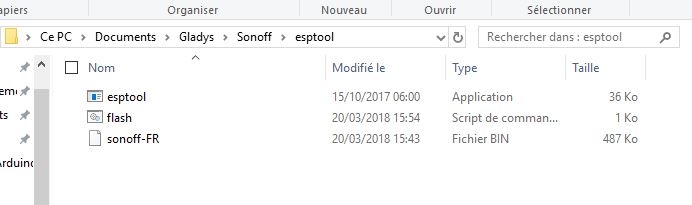
Unzip the archive containing the tools necessary to flash the new firmware that you downloaded previously.
Download and replace the sonoff-FR.bin file with the latest version that you can find here.
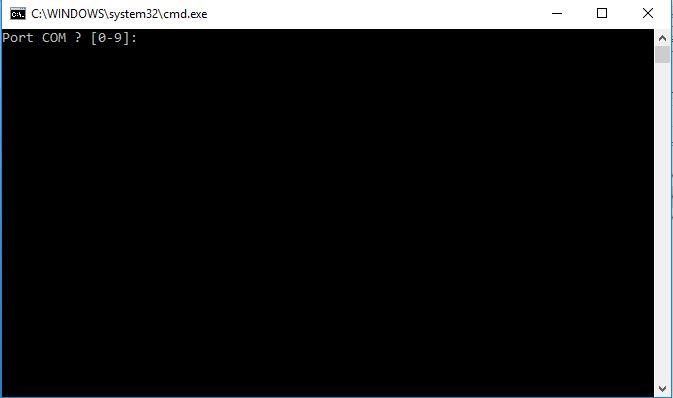
Run the flash.cmd file.
A command window will open
Enter the COM port number noted previously and validate with the Enter key.
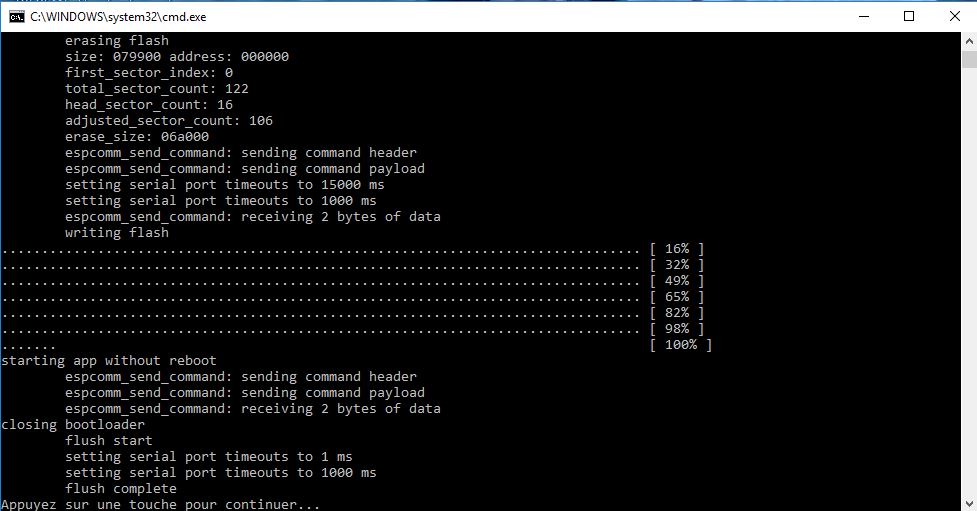
Once « Flush complete » is displayed, the operation is complete and your Sonoff is flashed.
Press any key to close the window
Unplug the USB from your PC and the Sonoff.
Relay Configuration:
You can now connect your Sonoff to the mains.
Warning, this requires knowledge of electricity, if you don’t know how to do it, call a professional!!!
To configure the Wi-Fi, press the ON/OFF button 4 times, which will put it in Hotspot mode.
Connect to the Sonoff with a smartphone, a tablet, or a laptop.
Provide the connection information for your Wi-Fi network.
- AP1 SSID: the name of your Wi-Fi network.
- AP1 Password: the password of your Wi-Fi network.
Find the IP address of your Sonoff relay (either via your box/router, or via a smartphone application that allows you to scan the network (ex: Net Analyzer or IP Tools on Android)).
Then go to the Sonoff management interface via its IP address.
Click on « module configuration »
Select your module type in our case 01 Sonoff Basic, (the relay will then restart).
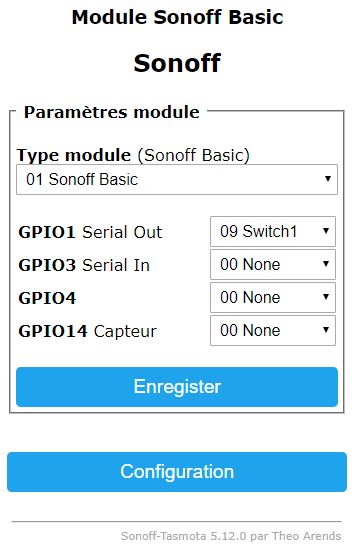
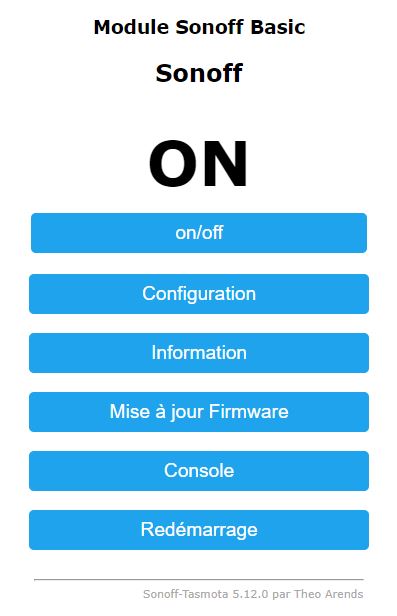
Here is the result on the general menu:
You can also configure the MQTT parameters.
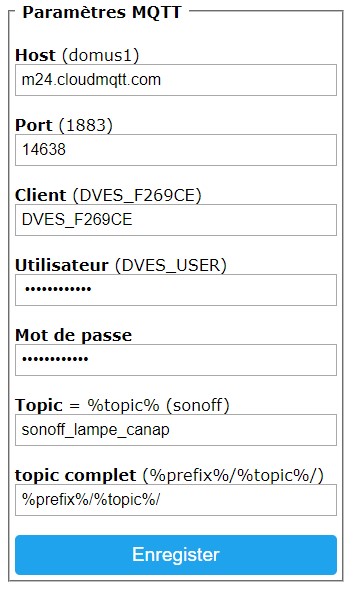
- Host: your broker address or MQTT IP address
- Port: your MQTT broker port (the default port is set to 1883)
- Client: unique device identifier, do not change if you do not know what it is for
- User: username for authentication on your MQTT broker
- Password: password for authentication on your MQTT broker
- Topic: unique identification topic for your device
Now that your Sonoff is flashed and configured on its IP address on your network, you need to add it to Gladys.
Configuration in Gladys V4:
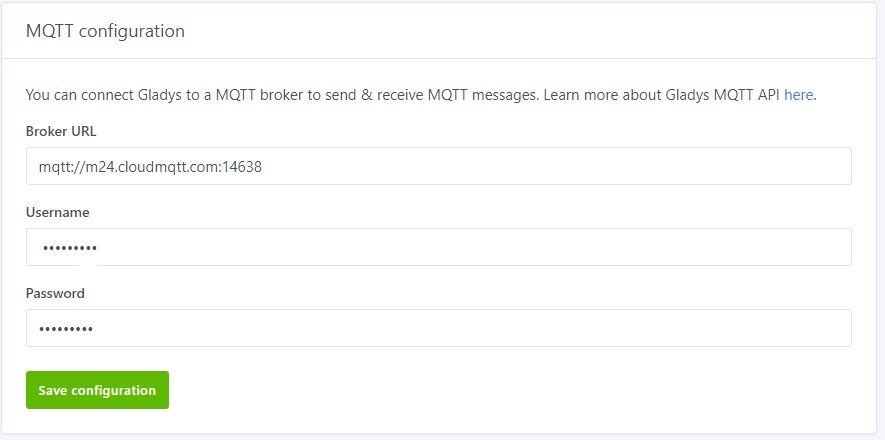
The first thing to do is to configure your mqtt server, click on « Integrations » then « Setup ». Fill in the three fields.
Now click on « Integrations » then « Sonoff » and « MQTT discover ».
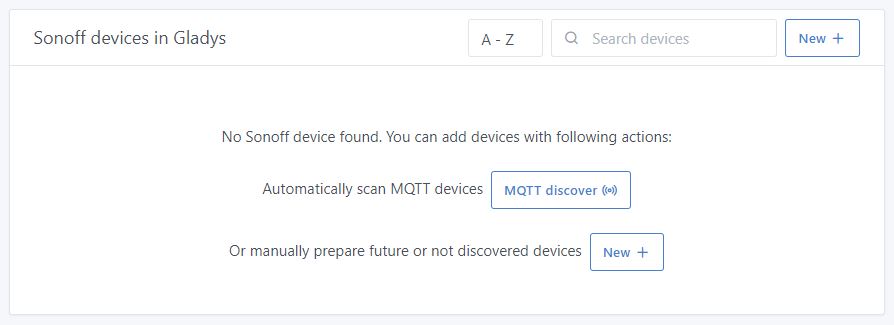
Here is what we will get:
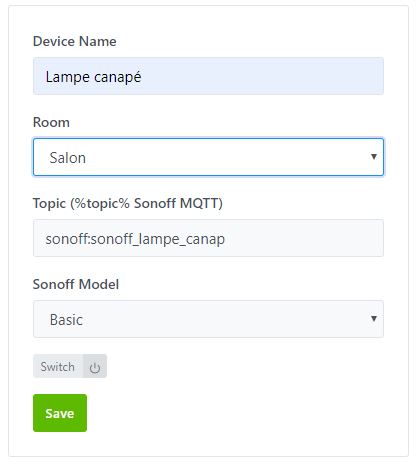
Fill in the Device Name and Room fields.
Save your settings.
Now click on the « Dashboard » and « edit »
Select « Devices in Room » then « + » and choose the room where your device is located and save.
You now have a box where you can control your Sonoff.
Bonus, just in case!!
Reset Sonoff
If, like me, you made a bad move or forgot your password.
No problem, there is a solution. You need to reset your Sonoff.
Prerequisites
You need the software nodemcu-flasher-master
The file to be implanted in your Sonoff « blank_1MB »
Relay Preparation
To flash the relay, you will need to solder 4 wires or a connector on the 4 pads.
- VCC 3V3
- RX
- TX
- GND
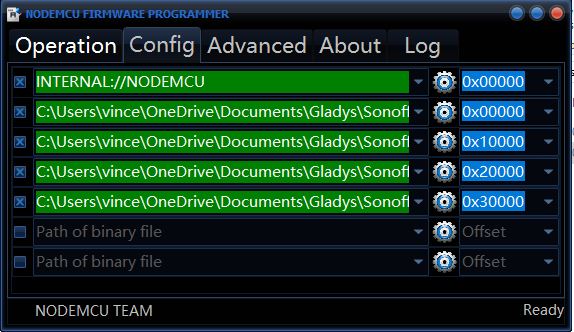
Erase the ESP8266 flash memory
To erase a 1MB range with this file blank_1M.bin, you just need to download the file and set it for download where you want to write it.
In config:
I want 0x000000 to 0x300000 to be erased.
Make sure to check the boxes at the beginning of the line, even the first one.
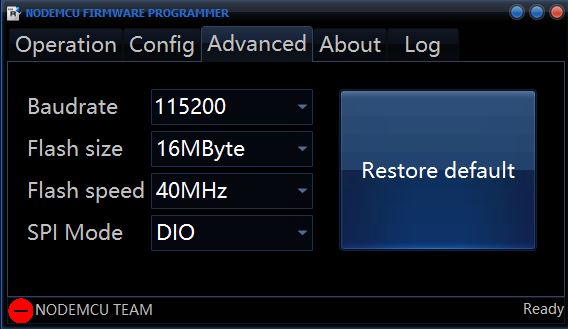
In Advanced:
- Baudrate: 115200
- Flash size: 16Mbyte
- Flash speed: 40Mhz
- SPI mode: DIO
In Operation:
Connect your Sonoff while keeping the button pressed.
Select the port of your USB cable and click on Flash(F)
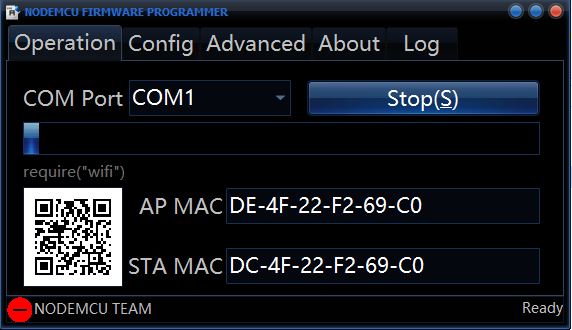
Now, enjoy a brand new « clean » memory, without the saved information from previous sessions!
You can flash it again.
Ps: if you see things to add, let me know.
I will add my experience for the Sonoff 2CH 85-220V and the creation of scenarios in Gladys.