Hi everyone!
I worked on this topic today. It’s not the most requested topic on the forum, but it’s a « quick win » and I think this feature is very useful for people who want to switch to Gladys while keeping another instance alongside (HA (Home Assistant), Node-RED, etc..) to manage devices not handled by Gladys.
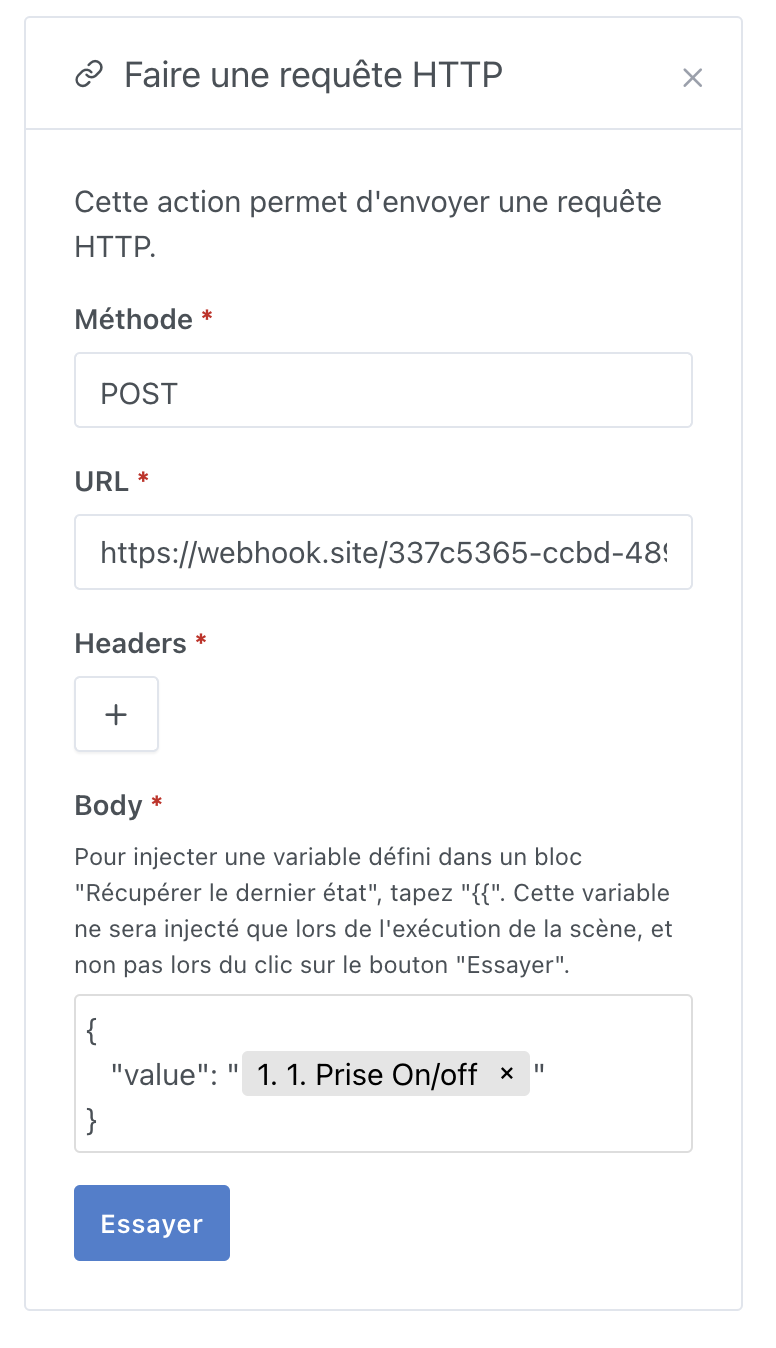
For the « Make an HTTP request » action, it looks like this:
Same behavior as the « Send a message » action
The PR is available here:
master ← new-variable-injected-component-scene
ouvert 03:52PM - 23 May 22 UTC
### Pull Request check-list
To ensure your Pull Request can be accepted as fa… st as possible, make sure to review and check all of these items:
- [x] If your changes affects code, did your write the tests?
- [x] Are tests passing? (`npm test` on both front/server)
- [x] Is the linter passing? (`npm run eslint` on both front/server)
- [x] Did you run prettier? (`npm run prettier` on both front/server)
- [x] If you are adding a new features/services, did you run integration comparator? (`npm run compare-translations` on front)
- [x] Did you test this pull request in real life? With real devices? If this development is a big feature or a new service, we recommend that you provide a Docker image to [the community](https://community.gladysassistant.com/) for testing before merging.
- [x] If your changes modify the API (REST or Node.js), did you modify the API documentation? (Documentation is based on comments in code)
- [x] If you are adding a new features/services which needs explanation, did you modify the user documentation? See [the GitHub repo](https://github.com/GladysAssistant/v4-website) and the [website](https://gladysassistant.com).
- [x] Did you add fake requests data for the demo mode (`front/src/config/demo.js`) so that the demo website is working without a backend? (if needed) See [https://demo.gladysassistant.com](https://demo.gladysassistant.com).
NOTE: these things are not required to open a PR and can be done afterwards / while the PR is open.
### Description of change
Please provide a description of the change here. It's always best with screenshots, so don't hesitate to add some!
However, I can’t really see how we could do this in the « Control a device » action because that view doesn’t have any text fields.
I wonder if in the end it’s not a different development..
Those of you who wanted this feature in the « control a device » action, what would you have used it for?
Do you have an example use case?