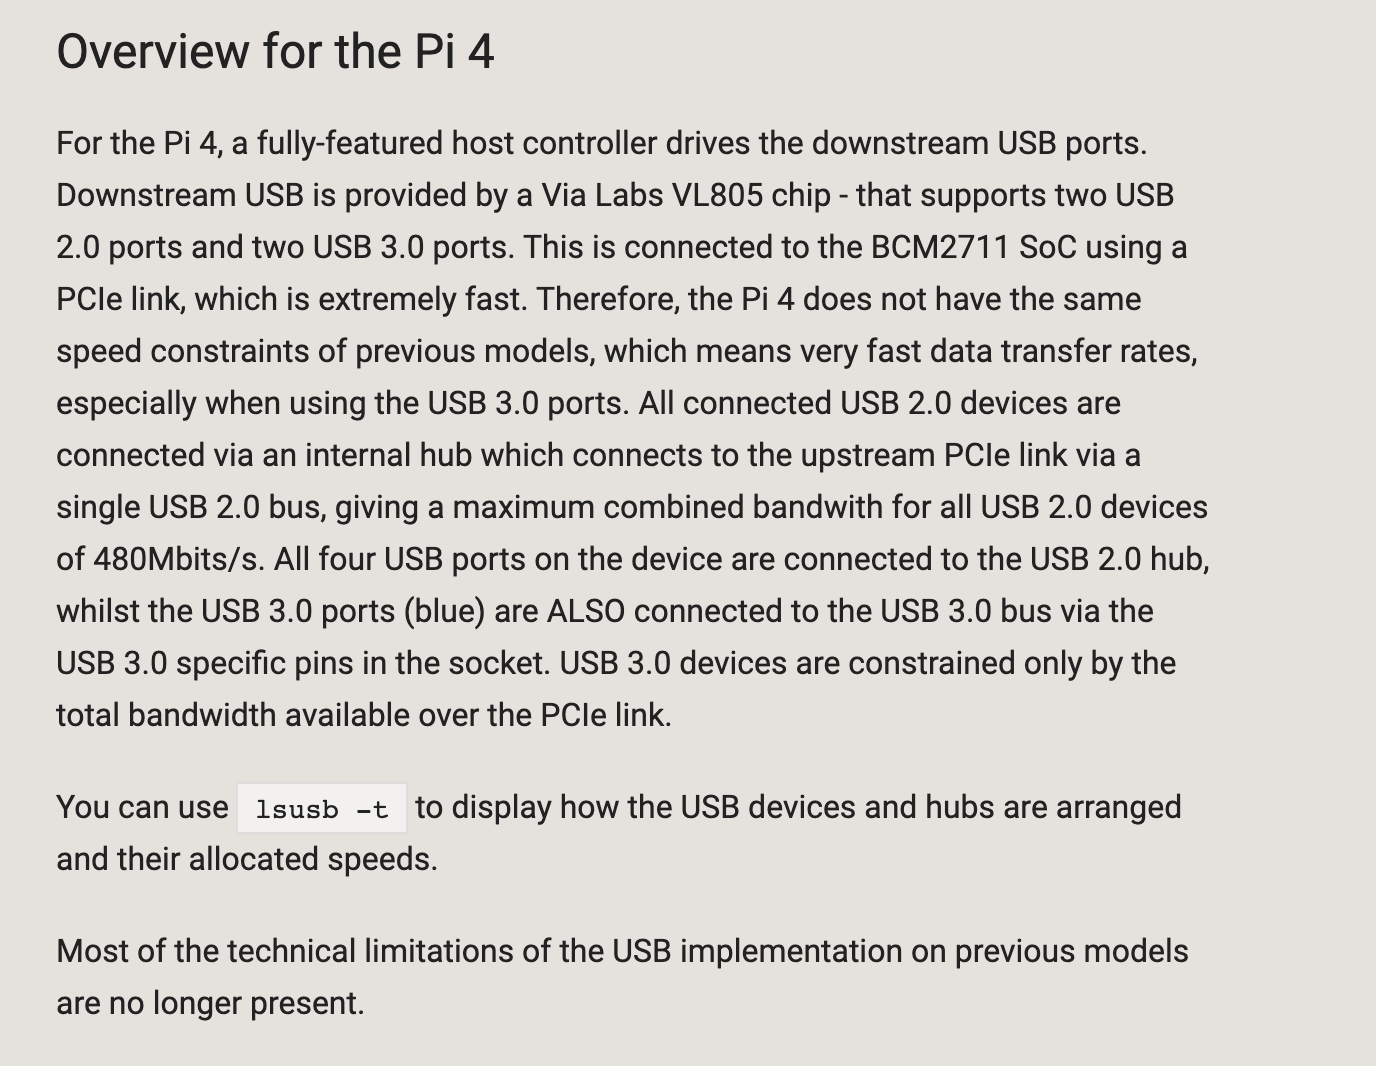
We were talking about this this morning with @Terdious. For those with complex setups and a lot of data written daily, using a micro SD card isn’t necessarily optimal. Over time, you quickly end up with corrupted files and not great read/write performance.
However, for less than €30 you can switch your Pi to an SSD. Here are a few references I found:
Then you need to clone the Gladys image onto the SSD, connect the SSD via USB to the Pi, and run a small command to tell it to boot from it
EDIT 18/01/2022: I made a video on the subject, super simple without any command line!
Check it out here:
I know @terdious is going to try a setup like this to see if it can improve his performance and the stability of his instance.
I’m curious to know if any of you are already doing this?
If so, it would be great to have a tutorial in the documentation to guide new users towards this option, as clearly using an SD card long-term is the best way to have data corruption and it spoils the Gladys experience a bit ^^
A quick update on the installation of Gladys on an SSD and its performance. Unfortunately, I didn’t take the time to test it with an SD card.
For the installation, I followed the tutorial and generally had no issues. The only issue is that the menus are not exactly the same, so you just need to take the time to look around
It’s important to understand that you first need an SD card, perform the manipulations, and then reboot by removing the SD card and you’re done.
pi@gladys:~ $ dd if=/dev/zero of=test bs=1048576 count=200
200+0 records in
200+0 records out
209715200 bytes (210 MB, 200 MiB) copied, 3.41732 s, 61.4 MB/s
pi@gladys:~ $ dd if=test of=/dev/null bs=1048576
200+0 records in
200+0 records out
209715200 bytes (210 MB, 200 MiB) copied, 0.405086 s, 518 MB/s
Low flow rate, I think we should also consider the fact that we’re using a USB port. I would like to see more feedback on this type of installation with more powerful SSDs (Samsung, etc.).
Indeed, with the raspberry being under a piece of furniture and hidden, I didn’t take the time to check that It’s probably the issue, in any case, in read we are much higher than what an SD card can offer
I started by following all the steps carefully, but I never managed to boot from the SSD… but I was stuck on USB 3.0. This morning, following the advice of @damalgos, I tried the complete procedure again but on USB 2 and this time it works perfectly. Then I restarted this time on USB 3.0 and it worked. I will detail the exact procedure later. I was able to perform this on a Raspberry Pi 4 1GB and on Pi 4 4GB. I will test tonight on the Pi 4 8GB, especially for performance. I used a Samsung T5 as an SSD - 75€ - tiny ^^
- Prerequisite:
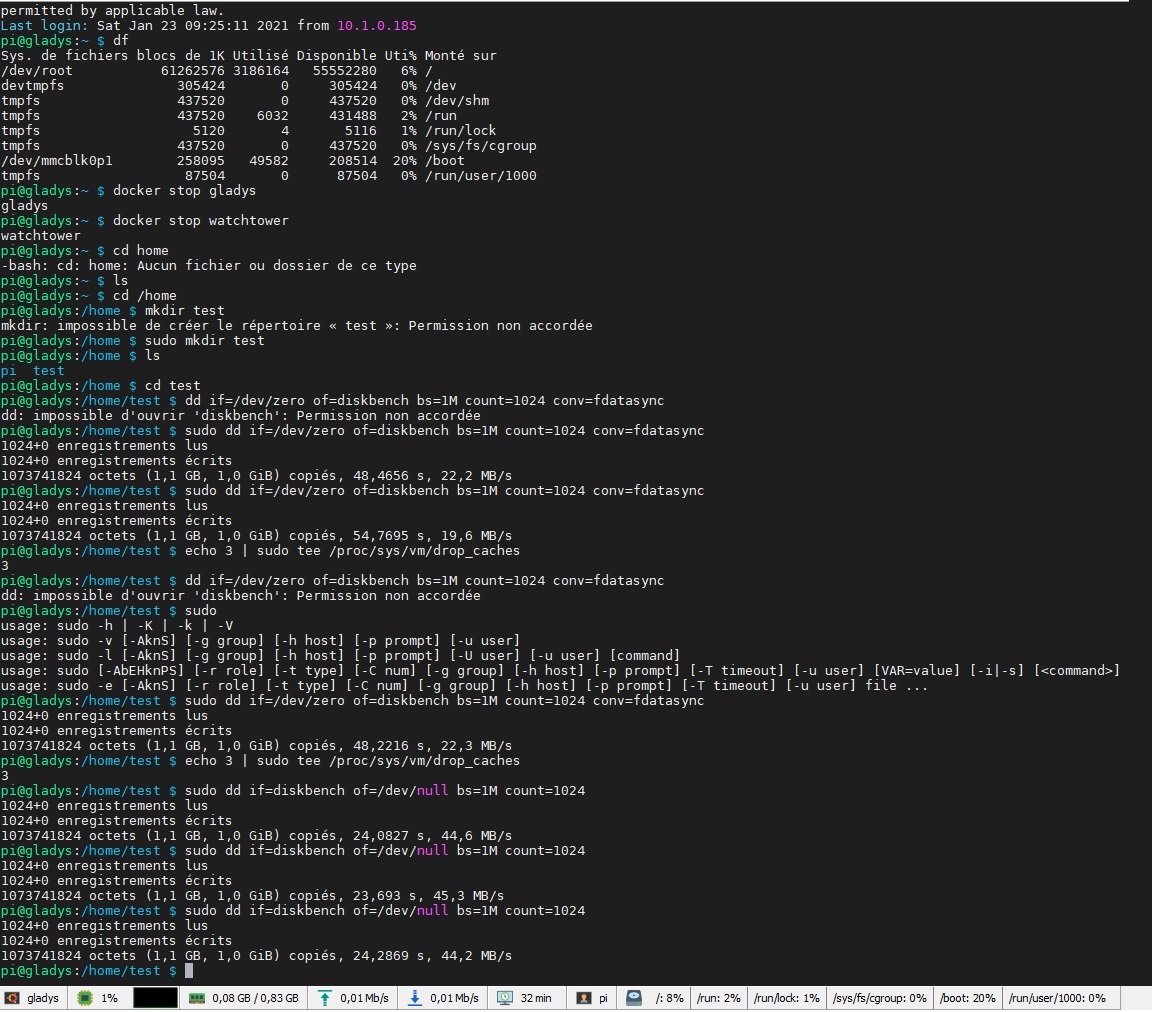
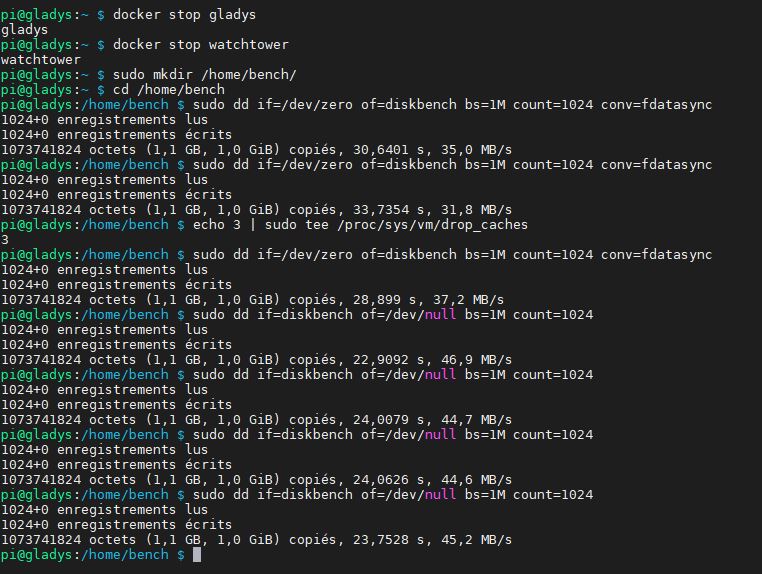
The test was performed with the official Gladys V4.0.4 image by cutting the docker containers at startup and after performing the necessary operations to be able to boot on the Raspberry Pi’s USB ports.
- SSD Testing:*
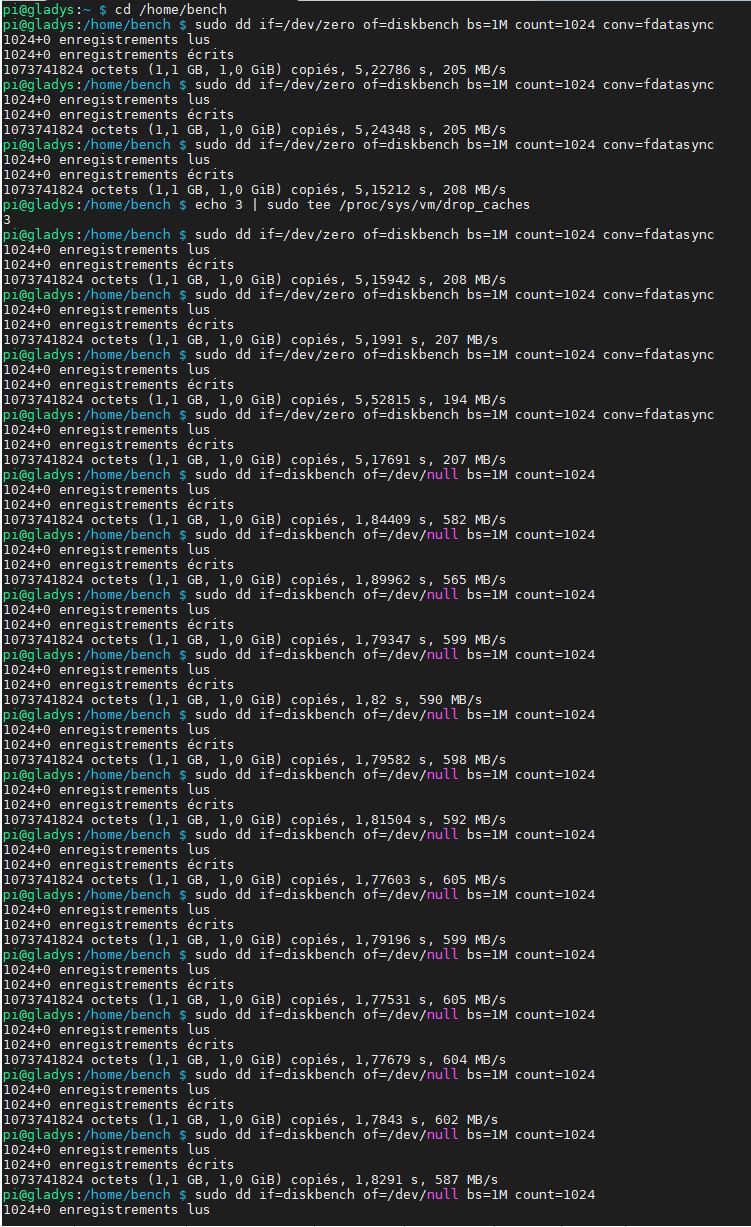
Samsung 860 EVO SSD Test:
USB2 Port:
Write = 30 to 31 MB/s
Read = 570 to 620 MB/s
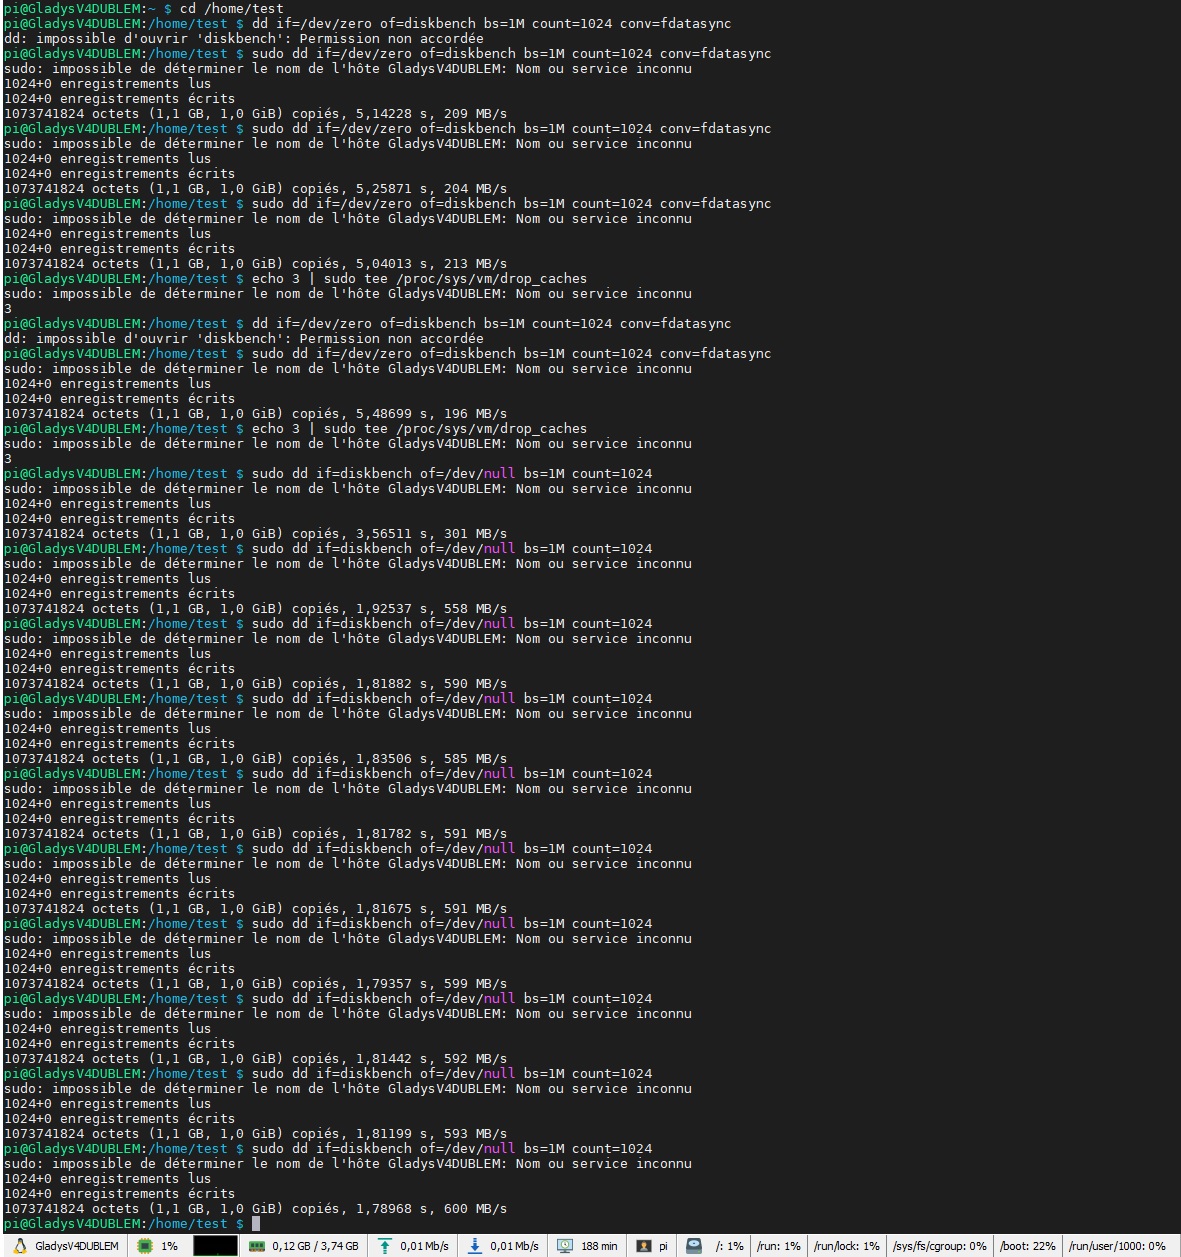
USB3.0 Port:
Write = 190 to 210 MB/s
Read = 560 to 610 MB/s
!! Warning !! Does not run in USB3.0 with the mentioned enclosure @pierre-gilles
Could you convert this into a small tutorial in the documentation? (with your performance figures, it will show the benefits of using an SSD instead of a micro SD card)
Well, yes and no. For the 860 Evo, I had it on hand. For the Samsung T5, I bought it partly for its small size (slightly smaller than the Pi) and it’s the only one available (didn’t find the 250GB for less than €156). And partly because I plan to put other things on it.
Just then, @pierre-gilles, is it possible to put multiple instances of Gladys on it? Does the port change automatically on a second Docker container? A tutorial on how to do it if that’s not the case?