Greetings!
I have just completed the transfer of my complete Gladys installation from an SD card to an external USB drive (SSD), and as I struggled quite a bit with my « not so simple » configuration, I am offering you a complete tutorial…
- Preface
I am using a Raspberry Pi 4. There may be differences for other versions!
I had issues due to insufficient power supply from the USB ports. An externally powered USB hub is highly recommended!
There are two scenarios:
- You only have Gladys to transfer: Follow the first 4 steps
- Your installation includes other things (Kodi, samba, cameras…): This is the solution that will be developed here. We will:
a. Configure the boot sequence on the pi;
b. Install rpi-clone;
c. Perform a first copy of the SD card (to create the necessary partitions);
d. Modify the size of the partitions to add a « Data » partition on the USB disk.
- Configure the boot sequence on the pi
To do this, you need to connect to the raspberry via SSH (see here if you are not familiar with this). First, we will update the pi. Type the command:
sudo apt update && sudo apt upgrade -y
Then, launch the « raspi-config » utility via the command:
sudo raspi-config
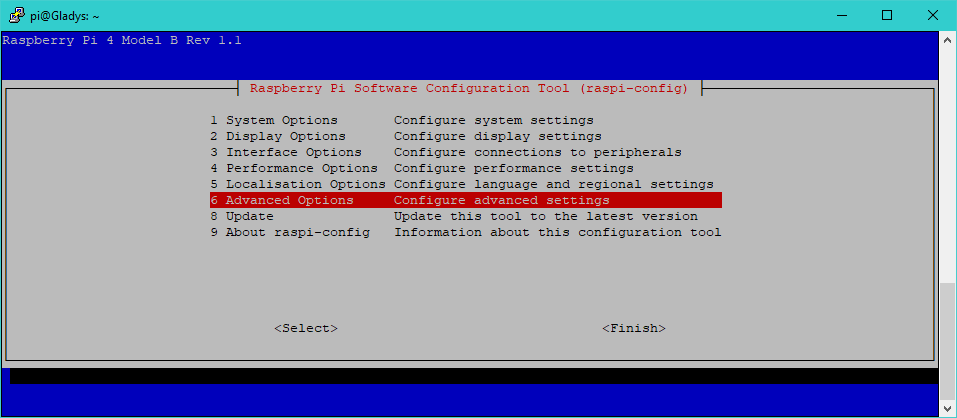
Navigate with the arrows to « 6 Advanced Options » → « A7 Bootloader version » → « E1 Latest… »
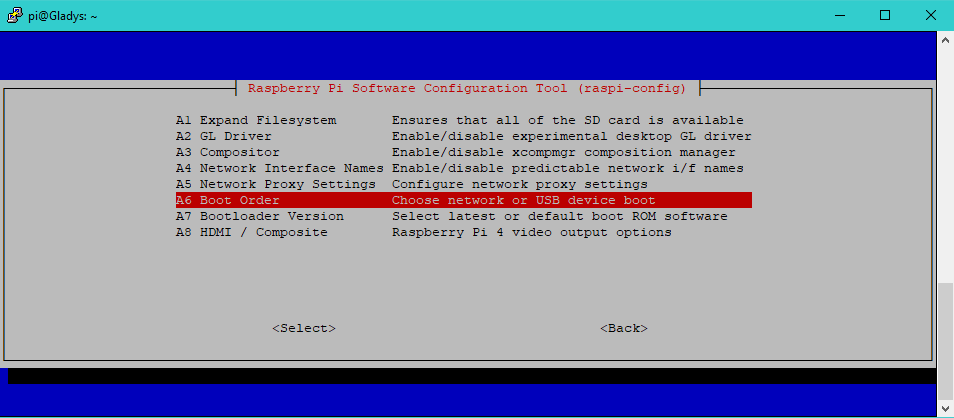
When the utility asks you to reset the configuration, say « no » as well as for the reboot because we are going to take advantage of this to change the pi’s boot sequence. Navigate to « 6 Advanced Options » → « A6 Boot Order » to choose « B2 USB Boot ».
- Install rpi-clone
Still via SSH, we will install the « rpi-clone » script. To do this, enter the following four commands, one at a time:
sudo apt install git
git clone https://github.com/billw2/rpi-clone.git
cd rpi-clone
sudo cp rpi-clone rpi-clone-setup /usr/local/sbin
If you haven’t already, connect your external disk to your raspberry.
- Perform a first copy of the SD card (to create the necessary partitions)
Stop the running services:
sudo service mysql stop
sudo service cron stop
sudo service apache2 stop
sudo service docker stop
sudo service kodi stop // if kodi is installed
And all those you might have added…
Then, two scenarios:
- The most common: You only have one external disk connected to your raspberry.
Still via SSH, type the command:
sudo rpi-clone sda -f
- You have multiple external disks connected to your raspberry.
In this case, you first need to identify the disk on which you want to be able to boot. To do this, type the following command and collect the necessary information, i.e. « sda », « sdb », « sdc », etc. Information that you will integrate into the command proposed in the previous point…
sudo lsblk -o UUID,NAME,FSTYPE,SIZE,MOUNTPOINT,LABEL,MODEL
That’s it (unless you want to resize the partitions, in which case go to the next step), Gladys is now fully migrated to your external disk! No more corrupted SD cards! You can now reboot the pi (you can remove the SD card or leave it in, it is no longer useful except if you want to make a backup from time to time…) by typing:
sudo reboot
Warning! For the next step, the pi must not have rebooted or must have booted from the SD card!
- Modify the size of the partitions to add a « Data » partition on the USB disk.
Generally, external disks have a capacity much larger than SD cards that we can exploit. If, for any reason, a problem occurs on one of the system partitions, all data can be corrupted and a complete new installation may be necessary.
I therefore propose to:
- Resize the system partition created by rpi-clone
- Create a new « Data » partition used for additional data storage, shares, backups, etc.
Warning! This requires manipulations that may corrupt the data. Perform these with caution!
a. Execute the command (where sda is the path to your USB drive)
sudo cfdisk /dev/sda
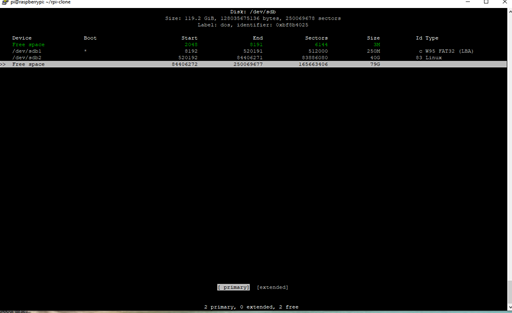
Then, select the line /dev/sda2 and choose the « Resize » option
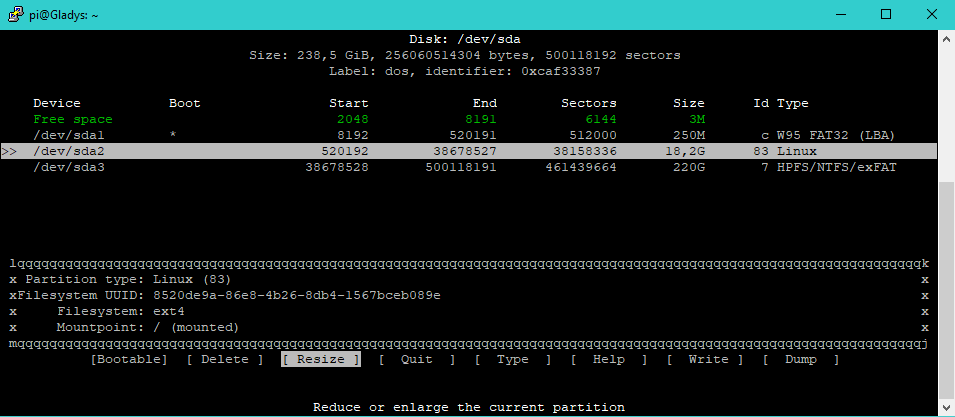
Enter the desired new size (a few tens of GB are more than enough (6G minimum!))
Then, go down to the last line (Free space) and choose the « New » option. Enter the desired size (by default, it suggests putting the rest). Finally, click on « Write » and type « yes » (in full, yes!)
That’s not all!
Now you need to format all this…
Type the command
sudo mkfs.ext4 /dev/sda2
sudo mkfs.ntfs -f /dev/sda3
(I chose ntfs for my share partition so that I can access it from another machine if needed)
To finish…
Since we just formatted the partition that we copied from the SD card, we need to make a copy of it with rpi-clone again:
sudo rpi-clone sda
You will notice that this time, there is no -f argument, which forces the creation of partitions, which we no longer want!
That’s it!
sudo reboot
After rebooting, all you have to do is mount the new partition in a folder you have created (mine is « Music »)
sudo mkdir /media/Music
sudo mount /dev/sda3 /media/Music
And if you want this to be done automatically at boot, you first need to get the UUID of the partition. To do this, type the following command and copy the corresponding number:
sudo lsblk -o UUID,NAME,FSTYPE,SIZE,MOUNTPOINT,LABEL,MODEL
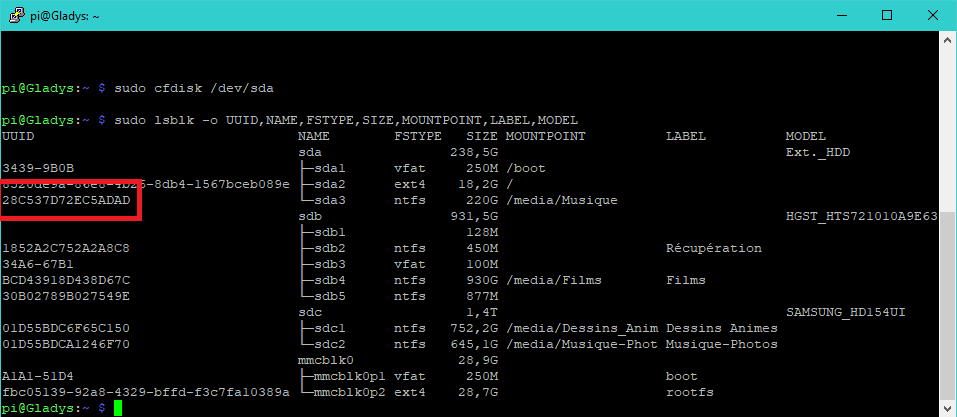
Then edit the « fstab » file and enter the number you retrieved with the necessary information (the mount point and the file system type)
sudo nano /etc/fstab
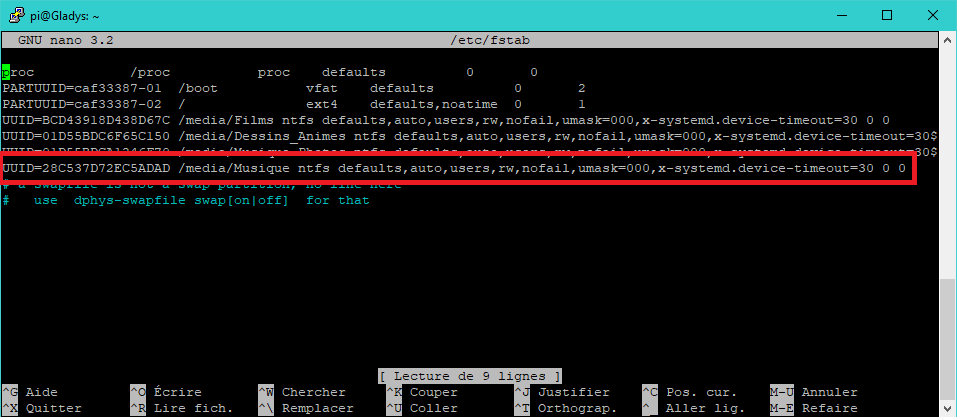
UUID=28C537D72EC5ADAD /media/Music ntfs defaults,auto,users,rw,nofail,umask=000,x-systemd.device-timeout=30 0 0
- Bonus: Use the SD card as a backup
I know, it’s odd but since it’s there and it’s no longer useful, I suggest you use it for system backup purposes because it’s very simple!
Just type the following command in SSH, AFTER stopping the services
sudo rpi-clone mmcblk0 -f2
And that’s it! You have a bootable copy of your system (to lend to friends so they can discover Gladys!  )
)
Don’t forget to reboot your pi because… You just stopped the services such as Docker running Gadys! 



 ).
).