Hub Harmony in Gladys
Hello, I will try to give you a small tutorial to integrate the Hub Harmony which, for those who don’t know, allows you to control hi-fi and video devices and even a bit of home automation (Not very useful as we use Gladys to centralize).
This Hub allows you to launch a combination of commands according to pre-recorded sequences or activities by the user and that’s what we’re going to integrate.
I chose to use Node-Red for its flexibility and will rely on it throughout this tutorial.
Table of Contents
- Prerequisites
- Node Installation
- Hub Activities
- Channel Change
- Amplifier Volume
1. Prerequisites
You don’t need much, but you still need them

- Gladys
- Mqtt
- Node-Red
- Some knowledge of JavaScript.
- A little patience.
Installation of Prerequisites
1.1 Gladys Installation
For Gladys, normally it should be easy.
1.2 Mqtt Installation
Let’s move on to Mqtt. There, it’s not too complicated either.
Here is the tutorial
1.3 Node-Red Installation
If it’s a brand new installation, you can run the following commands:
Node-Red
Installation of Node-Red from Docker
docker run -d \
–log-opt max-size=10m \
–restart=always \
–privileged \
-u root \
–network=host \
–name node_red \
-u node-red:dialout \
-v /var/lib/node-red:/data \
nodered/node-red
then this one
sudo chown -R 1000:1000 /var/lib/node-red
2. Installing Node Harmony
Now, we can go to Node-Red.
The IP address of the Raspberry or the domain name of your machine on port 1880
Ex: 192.168.1.XX:1880 or XX.local:1880
When you get there, press Ctrl+Shift+P, or in the top right corner, click on the Manage palette menu.
We arrive on the page of the already installed nodes
Next, you need to click on the install tab.
We will look for node-red-contrib-harmony-websocket.
And of course, install it.
3. Integrating Activities
Don’t worry, if I can do it, everyone can do it.
3.1. Mqtt
Here is an example of an Mqtt integration in Gladys. For the activity name, here « tv ». This will make it easier to identify in Node-Red.
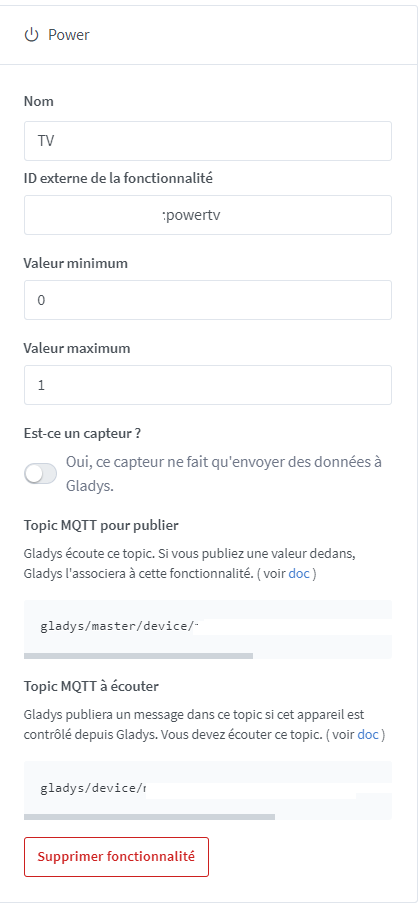
Do all activities at once
Experience Return:
If you have activity names with identical words, you need to differentiate them with capital letters because the function in Node-Red that we will use is case-sensitive.
And above all, integrate them into the dashboard
3.2. Mqtt in Node-Red
We will start by integrating all MQTT nodes in Node-Red and starting the server that goes with it.
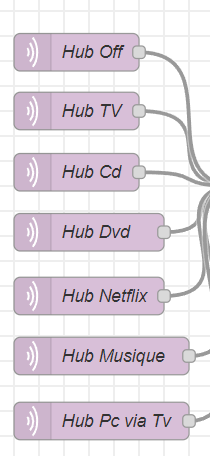
I don’t mention it, but remember to deploy.
3.2.1 Configuring the Mqtt Server in Node-Red.
We open one of the Nodes to configure the server as below.

We will click on the pencil
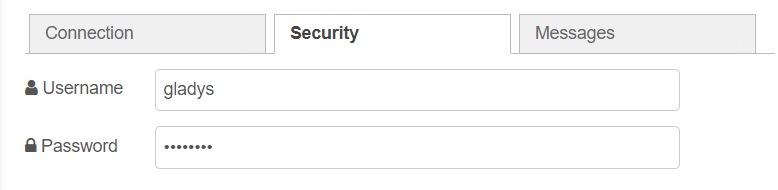
These are the credentials and passwords of the MQTT integration in Gladys
3.2.2. Mqtt Topic.
After validating the server, we will put in the topic the link of the topic of the integration listening in Gladys. Obviously, each node has a different link.

3.3. Configuring the Node Harmony Server.
After all this, we will set up the Hub Node. It’s roughly the same principle except that there, normally, it should find the IP address of it all by itself.
If everything goes as planned, when you validate the configuration, you should see, in the drop-down menu, all your activities that you have programmed with numbers.
This represents the ID of each activity. Since this is important, we will copy them somewhere with their name.
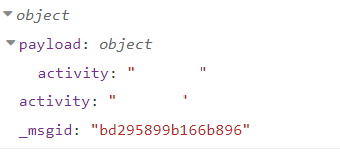
In the image above, we see what the Node returns when we activate it manually. So we will send it this way to not clutter the flows too much. (Obviously, between the quotes, there will be the activity identifier)
3.3.1 Activity IDs in a Variable.
To make all this easier, we will save them in a variable that can be used in the flow. Let’s put all this in a function.
There are 3 types of variables:
- global: usable everywhere.
- flow: as the name indicates, usable in the entire flow where it is declared.
- context: usable only in a function.
const a = flow.get('activitesHub') ||
{
    "activites": [ //Create activities array
        {
            "name": "tv", //Activity name (same as MQTT)
            "commande": ""//Between the " " the activity number
        },
        {
            "name": "",
            "commande": ""
        }
    ]
}
flow.set('activitesHub', a);
Be careful with the syntax
Be careful especially with the comma between each entry in the array and don’t put one at the end.
Then we will set it up as in the images below.

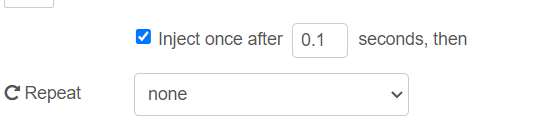
And in the « inject » node, you need to click as in the image below
This will allow, in case of a Node-Red restart, that this variable resets itself.
There is also another solution by modifying the Node-Red configuration file, but let’s stay with the simplest for now.
To check that the variable is well initialized, we will look here and update at the Flow level.
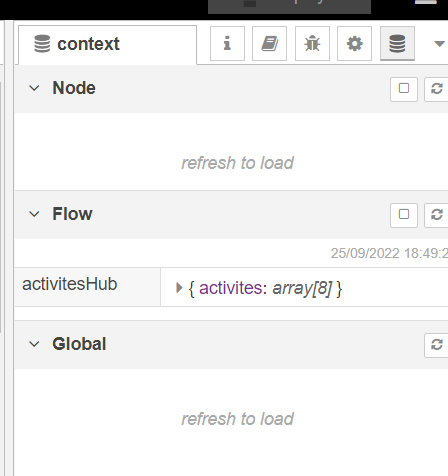
Normally if everything went well, you should see your variable. And between the brackets, the number of activities you have recorded..
3.3.2. Mqtt Verification + Activity Code Retrieval.
Now, we will set up a function (A2) to verify which MQTT link the information comes from, retrieve the activity code, and a little extra thing that we will see later.
//Retrieve the variable created earlier
const activitesHub = flow.get("activitesHub");
//We make a loop to compare the received message with the previous variable
for (const i in activitesHub.activites) {
    var verifCommande = msg.topic.includes(activitesHub.activites[i].name);
    //If it matches it returns "true"
    if (verifCommande) {
        const activite = activitesHub.activites[i].name;
        switch (msg.payload) {
            case 1:
                //Creation of the object to activate the node
                msg.payload = {
                    activity: activitesHub.activites[i].commande,
                };
                //For later
                msg.commande = {
                    commande: activite, //Puts requested activity
                    etat: true //When it is activated
                };
                return msg;//First node output only
            case 0:
                msg.payload = null;
                msg.commande = {
                    commande: activite,
                    etat: false //When it is deactivated
                };
                return [null, msg];//Second output only
            default:
                break;
        }
    }
}
In the function above, we make a test to know which activity we are requesting thanks to a search in the msg.topic which is simply the same message as the one retrieved in Gladys in the listening topic.
This function will be connected to the Hub harmony Activity node.

To have a second output, or more:

3.3.3 Saving the Hub State.
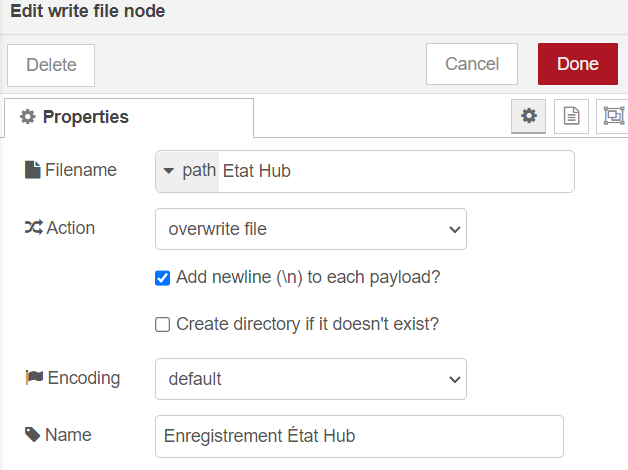
We will save the state of the Hub in a second flow variable, and in addition, we will put it in a text file which will allow us to find it more easily in case of a complete restart of Node-Red. This avoids having to remake the variable every time.
In a new function.
Hooked to the same inject node as the previous flow variable.
let flowEtatHub = flow.get('etatHub') ||
    {
        "etatHub": [] // Initialize an array
    }

flow.set('etatHub', flowEtatHub);
In a new function (A3) again.

let flowEtatHub = flow.get('etatHub')

let a = false; //test if already registered
let testArray = flowEtatHub.etatHub.length; //test if the array is empty

//if already registered-> state change
for (const i in flowEtatHub.etatHub) {
    const hub = flowEtatHub.etatHub[i].commande;
    if (msg.commande.commande === hub) {//Compare the command sent if it is already in the variable
        flowEtatHub.etatHub[i].etat = msg.commande.etat;
        a = true
    }
}
//If it's not the case, we add it to the array
if (!a || !testArray) {
  flowEtatHub.etatHub.push(msg.commande);
}

msg.payload = flowEtatHub;
return msg;
And this one, connected to the backup in a text file.
Normally, the activities should activate (By disabling the Hub Node, this prevents everything from starting). Turn them all on, you should see a fault, no button returns to the stopped position when you operate another one. Disable all except the off one.
By doing this, you have solved half of the problem. We will see what is in the EtatHub variable.
As in the previous variable check and by refreshing
As usual, if everything goes well, you should see the state of the buttons on Gladys’ dashboard. It is thanks to this that we will finish with this issue. We will create a function that compares the state of the button activated with respect to the previously lit one.
This way, we will send information to Gladys in MQTT to reverse it.
In function A4.
When sending in Mqtt, you need to use the ‹ MQTT Topic to publish › link from Gladys, or at the level of the Node topic
const flowEtatHub = flow.get("etatHub");

for (const i in flowEtatHub.etatHub) {
    //If the off button is activated
    if (flowEtatHub.etatHub[i].commande === "extinction" && flowEtatHub.etatHub[i].etat) {
        //Then we check the new message if it is different
        if (msg.commande.etat && msg.commande.commande != "extinction") {
            //If this is the case, we send to Gladys 0 to disable the button
            msg.payload = "0";
            //And modify the hub state variable
            msg.commande = {
            commande : "extinction",
            etat : false
            }
        return msg;
        }
    }
    //We repeat the operation with each activity but we send the information to output number 2 of the Node etc.
    else if (flowEtatHub.etatHub[i].commande === "tv" && flowEtatHub.etatHub[i].etat) {
        if (msg.commande.etat && msg.commande.commande != "tv") {
            msg.payload = "0";
            msg.commande = {
            commande : "tv",
            etat : false
            }
        return [null, msg];
        }
    }
}
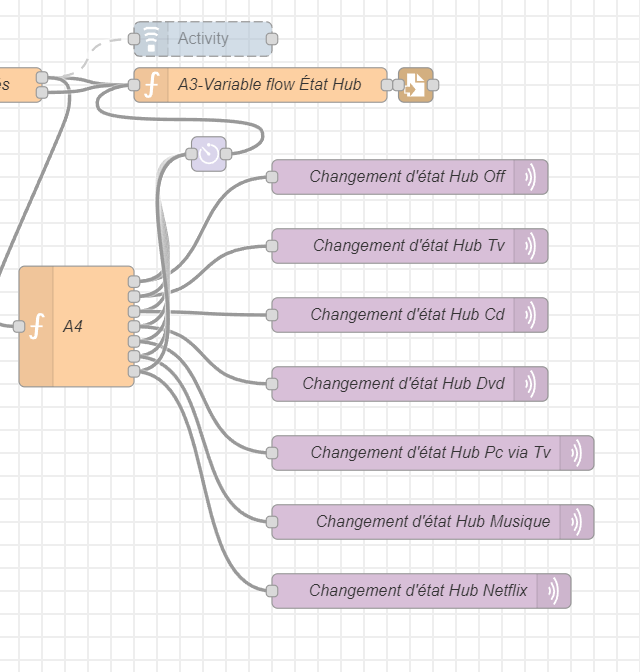
With this, when you select an activity, the previous one goes into off mode
3.3.4. Resetting the off button (just in case).
Let’s set up a function Node so that if you disable the off button, it will reset.
You will need to place it between the MQTT inputs and the function that sends the code.
//Reset of the Off Hub State in case of error if there is no activity
if (msg.payload === 0) {
    var verifCommande = msg.topic.includes("powerextinction");//Put the name of the off activity you put in Gladys in quotes
    if (verifCommande) {
        msg.payload = "1";
        return [null, msg];
    }
}
return msg;
And we will connect it to its second output to the MQTT node that corresponds to the off button.
3.3.5. Resetting the hub state variable
In case of a problem, due to a Node-Red restart, we will set up a small function to read the backup text file and put it back in the correct variable, if only that one is empty.

In read file, at the level of path, you need to put the same name as in the recording in the text file.
In the function.
let flowEtatHub = flow.get('etatHub');
let testArray = flowEtatHub.etatHub.length; //test if the array is empty
if (testArray === 0) {//If it is empty, we put each element of the array back in its place
    for (const i in msg.payload.etatHub) {

        flowEtatHub.etatHub.push(msg.payload.etatHub[i]);
    }
}
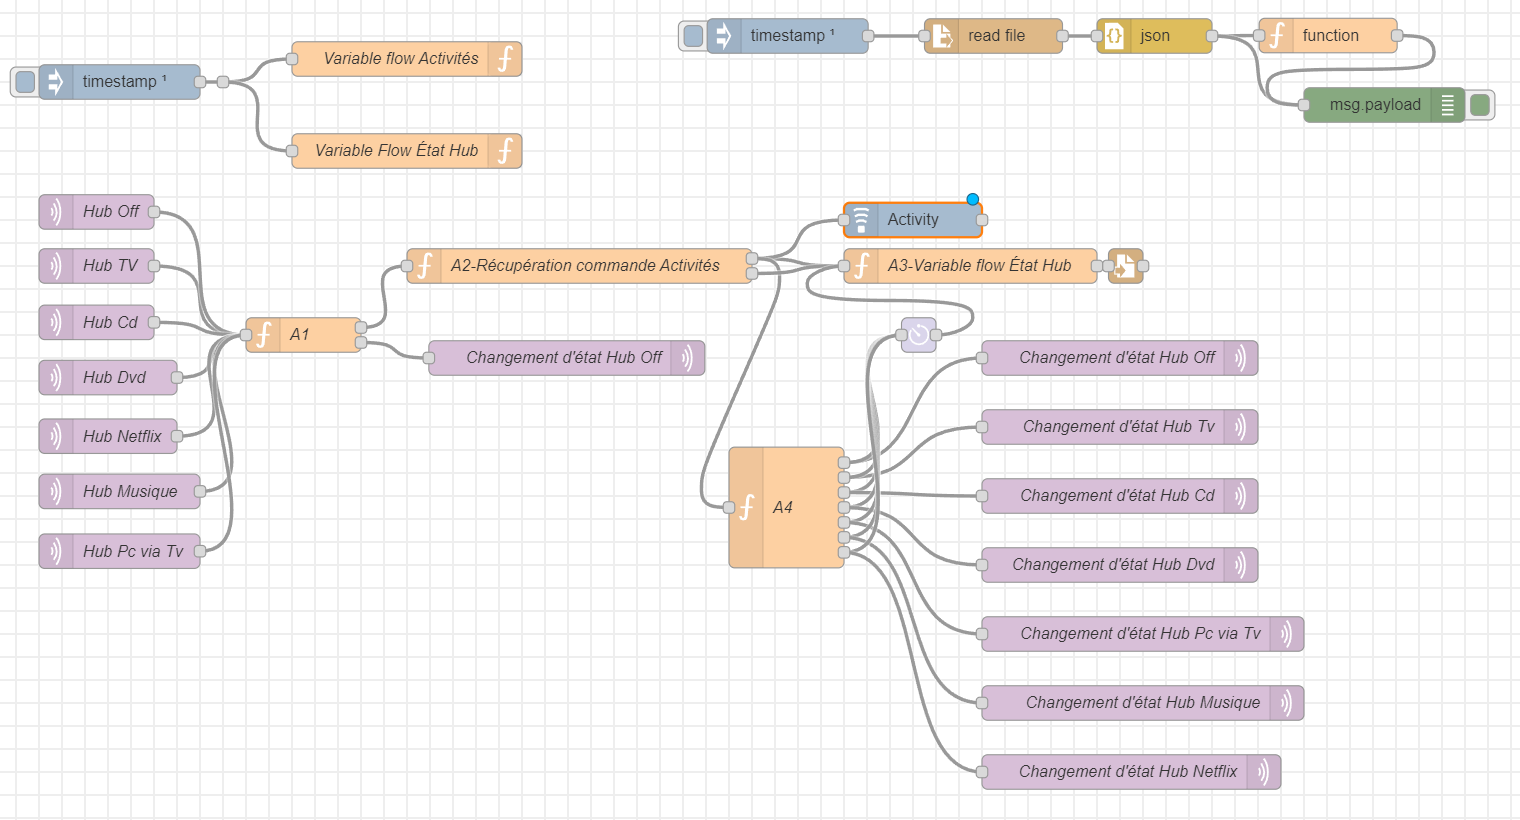
Normally this should look like this,
You can of course change each variable name according to your preference in the condition that you modify them in the rest of the code.
4. Channel Change
4.1 MQTT Integration in Gladys
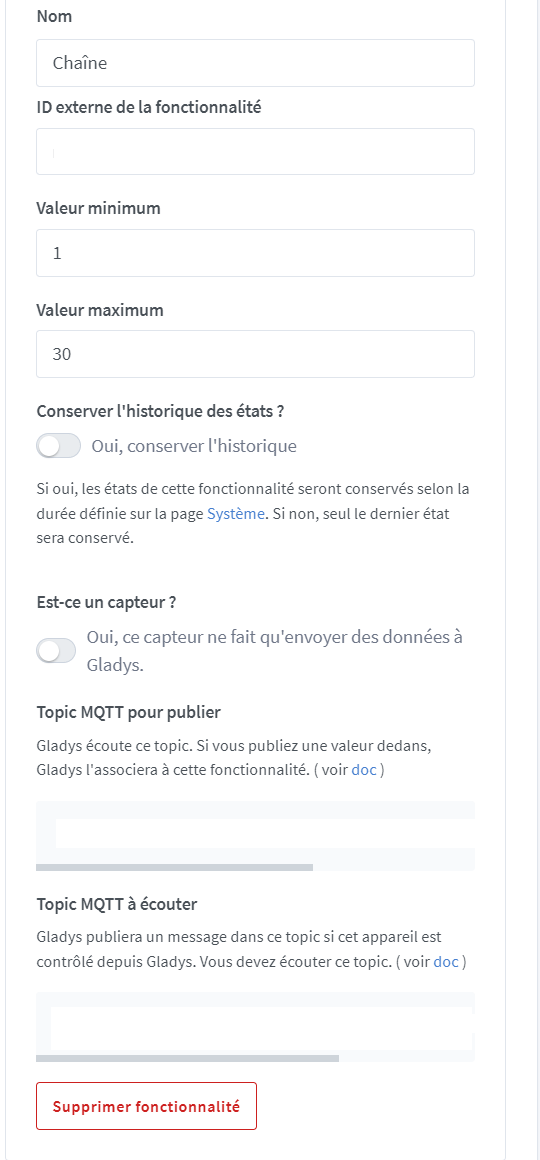
Remember to change the number of channels you have at home, the following will allow you to go up to 99.
But a small modification can be made in case there are more.
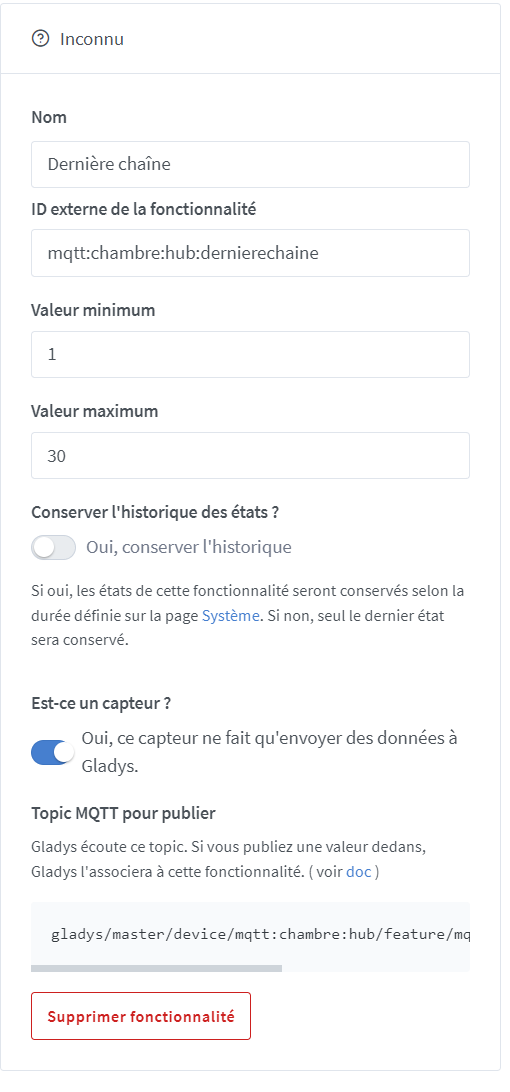
This one will keep the last channel used, so we can create scenes in Gladys to turn on the TV activity and change the channel.
To start in Node-Red, we will retrieve the code of each digit. Same principle as before but with the command, injection and debug nodes.

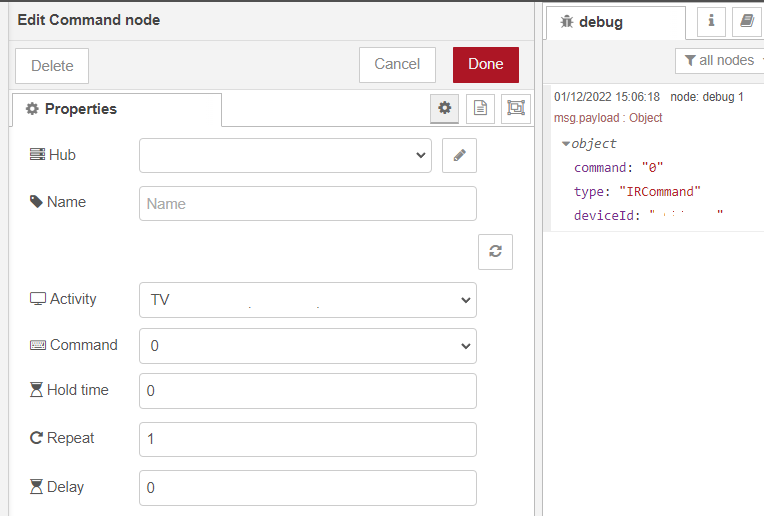
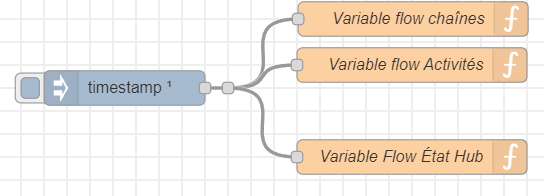
We make a flow variable again like this and we place it here
const a = flow.get('chaineTv') || {
    "chaines": [
        {
            "name": "0",
            "command": {
                "command": "0",
                "type": "IRCommand",
                "deviceId": "//Put the TV's Hub ID here"
            }
        },
        {
            "name": "1",
            "command": {
                "command": "1",
                "type": "IRCommand",
                "deviceId": ""
            }
        },
        {
            "name": "2",
            "command": {
                "command": "2",
                "type": "IRCommand",
                "deviceId": ""
            }
        },
        {
            "name": "3",
            "command": {
                "command": "3",
                "type": "IRCommand",
                "deviceId": ""
            }
        },
        {
            "name": "4",
            "command": {
                "command": "4",
                "type": "IRCommand",
                "deviceId": ""
            }
        },
        {
            "name": "5",
            "command": {
                "command": "5",
                "type": "IRCommand",
                "deviceId": ""
            }
        },
        {
            "name": "6",
            "command": {
                "command": "6",
                "type": "IRCommand",
                "deviceId": ""
            }
        },
        {
            "name": "7",
            "command": {
                "command": "7",
                "type": "IRCommand",
                "deviceId": ""
            }
        },
        {
            "name": "8",
            "command": {
                "command": "8",
                "type": "IRCommand",
                "deviceId": ""
            }
        },
        {
            "name": "9",
            "command": {
                "command": "9",
                "type": "IRCommand",
                "deviceId": ""
            }
        }
    ]
}
flow.set('chaineTv', a)
4.4 Complete Node + Settings

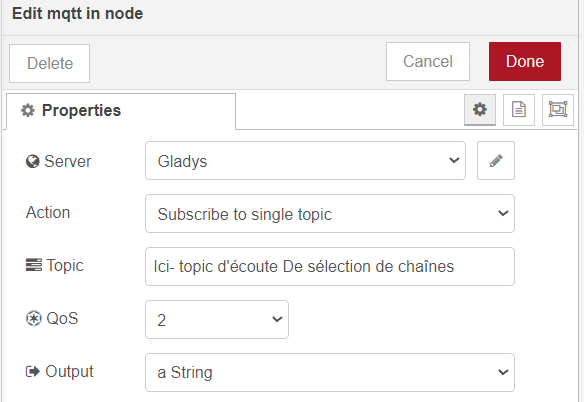
In the previous image, you should know how to fill it with the appropriate listening topic. But the most important thing, to facilitate the rest, is to properly set the output dropdown to **string*
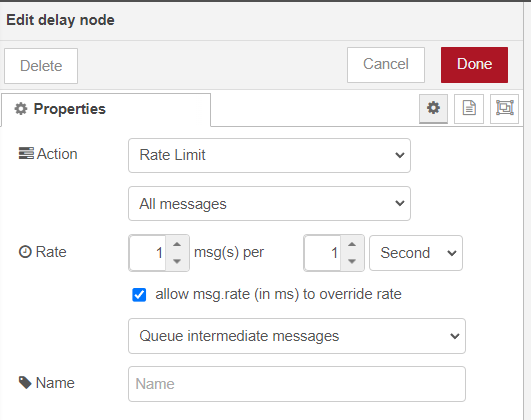
Above, the image shows the Node delay setting for the use we want here. We let the first message pass and the second waits a time lapse in milliseconds that we will determine in the function B1
Then in the function B1
const commandeHubChaineTv = flow.get('chaineTv');
let flowEtatHub = flow.get("etatHub");
let chaines = msg.payload;
let commandEnvoi2 = {};
let sauvegardeChaine = {};
let etatTv = false;
let etatExtinction = false;
sauvegardeChaine.payload = msg.payload;

//Check that the TV activity is on and the off button is disabled
for (const i in flowEtatHub.etatHub) {
    if (flowEtatHub.etatHub[i].commande === "tv" && flowEtatHub.etatHub[i].etat) {
        etatTv = true;
    }
    if (flowEtatHub.etatHub[i].commande === "extinction" && !flowEtatHub.etatHub[i].etat) {
        etatExtinction = true;
    }
}
if (etatTv && etatExtinction) {
    //Check the channel number then retrieve the command
    if (chaines.length === 1) {
    //We loop through the variable of all the channel commands
    //We compare with the requested channel and then retrieve the command that we send
        for (const i in commandeHubChaineTv.chaines) {
            if (chaines === commandeHubChaineTv.chaines[i].name) {
                msg.payload = commandeHubChaineTv.chaines[i].command;
                return [msg, sauvegardeChaine];
            }
        }
    }
    //Check the channel number then retrieve the 2 commands
    else if (chaines.length === 2) {
    //We do the same thing
        chaines = chaines.split(""); //This allows us to split into 2 in an array each channel number
       //retrieve in this array the values and we compare them as before
        var nbrChaine = chaines[0];
        var nbrChaine2 = chaines[1];
        for (const j in commandeHubChaineTv.chaines) {
            if (nbrChaine === commandeHubChaineTv.chaines[j].name) {
                msg.payload = commandeHubChaineTv.chaines[j].command;
                msg.rate = 500; //Time in milliseconds between each message can be changed
            }
        }
        for (const i in commandeHubChaineTv.chaines) {
            if (nbrChaine2 === commandeHubChaineTv.chaines[i].name) {
                commandEnvoi2.payload = commandeHubChaineTv.chaines[i].command;
            }
        }
        //We return in the first output of the Node the first number then the second then we save the channel with the second output to the mqtt
        return [[msg, commandEnvoi2], sauvegardeChaine];
    }
}
 , it’s all working correctly now.
