I wanted to control the Xiaomi Gateway to access its sounds and lights. With Jérôme and Pierre-Gilles’ Node Red video, I made a lot of progress on Node Red. Jérôme provided me with this link: Xiaomi Gateway in NodeRED - NotEnoughTech, to try to understand the Gateway commands. To learn even more about Node Red, I then followed this series of tutorials created by Néodyme: https://www.youtube.com/watch?v=Sf1_fbwA6iQ&list=PLYCQztVKrSmDaZG0bwnbd0PfgdXGe9Q2c&index=5.
Attention:
If we decide to go through Node Red, it should be known that the Xiaomi integration will no longer work, as the Gateway only connects to one « address ». It is Mqtt that will send the values to Gladys, which has the consequence: the sensors no longer work with the Xiaomi integration. We will be able to use them with the zigbbe2Mqtt integration.
If you have never put your Gateway in developer mode, you will need to downgrade the version of Mi Home on Android (see the « Node Gateway » chapter below).
So I was able to control the Led and the sounds of the Gateway using « nodes inject » to start with (the sounds are always controlled by « nodes inject »), it was necessary to decrypt the string of characters to be sent to the Gateway. In this video Xiaomi Gateway in NodeRED - NotEnoughTech, the brightness and color commands are reversed.
To get started:
You need to install Node Red (see Pierre Gilles’ video) (I installed it on the Raspberry where I installed Gladys using Putty).
You need to install the Xiaomi Gateway library: « node-red-contrib-xiaomi-smart-devices ».
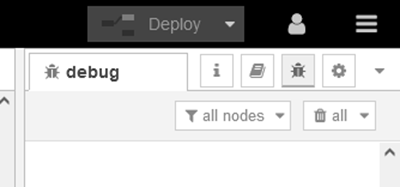
In Node RED, click on the three horizontal lines
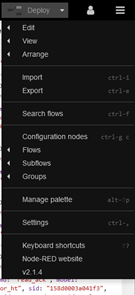
Click on « Manage palette » 11th line
Go to the « install » tab (top of the page), start a search « Xiaomi » for example,
then scroll down to see the palette « node-red-contrib-xiaomi-devices »
Choose: "node-red-contrib-xiaomi-smart-devices, click on the small « install », which is on the right.
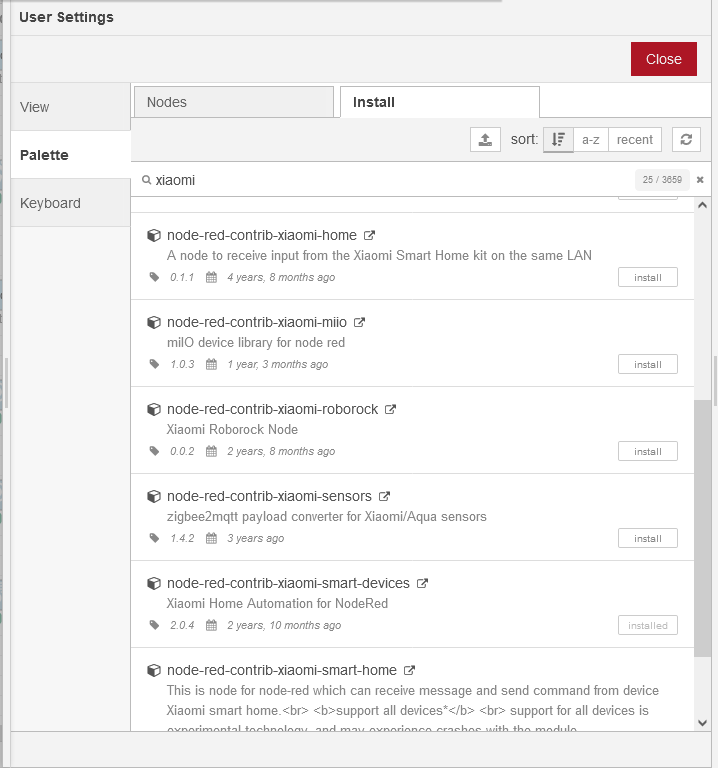
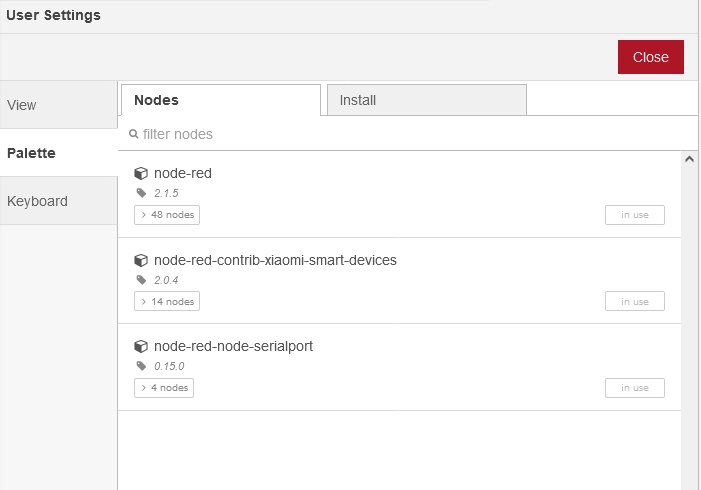
Click on the Nodes tab to the left of the « install » tab at the top, to check that the library is properly installed.
Close the page. And in Node Red, in the left column, in the « Filter nodes » section, at the bottom you should have all the Xiaomi Nodes installed.
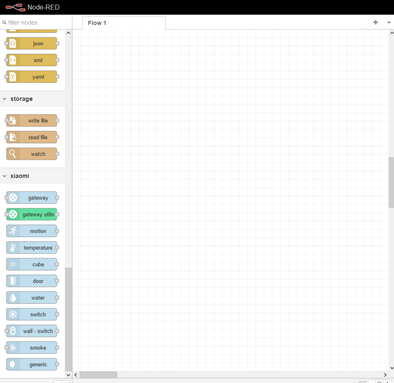
To create the « Node Gateway »
Click and drag the node called « gateway », to the center of the window. Then double-click on the node, click on the small pencil to access the window below, where the parameters will be entered.
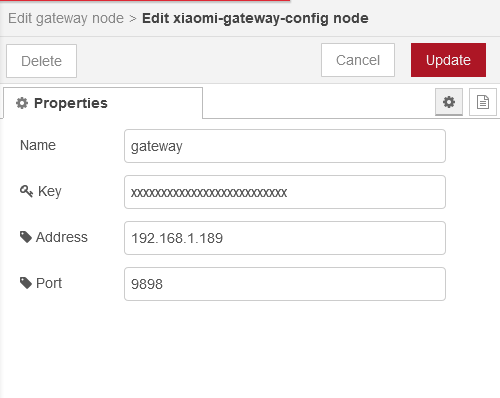
You will need:
Name: The one you want. This will be the name of the Xiaomi server for Node Red
Key: This is the password of the Gateway that can be read when it is put in developer mode.
Address: This is the IP address to which your Gateway is connected on your local network
Port: 9898 (by default)
If you have already retrieved this password under an old version of MI HOME, there is no reason for it to have changed, even after several resets of the Gateway. I noticed this once I had downgraded my version, at the moment the Mi Home Apps has updated again (current version 6.14.702) and I have no problem.
To put the Gateway in developer mode see, Gladys assistant: Xiaomi Home | Gladys Assistant.
At the moment, this procedure can no longer be applied because the hidden menu is no longer accessible. I had to downgrade my version of Mi Home to access it.
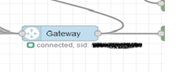
To check if you have the correct password, when you have entered the parameters in the « Node Gateway », it indicates to you that it is connected, by returning the « sid » (Mac address) of your Gateway, and the small green square with the mention « connected »
If you do not have the password, or if your Gateway is not already in developer mode, you need to downgrade the version of the MI Home app, follow these links.
Here is the address of the site where to retrieve an old version of the Mi Home Apps for Android: https://androidapksfree.com/mihome/com-xiaomi-smarthome/old/ .
Read this forum to have the method to retrieve the password:
https://community.jeedom.com/t/xiaomi-gateway-passer-en-mode-dev-sur-app-6-0-214/49374, (message 5/15 of January 13).
I assume you know the basics of Node Red, I skip the installation of the Nodes. Otherwise see Pierre-Gilles’ video or follow this link:
the light part
The data to send to the Gateway, to control the Led:
Here is the Gateway command flow
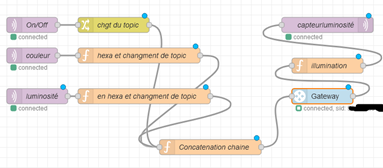
I converted the brightness and color to hex, I concatenated the two strings, then converted to decimal, then I multiplied this string by the value of the nodeMqtt « OnOff » (0 or 1), and finally, I put the result in a msg.payload to send it to the « Node-gateway ». I memorized the variables « OnOff, brightness and color » using Context variables.
To turn off the Gateway*
You need to set the RGB value to 0. We will see later how to apply this 0
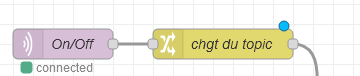
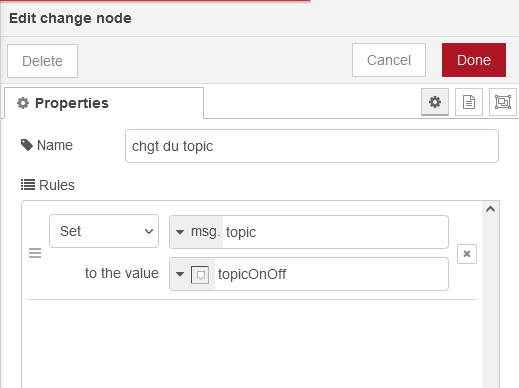
In the Node topic change, I change the name of the Mqtt topic OnOff coming from Gladys: (gladys/device/mqtt:gateway/feature/mqtt:gatewayOnOff/state), to simplify it, which will serve us later, for understanding. This is not mandatory.
In « to the value »: We simply name the topic « topic OnOff »
To turn on the Gateway
You need to send « the color and brightness » by combining them:
Explanation:
The final RGB value must be a decimal number. Take the number « 1677786880 » which will turn on the led.
To understand how it works, you need to convert this number to hexadecimal, in my example: 1677786880 gives in hex: 6400FF00.
We decompose this number: 6400FF00
64 = brightness (AA)
00 = red color (RR)
FF = green color (GG)
00 = blue color (BB)
So, here the Gateway will light up at 100% green. By changing the values of RR, GG, and BB, you will modify the colors of the Led. And by modifying the value of AA, you will modify the brightness.
Range of operation of the values:
AA: is adjustable from 0 to 64 in hex, so from 0 to 100 in decimal (tip set the Mqtt slider you create in Gladys: min 0 max 100, you will only have to convert in Node Red (decimal to hexadecimal). Be careful if you set the brightness to 0 the Gateway turns off. I added a « node change » behind the « node Mqtt brightness », to change the 0 coming from the dashboard slider to 2, so that the gateway does not turn off.
RR, GG and BB: the colors are adjustable each from 0 to FF (in hexadecimal), or in decimal from 0 to 255. If you set all the values RRGGBB to 00 or to RR=GG=BB, the final color will be white.
Brightness part:
I removed the « Node Change » to prohibit the value 0 coming from the Mqtt brightness slider Gladys, it is preferable to set it between 1 and 100.

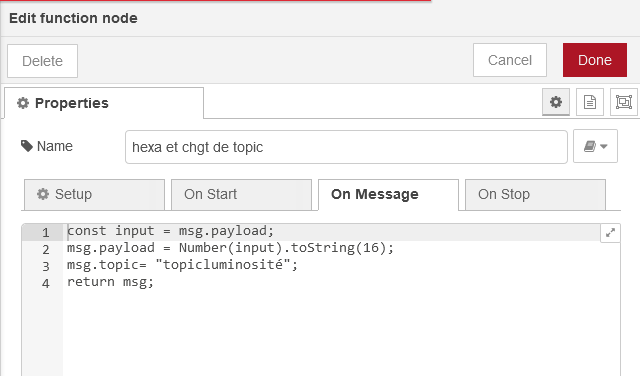
In the « Nodes function Brightness », noted « hexa and topic change »
On line 1, I read the msg payload, of the previous node « node Mqtt brightness », and I store it in the variable « input »
On line 2, I convert the msg.payload, which contains a string corresponding to the decimal number received from the Mqtt slider created in Gladys, into a string containing this number converted to hexadecimal.At line 3, I modify the topic name from Gladys to a simpler name « topicluminosité » for the rest of the processing.
At line 4, we send msg.pload to the « next node »
Instructions to paste:
const input = msg.payload;
msg.payload = Number(input).toString(16);
msg.topic= "topicluminosité";
return msg;
Color part,
I encountered a problem with the color value format.
If a color without red is chosen, the hexadecimal value ends up being expressed in 3 or 4 digits. Earlier, I took the value 6400FF00 as an example, where 64 corresponds to the percentage of brightness. At this stage of the program, the string concatenation is not done, so my color value is 00FF00. But as usual, the left 00s do not count, and in the string, we end up with the value FF00. After the famous concatenation, which we see later, we get the value 64FF00 (in decimal = 6618880) which does not correspond at all to our starting value (1677786880), with this value the Gateway does not light up.
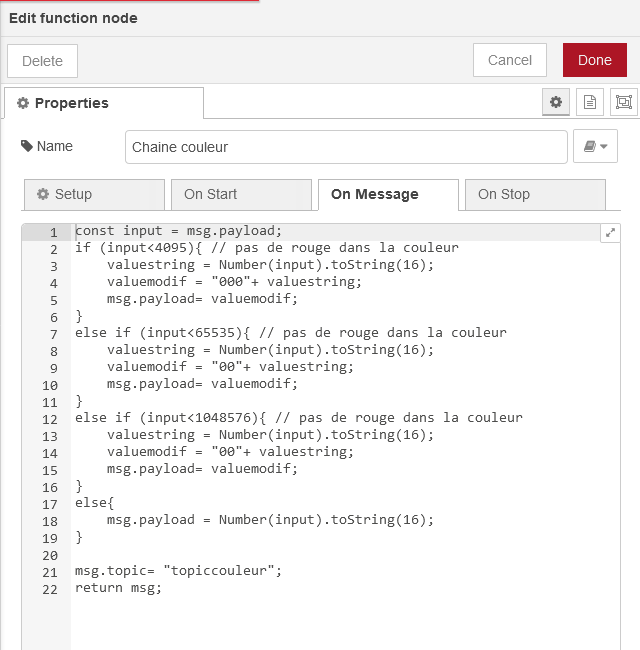
So I handle this problem from line 2 to line 11, and if the number is indeed in a 6-digit format, we move on to line 13.
If the « color » value is missing 3 digits, we need to add 000:
Line 1: We retrieve the value of the Mqtt node coming from Gladys (msg.payload) and place it in the variable « input ».
Line 2: We test if « input » has a value strictly less than 4096 decimal (in hexa = 1000), (so never equal to 4096), but 4095 (and in hexa FFF). So, we will pass into this part of the code when the value contained in input is less than 4096.
Line 3: I convert the msg.payload, which contains a string corresponding to a decimal number, received from the Mqtt button created in Gladys, into a string containing the same number, but converted to hexadecimal. Then I place it in « valuestring ».
Line 4: I concatenate the string « 000 » with the string « valuestring » which gives, if « valuestring » = FFF, « 000FFF ». Then I place this value in the string « valuemodif ».
Line 5: « valuemodif » is placed in msg.payload,
If the color value is missing 2 digits, we need to add 00:
We do the same as before, in this case the « condition if » will be on the number 65536 so as before, the last value that allows passing into the loop is 65535 in decimal (FFFF in hexa). And we place in front of the string « valuestring », the string « 00 ».
If the color value is missing 1 digit, we need to add 0:
In this case the color works the led lights up, but the brightness is distorted because the missing digit in the color is taken from the digit of the brightness. If we have « valustring » = 25FF5 and we concatenate with « brightness », we will have 6425FF5,
AA = 6 instead of 64 RR = 42 GG = 5F BB = F5, whereas we should have AA = 64 RR = 02 GG = 5F BB = F5.
So the value to test here will be 1048576.
And if the color has its 6 digits, we move on to line 19 of the program.
Line 21: modification of the topic name coming from Mqtt Gladys
Line 22: sending the message to the next node
Instructions to paste:
const input = msg.payload;
if (input<4095){ // no red in the color
valuestring = Number(input).toString(16);
valuemodif = "000"+ valuestring;
msg.payload= valuemodif;
}
else if (input<65535){ // no red in the color
valuestring = Number(input).toString(16);
valuemodif = "00"+ valuestring;
msg.payload= valuemodif;
}
else if (input<1048576){ // no red in the color
valuestring = Number(input).toString(16);
valuemodif = "00"+ valuestring;
msg.payload= valuemodif;
}
else{
msg.payload = Number(input).toString(16);
}
msg.topic= "topiccouleur";
return msg;
And these two flows « color » and « brightness » are sent to the « Node function String Concatenation »
In this Node, I test the arrivals of the payloads according to their topic. Hence the interest of having simplified the names of the Gladys topics, they are the same, but I changed their respective names.
Lines 2, 3, 4 are used to declare the variables and to store them in the « context » variables.
||, the two vertical bars (pipe), are used to initialize the variables if they do not contain any values. (So first initialization led in white at 100% and ON = 1). If we modify a Node and « deploy », we lose the history of the variables and we start again with the values indicated after the pipes (||)
Line 22: we concatenate the variables « brightness » and « color », which we place in « valuestring ».
Line 23: we transform the string into a number and place it in « valuehex » (which I should have called « valuenum », but it doesn’t change the operation).
Line 24: we multiply « valuehex » by the value of the variable « OnOff » which we place in « Value ». This line allows to turn on or off the Gateway. If « OnOff » is worth 1, we turn on the Gateway, the value of « value » will be equal to « brightness + color ». If « OnOff » is equal to 0, we turn off the Gateway, « value » will be equal to 0 and we have seen that if RGB (so value) = 0 the Gateway turns off.
Line 25: we load the payload with « Value »
Line 26: we make the « Json » with the key of the Gateway and the RGB value.
Line 32: we load msg.payload with the command « cmd », which the Gateway will be able to interpret.
You have to turn on the Gateway first, then you can change the light and the color.
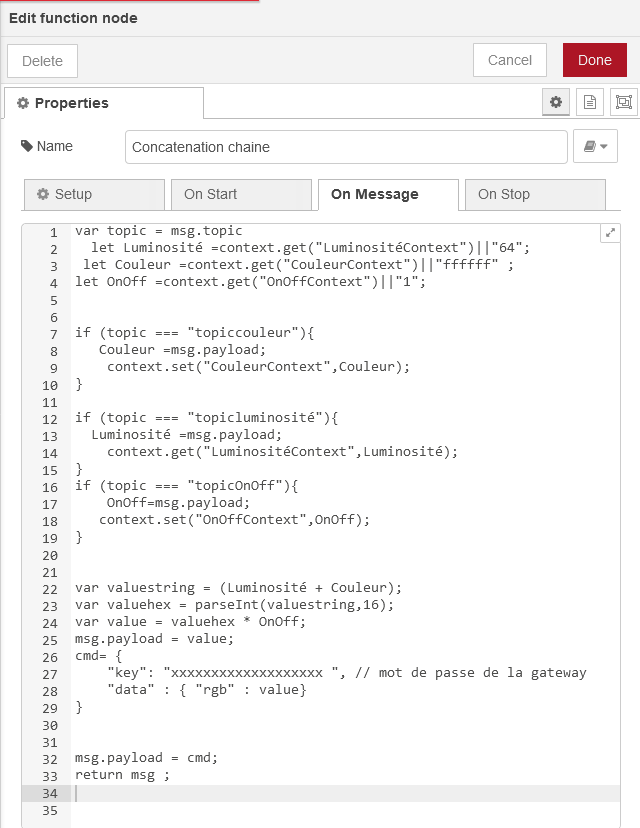
Instructions to paste: put your Gateway password on line 27
var topic = msg.topic
var Luminosité =context.get("LuminositéContext")||"64";
varCouleur =context.get("CouleurContext")||"ffffff" ;
``var OnOff =context.get(« OnOffContext »)||« 0 »; // it is preferable to put a 0 as default value
if (topic === "topiccouleur"){
Couleur =msg.payload;
context.set("CouleurContext",Couleur);
}
if (topic === "topicluminosité"){
Luminosité =msg.payload;
context.set("LuminositéContext",Luminosité);// it is necessary to well put « set » and not « get » as on the screenshot
}
if (topic === "topicOnOff"){
OnOff=msg.payload;
context.set("OnOffContext",OnOff);
}
var valuestring = (Luminosité + Couleur);
var valuehex = parseInt(valuestring,16);
var value = valuehex * OnOff;
msg.payload = value;
``cmd= {
"key": "xxxxxxxxxxxxxxxxxxxxxx ", // gateway password
"data" : { "rgb" : value}
}
msg.payload = cmd;
return msg ;
On the Gladys Mqtt side:
On the Dashboard, I created this type of command with the Mqtt integration,
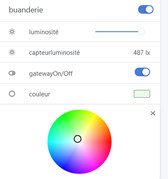
In the Mqtt integration of Gladys I created the Gateway device, then in this device I added the following features:
-
brightness (slider)
-
On/Off (switch)
-
the color palette
-
the 4th will be a sensor receiving the brightness value of the room, captured by the Gateway (see below)
Creation of the Gateway device
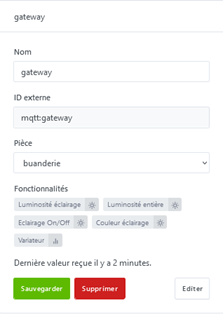
Adding the 4 features (see Gladys assistant MQTT for how to do it)
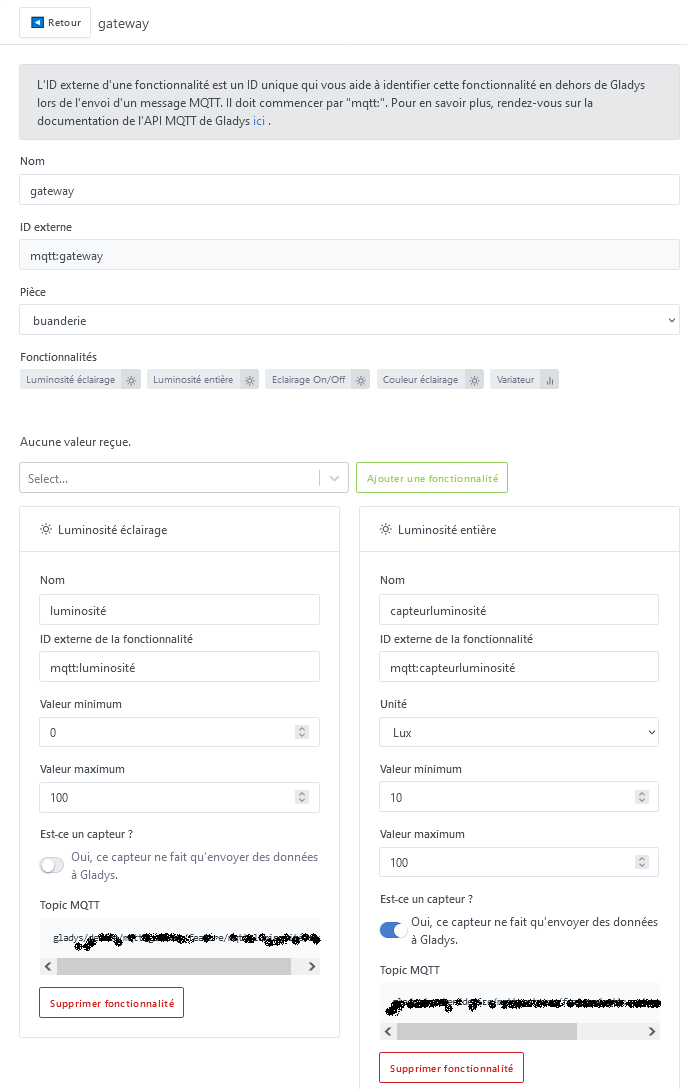
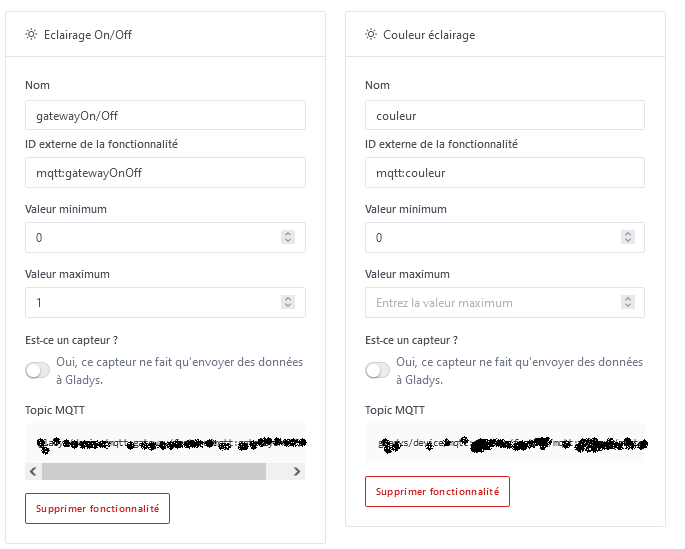
For the « Node _Illumination »:
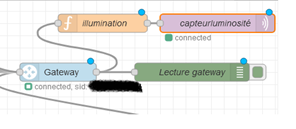
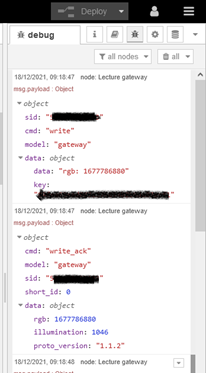
I retrieve the info in the « Node Debug » named « Gateway Reading ».
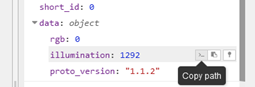
The first message « cmd write » indicates that the color command has passed and the second « cmd write_ack » confirms the command has been taken into account. In the second message in the « data: object » line, we have the return of the RGB value and the illumination value, so we retrieve the illumination value. At the end, on the right of the line, we pass the mouse and icons appear.
When you click on the « copy path » icon, you retrieve the path of the value of « illumination » (payload.data.illumination).
In the « Node function illumination » below:
Line 1: Write: " const input = msg. " and paste the copy path you retrieved behind it,
Line 2: The if condition allows you to maintain the display in Gladys, otherwise, every value received from the sensors, the illumination value disappears because it is not refreshed. 1324 corresponds to the maximum value of the sensor’s brightness (may be a few units off  )
)
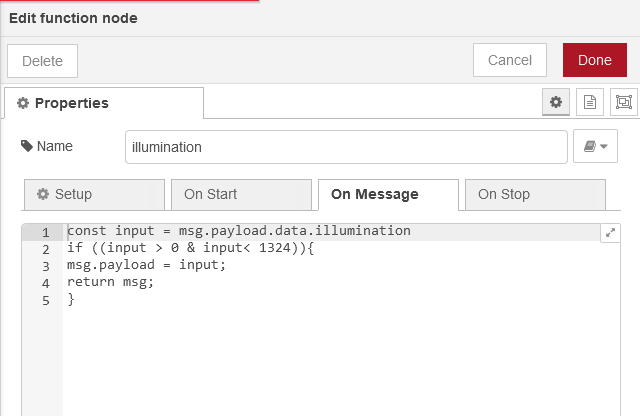
Instructions to paste:
const input = msg.payload.data.illumination
if ((input > 0 & input< 1324)){
msg.payload = input;
return msg;
}
The sound part:
At the moment, I only control the Gateway via the « Inject Nodes »: « sound » and « soundstop ». I haven’t developed the MQTT commands yet.
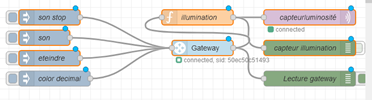
Explanation of the command:
I found this list here: Xiaomi Gateway in NodeRED - NotEnoughTech
List of sounds
stop =10000
custom1 = 10001 (didn’t work for me)
custom2 = 10002 (my recordings start at Custom 2)
Custom 3 = 10003
Custom 4 = 10004
police car 1 = 0
police car 2 = 1
accident = 2
countdown =3
ghost = 4
sniper rifle = 5
battle = 6
air raid = 7
bark = 8
doorbell = 10
knock at a door = 11
amuse = 12
alarm clock = 13
mimix = 20
enthusiastic = 21
guitar classic = 22
ice world piano = 23
leisure time = 24
childhood = 25
morning stream list = 26
music box = 27
orange = 28
thinker = 29
I checked all the sounds and they work.
Here is the command that the « NodeInject » passes: « sound »
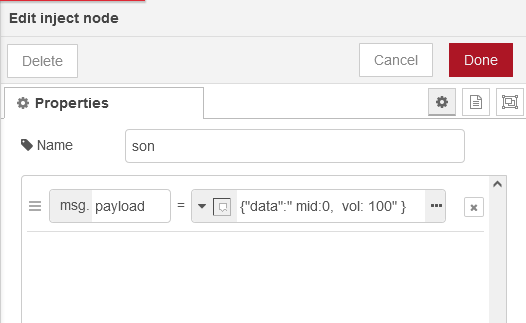
The value « mid » corresponds to a number from the list of sounds above.
Here « mid: 0 » corresponds to " police car 1", the number 0
For custom sounds, it starts at 10002 for me
The value « vol » corresponds to the volume, and its operating range can be adjusted from 0 to 100.
To stop the sound, set the value of « mid » to 10000.
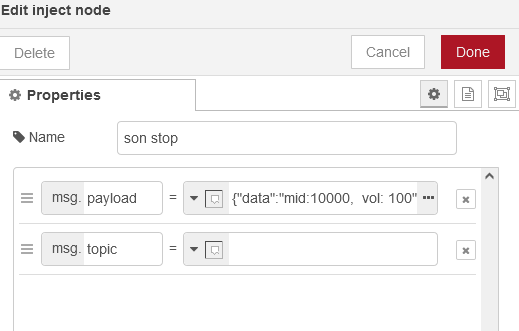
Below is the copy of the « nodedebug: Gateway reading » return, following the commands issued:
Sound command:
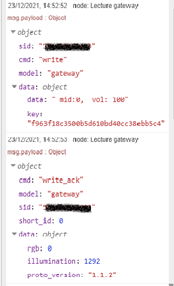
« sonstop » command:
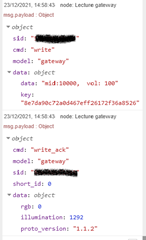
The sensor part
Here is the flow for a door or window opening detector sensor.
You create an MQTT sensor in Gladys, you retrieve its topic. (See MQTT integration Gladys).
First, you need to connect all the sensors to the Gateway in the Mi Home app. And have installed the Gateway Node, and that it is connected (see the chapter: To create the "Node_Gateway )
- First, we will use the « NodeXiaomi Gateway Utils », which we find in the Node column section Xiaomi. This node allows you to retrieve all the Keys of all the sensors connected (wifi compatible) to the gateway in the MiHome app.

Node configuration, just select the name you gave to the Gateway in the drop-down menu
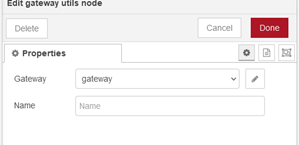
After Done, then Deploy, you should read the mention « connected », under the « Node Gateway Utils ».
Then see in the Debug part, the list below, it appears after about 10 seconds.
You click on the small triangle to deploy the Json
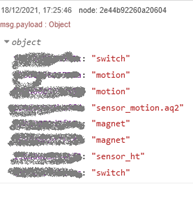
The object is expanded, you can then read the name of all the sensors and their respective Sid. The grayed out part corresponds to a number like this: sid: 190d0005f568f4.
- We retrieve the Node corresponding to the sensor that we want to create in the Node column, we will use a "Node wall-switch " for the example.
- We place a « Node Function » and the "Node Mqtt " (which will send the data to Gladys). Then, we fill them in as follows:

Xiaomi Node wall-switch :
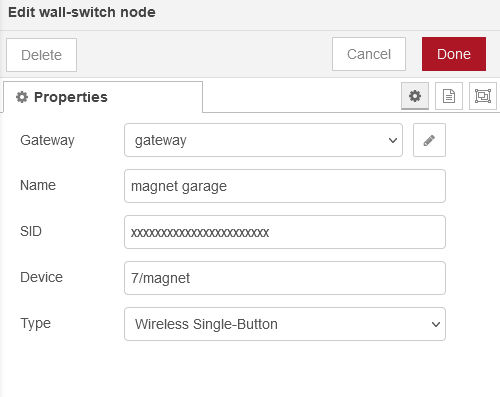
Gateway: name of your gateway
Name: name given to the Node
Sid: sid corresponding to the sensor found in the list above
Device: Key/Name, you give a number and a name
Type: this is the type of button to choose from the drop-down menu, (for me it’s a door opening detector, open/closed, not wired)
« Node Function »:
You need to retrieve the status of the « open » or « closed » button. When you trigger the button (or sensor), the Gateway sends a cmd: « report », it is in this Json that we find our information. It is displayed in the « Debug » column. When the door is open, the sensor sends « open » when the door closes it sends « close ». We retrieve the status in data: object.
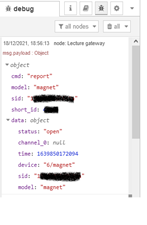
You just have to write « msg.payload = msg.payload.status » (line 1: of the « Node function ») (or do « copy path » as seen above), then you just have to test if msg.payload is « open » or « close » (line 2). But Gladys only knows 1 or 0, we transform « open » into « 1 » and « close » into « 0 », so we force msg.payload = 1 when the sensor is « open » and 0 when it is « close », (lines 2 to 7 do this). Line 8 returns the msg.payload to the next node.
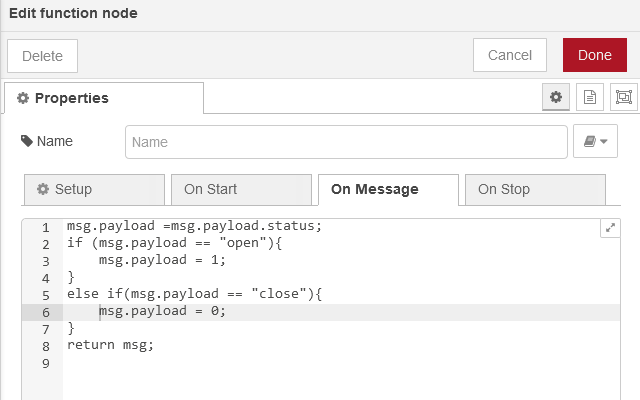
Instructions to paste:
msg.payload =msg.payload.status;
if (msg.payload == "open"){
msg.payload = 1;
}
else if(msg.payload == "close"){
msg.payload = 0;
}
return msg;
« Node Mqtt: »
Pierre-Gilles explains in his Node Red video how to declare the MQTT server.
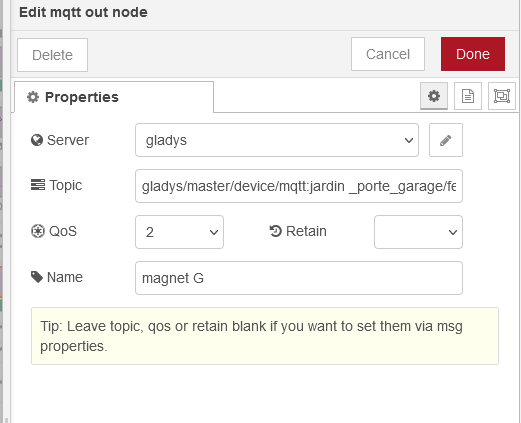
Server = MQTT server name
Topic = name of the topic created, when you created the MQTT sensor in Gladys
QOS 0 – sends the message once (not guaranteed)
QOS 1 – At least once (guaranteed)
QOS 2 – Only once (guaranteed)
Name = name of the Node that will be displayed in Node Red
Done, deploy and it should be good, there is nothing left to do but test.
For other sensors, use the same principle:
- Activate the sensor
- Read the « cmd: report »
- Find the status in data: object
There are several ways to do it, I use the Node function, Pierre-Gilles used the Node Change for this application.
I hope it wasn’t too hard to read.
The codes can surely be improved, as I’m a beginner in Node Red and in Js, so I’m open to all code optimizations.
That’s it, I’m done, but there are still possibilities to retrieve radios other than Chinese (see always the same link: Xiaomi Gateway in NodeRED - NotEnoughTech)