ça serait dingue ! Très belle trouvaille !
Top !
ça serait dingue ! Très belle trouvaille !
Top !
Je suis pas loin d’avoir une première version du téléversement automatique.
Cependant, j’ai encore un petit encore bug. j’essaie de flasher la carte avec mon fichier .hex, mais ça ne veut pas fonctionner.
avrgirl.flash(require.resolve(`arduino-code.ino.standard.hex`, function (error) {
  if (error) {
    logger.warn(error);
  } else {
    logger.warn('Flashing done!');
  }
});
A priori, il s’avèrerait que le relative path n’est pas accepté.
2020-05-15T14:35:32+0200 <warn> setup.js:22 () { Error: ENOENT: no such file or directory, open 'mega/arduino-code.ino.hex'
at Object.openSync (fs.js:443:3)
at Object.readFileSync (fs.js:343:35)
at Object.tools._parseHex (/home/pi/Gladys/server/services/arduino/node_modules/avrgirl-arduino/lib/tools.js:13:17)
at Stk500v2._upload (/home/pi/Gladys/server/services/arduino/node_modules/avrgirl-arduino/lib/stk500v2.js:28:19)
at /home/pi/Gladys/server/services/arduino/node_modules/avrgirl-arduino/avrgirl-arduino.js:109:24
at /home/pi/Gladys/server/services/arduino/node_modules/avrgirl-arduino/lib/connection.js:26:18
at Connection._setUpSerial (/home/pi/Gladys/server/services/arduino/node_modules/avrgirl-arduino/lib/connection.js:49:10)
at /home/pi/Gladys/server/services/arduino/node_modules/avrgirl-arduino/lib/connection.js:25:15
at /home/pi/Gladys/server/services/arduino/node_modules/avrgirl-arduino/lib/connection.js:70:12
at /home/pi/Gladys/server/services/arduino/node_modules/avrgirl-arduino/lib/connection.js:191:26
at process._tickCallback (internal/process/next_tick.js:68:7)
errno: -2,
syscall: 'open',
code: 'ENOENT',
path: 'mega/arduino-code.ino.hex' }
Apparemment, seul un absolute path est accepté. Auriez-vous une solution à ce problème ?
Edit :
Bon et bien ce n’était pas si compliqué, c’est corrigé 
Du coup normalement, le téléversement automatique est géré pour les Aruino Uno et Mega ! Les .hex pour les autres cartes arriveront bientôt 
Hey Hey !
Belle progression et super boulot !
Mon installation Gladys 3 est toujours active et j’ai pas mal d’autres “bidouilles” en cours mais dès que je peux je test tout ca !
Bravo c’est très très prometteur !
Merci beaucoup, ça fait plaisir
Pour l’instant, il y a encore pas mal de choses à corriger, mais on arrive à une solution à peu près complète.
Je suis en train de travailler sur la partie réception. J’ai donc créé un petit script qui exécute avec une requête POST. Les résultats sont prometteurs, j’obtiens les données d’un capteur que j’ai installé chez moi hier :
2020-05-17T20:28:05+0200 <warn> recv.js:23 (SerialPort.<anonymous>) Received 999027 / 32bit Protocol
2020-05-17T20:28:05+0200 <warn> recv.js:23 (SerialPort.<anonymous>) : 1

2020-05-17T20:28:05+0200 <warn> recv.js:23 (SerialPort.<anonymous>) Received 888052 / 32bit Protocol
2020-05-17T20:28:05+0200 <warn> recv.js:23 (SerialPort.<anonymous>) : 1

2020-05-17T20:28:06+0200 <warn> recv.js:23 (SerialPort.<anonymous>) Received 888052 / 32bit Protocol
2020-05-17T20:28:06+0200 <warn> recv.js:23 (SerialPort.<anonymous>) : 1

2020-05-17T20:28:06+0200 <warn> recv.js:23 (SerialPort.<anonymous>) Received 888052 / 32bit Protocol
2020-05-17T20:28:06+0200 <warn> recv.js:23 (SerialPort.<anonymous>) : 1

2020-05-17T20:28:06+0200 <warn> recv.js:23 (SerialPort.<anonymous>) Received 888052 / 32bit Protocol
2020-05-17T20:28:06+0200 <warn> recv.js:23 (SerialPort.<anonymous>) : 1

2020-05-17T20:28:15+0200 <warn> recv.js:23 (SerialPort.<anonymous>) Received 999026 / 32bit Protocol
2020-05-17T20:28:15+0200 <warn> recv.js:23 (SerialPort.<anonymous>) : 1
L’idée maintenant est de modifier le code Arduino générique, de manière à avoir un format de JSON standardisé est compréhensible par Gladys.
De plus, pour le côté pratique, je me demandais s’il n’était pas plus pratique de séparer les émissions et réceptions au niveau des Arduinos directement ? Autrement dit, un code pour un Arduino qui émettra des données, et un code pour un Arduino qui servira de capteur et de récepteur. Ça permettrait que si on a du délai à imposer pour les réceptions, que ça n’impacte pas Gladys lorsque l’on demande à émettre un signal.
Pour l’instant ce ne sont encore que des idées, mais dès que tout sera clair, cette phase “finale” de développement devrait être assez rapide 
Je pense que c’est plus simple d’avoir une espèce de tout en un.
Niveau délais c’est quand même assez rapide et je ne pense pas que ca impacte Gladys non ?
Regarde le code qu’on avait dans Gladys 3, il gérait l’émission et la réception en un programme et ça fonctionnait très bien ! ![]()
Très beau boulot sinon !
Waouh super boulot 
J’ai hâte de pouvoir tester ça, je programme pas mal sur Arduino et c’est une super nouvelle.
Très bon boulot.
@pierre-gilles @loic_btz Merci beaucoup ![]()
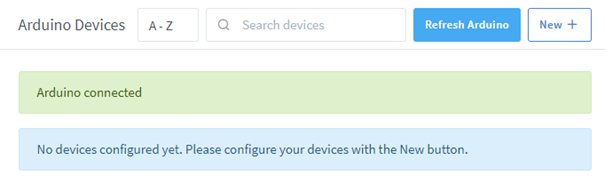
Parfait, j’ai travaillé un peu tout ça. Une nouvelle version du code Arduino a été uploadé, et maintenant il est possible de créer des capteurs 433. Pour l’instant les sorties serial de l’Arduino apparaissent uniquement dans les logs, et la dernière sortie est stocké dans le paramètre ‹ CODE › du device.
Je galère encore à me représenter comment présenter les devices dans l’interface, mais on arrive enfin à une communication dans les deux sens ![]()
Si vous avez des suggestions sur la manière dont les devices pourraient être affichés je suis preneur ![]()
D’ailleurs @pierre-gilles, j’ai essayé au niveau de la BD de définir le capteur comme un capteur de température, mais il n’apparait pas sur la dashboard lorsque je fais ma box device-in-room… Y a-t-il des spécifications pour que ça apparaisse ?
Salut @billona,
Alors après quelques jours de tests et de quelques galère, voici mon retour. Je vais d’abord présenté ici les test en téléversement + émission 433 seulement (Je n’ai pas de prises Chacon pour le moment - J’en ai commandé 4, ça me sera toujours utile ^^) . Puis dans un second je posterais les test en réception.
Pour information, la différence qu’on a sur l’ArduinoJSON vient du fait que tu utilises la version 5 alors que de mon côté ça fait une bonne année que je suis passé en version 6 qui traite notamment les erreurs de déserialization. Peut-être serait-il bon de passé sur celle-ci au plus tôt car comme je te l’avais les appels changent. C’est toi qui voit, si tu as besoin je t’aiguillerais. Pas grand chose à changer.
Côté programme, aucune actions requises n’a été nécessaire pour que ce soit fonctionnel :
Plateforme de test :
#include <RCSwitch.h>

RCSwitch mySwitch = RCSwitch();

void setup() {
Serial.begin(9600);
mySwitch.enableReceive(0);  // Receiver on interrupt 0 => that is pin #2
}

void loop() {
if (mySwitch.available()) {

  Serial.print("Received ");
  Serial.print( mySwitch.getReceivedValue() );
  Serial.print(" / ");
  Serial.print( mySwitch.getReceivedBitlength() );
  Serial.print("bit ");
  Serial.print("Protocol: ");
  Serial.println( mySwitch.getReceivedProtocol() );

  mySwitch.resetAvailable();
}
}


Tests :
setup.js:27 () Flashing done!
<warn> send.js:18 (SerialPort.<anonymous>) Arduino: port opened
<warn> send.js:19 (SerialPort.<anonymous>) {"function_name":"emit_433","parameters":{"data_pin":"3","code":"1381717","bit_length":"24"}}%
10:06:31.598 -> {"action":"received","value":517}
10:06:31.869 -> {"action":"received","value":517}
10:06:42.006 -> {"action":"received","value":1381717}
10:06:42.282 -> {"action":"received","value":1381717}
setup.js:27 () Flashing done!
15:39:02.464 -> {"action":"received","value":517}
15:39:02.737 -> {"action":"received","value":517}
15:39:07.016 -> {"action":"received","value":1381717}
15:39:07.290 -> {"action":"received","value":1381717}
setup.js:27 () Flashing done!
2020-05-20T21:04:58+0200 <warn> send.js:18 (SerialPort.<anonymous>) Arduino: port opened
2020-05-20T21:04:58+0200 <warn> send.js:19 (SerialPort.<anonymous>) {"function_name":"emit_433","parameters":{"data_pin":"4","code":"1381717","bit_length":"24"}}%
21:05:09.001 -> {"action":"received","value":517}
21:05:09.275 -> {"action":"received","value":517}
21:05:11.949 -> {"action":"received","value":1381717}
21:05:12.223 -> {"action":"received","value":1381717}
setup.js:27 () Flashing done!
2020-05-20T20:59:56+0200 <warn> send.js:18 (SerialPort.<anonymous>) Arduino: port opened
2020-05-20T20:59:56+0200 <warn> send.js:19 (SerialPort.<anonymous>) {"function_name":"emit_433","parameters":{"data_pin":"4","code":"1381717","bit_length":"24"}}%
21:00:06.321 -> {"action":"received","value":517}
21:00:06.591 -> {"action":"received","value":517}
21:00:10.053 -> {"action":"received","value":1381717}
21:00:10.323 -> {"action":"received","value":1381717}
2020-05-20T20:49:34+0200 <warn> setup.js:25 () Error: no Arduino 'duemilanove168' found.
at /home/pi/GladysV4-ArduinoUSB/Gladys/server/services/arduino/node_modules/avrgirl-arduino/lib/connection.js:30:25
at /home/pi/GladysV4-ArduinoUSB/Gladys/server/services/arduino/node_modules/avrgirl-arduino/lib/connection.js:70:12
at /home/pi/GladysV4-ArduinoUSB/Gladys/server/services/arduino/node_modules/avrgirl-arduino/lib/connection.js:191:26
at runMicrotasks (<anonymous>)
at processTicksAndRejections (internal/process/task_queues.js:94:5)
- Arduino Due en ma possession, pas Duemilanov
- Détail Port USB :
[26206.334098] usb 1-1.2: new full-speed USB device number 23 using xhci_hcd
[26206.477587] usb 1-1.2: New USB device found, idVendor=2341, idProduct=003d,
bcdDevice= 0.01
[26206.477595] usb 1-1.2: New USB device strings: Mfr=1, Product=2, SerialNumber=220
[26206.477600] usb 1-1.2: Product: Arduino Due Prog. Port
[26206.477605] usb 1-1.2: Manufacturer: Arduino (www.arduino.cc)
[26206.477610] usb 1-1.2: SerialNumber: 5583931343835151F1F0
[26206.480259] cdc_acm 1-1.2:1.0: ttyACM11: USB ACM device
Idem précédent point 5
setup.js:27 () Flashing done!
<warn> send.js:18 (SerialPort.<anonymous>) Arduino: port opened
<warn> send.js:19 (SerialPort.<anonymous>) {"function_name":"emit_433","parameters":{"data_pin":"3","code":"1381717","bit_length":"24"}}%
12:08:40.360 -> {"action":"received","value":517}
12:08:40.633 -> {"action":"received","value":517}
12:08:54.081 -> {"action":"received","value":1381717}
12:08:54.319 -> {"action":"received","value":1381717}
2020-05-20T15:50:01+0200 <warn> setup.js:25 () Error: no Arduino 'leonardo' found.
at /home/pi/GladysV4-ArduinoUSB/Gladys/server/services/arduino/node_modules/avrgirl-arduino/lib/connection.js:30:25
at /home/pi/GladysV4-ArduinoUSB/Gladys/server/services/arduino/node_modules/avrgirl-arduino/lib/connection.js:70:12
at /home/pi/GladysV4-ArduinoUSB/Gladys/server/services/arduino/node_modules/avrgirl-arduino/lib/connection.js:191:26
at runMicrotasks (<anonymous>)
at processTicksAndRejections (internal/process/task_queues.js:94:5)
- Arduino Leonardo ETH en ma possession, pas Leonardo tout court
- Reconnu en “Unknown” dans les configurations
- Détail Port USB :
[25878.209177] usb 1-1.2: new full-speed USB device number 22 using xhci_hcd
[25878.349042] usb 1-1.2: New USB device found, idVendor=2a03, idProduct=8040, bcdDevice= 1.00
[25878.349049] usb 1-1.2: New USB device strings: Mfr=1, Product=2, SerialNumber=3
[25878.349054] usb 1-1.2: Product: Arduino Leonardo ETH
[25878.349059] usb 1-1.2: Manufacturer: Unknown
[25878.351702] cdc_acm 1-1.2:1.0: ttyACM11: USB ACM device
setup.js:27 () Flashing done!
<warn> send.js:18 (SerialPort.<anonymous>) Arduino: port opened
<warn> send.js:19 (SerialPort.<anonymous>) {"function_name":"emit_433","parameters":{"data_pin":"3","code":"1381717","bit_length":"24"}}%
- Réception codes - Aucun :
2020-05-20T21:10:47+0200 <warn> setup.js:25 () Error: stk500 timeout. 200ms
at Timeout.<anonymous> (/home/pi/GladysV4-ArduinoUSB/Gladys/server/services/arduino/node_modules/stk500-v2/lib/parser-v2.js:114:21)
at listOnTimeout (internal/timers.js:531:17)
at processTimers (internal/timers.js:475:7) {
code: 'E_TIMEOUT'
}
- Détail Port USB :
[44768.245296] usb 1-1.3: new full-speed USB device number 26 using xhci_hcd
[44768.381652] usb 1-1.3: New USB device found, idVendor=1a86, idProduct=7523, bcdDevice= 2.54
[44768.381668] usb 1-1.3: New USB device strings: Mfr=0, Product=2, SerialNumber=0
[44768.381682] usb 1-1.3: Product: USB2.0-Serial
[44768.391535] ch341 1-1.3:1.0: ch341-uart converter detected
[44768.395073] usb 1-1.3: ch341-uart converter now attached to ttyUSB0
setup.js:27 () Flashing done!
<warn> send.js:18 (SerialPort.<anonymous>) Arduino: port opened
<warn> send.js:19 (SerialPort.<anonymous>) {"function_name":"emit_433","parameters":{"data_pin":"4","code":"1381717","bit_length":"24"}}%
11:57:06.842 -> {"action":"received","value":517}
11:57:07.082 -> {"action":"received","value":517}
11:57:29.392 -> {"action":"received","value":1381717}
Non disponible
Axes d’améliorations notés que tu as peut-être en tête :
Interrupteur et Lumière ? Utilité de la fonctionnalité Bouton ?). Mais côté “émission 433”, la même chose prévaut pour ces 2 premières fonctionnalités. Ne faudrait-il pas proposer 2 lignes code ON + Longueur du code / code OFF + Longueur du code ou même une Longueur du code commune puisque on utlisera généralement la même Longueur.La suite pour la réception à venir. Déjà quelque tests faits.
Merci pour tes tests @Terdious
Je vois ! Oui si tu as la possibilité de m’aiguiller je ne suis pas contre, comme ça ce sera fait ^^
C’est étrange, de mon côté l’ajout comme la suppression fonctionnent très bien…
J’ai modifié l’affichage pour que ça semble un peu plus cohérent, la première version était surtout du test en attendant d’améliorer le reste… Si tu pouvais me donner ton retour sur cette nouvelle version ce serait top ![]()
Les messages sont créés. Il faudra peut-être que je retravaille ça par la suite, mais normalement c’est mis en place.
Ça aussi c’est étrange… De mon côté, même en DEV je peux tout faire sans avoir à rafaîchir…
Je viens de remodifier l’API USB pour rajouter ces paramètres lors de la récupération des ports USB. Si je n’ai pas fait d’erreur dans le code alors ce sera bon. Je n’ai pas encore pu tester vu que lors de mes tests je n’ai pas eu de changement de path, mais si ça t’arrive j’aimerais bien avoir ton retour ^^
Salut @Xeanorts ! Tu as bien compris le fonctionnement du service ^^
A vrai dire le service est plus centré sur la communication en USB avec l’arduino. N’ayant jamais utilisé de nano IOT ou d’Uno Wifi je ne connais pas leur fonctionnement. Mais ça pourrait faire l’objet par l’avenir d’une mise à jour du service pour les prendre en compte.
Pour l’instant, la priorité selon moi est d’avoir un service de communication USB fiable et fini.
Le code générique permet actuellement de gérer de l’émission IR ![]()
Si tu as ça en accueil c’est que gladys utilise une base de données existante qui contient des identifiants.
Si tu décrit pas les étapes que tu as effectué pour en arriver là , c’est difficile pour nous de t’aider.
Quel est ton objectif ? Tester le service arduino ?
Le problème vient surement des requêtes CORS qui ne passent pas dans cette config… Ça le fait chez moi aussi…
Ce que je fais, c’est qu’après avoir migré ma db (dans le dossier server : npm run db-migrate:dev), je fais un nano front/config.js, et je remplace “localhost” par l’adresse IP de la machine sur laquelle tourne Gladys.
@benPi, oui, je fais de même que @billona, le front va chercher la base sur le localhost du navigateur en cours. Donc si comme moi tu as une DB qui tourne sur le localhost, il s’y connecte. Etrange ^^
Avec plaisir ^^
StaticJsonBuffer<400> jsonBuffer;
JsonObject& v = jsonBuffer.parseObject(json_data);
par les lignes suivantes:
StaticJsonDocument<400> jsonBuffer;
DeserializationError error = deserializeJson(jsonBuffer, json_data);
if (error) {
  Serial.println(error.c_str());
  return;
}
JsonObject v = jsonBuffer.as<JsonObject>();
Chez moi ça marche bien, j’ai fait les test avec ta version et celle modifiée ainsi (la seconde avec un téléversement depuis mon PC Windows).
Il s’agit d’une erreur de « length ». Pour information, je fais tout les tests avec ton projet sous 2 plateforme, VScode sur Windows et sur un raspberry Pi 4 également. Les comportements sont toujours les mêmes, je te préciserais si jamais il y avait des différences. Egalement j’utilise toujours 2 navigateur, Chrome et Firefox pour être « sûr » que ce n’est pas un souci de ce côté là. En bref je’essaye tant que je le peux de faire tout les tests avec 2 supports (PC/ RPi, Windows/Linux, Chrome/Firefox, 2 Arduino du même type pour chaque type, 2 x E433Mhz Générique / 2 x E433Mhz de marque, idem pour les R433MHz - même 3)
Pour info également, je ne peux plus faire de test depuis la mise à jour suite à ton post, il ne reconnait plus les cartes qui sont bien vu par la commande dmesg -s 1024, et le changement de type de carte me fait complètement bugger google ou firefox (testé sur les 2). Je suis obligé de kicker via le gestionnaire des tâches ou attendre que google me propose d’interrompre la page :
Egalement, je vois que le PIN de la réception n’est plus proposé. J’avais remarqué lors des essais précédent, qu’il fallait en fait mettre le PIN 0 et brancher le récepteur sur le PIN 2, ce qui est normal, puisqu’il est traité par interruption (« Interruption 0 = PIN 2 » sous la plupart des Arduino, « PIN 3 » sous YUN et Leonardo au moins). Ainsi, cela marchait bien avec ton programme sur mes test sous l’IDE Arduino. Par contre, je n’ai pas réussi à le faire sous le RPI, je n’arrive pas à lire le port série lorsqu’il est occupé par Gladys.
Voilà, pour le coup je ne sais plus trop comment t’aider actuellement, j’ai tenté une réinstalle complète du PI, mais rien de plus ^^ Malheureusement je n’ai pas de support Apple à disposition ^^
oui j’ai une distribution Raspbian-buster-desktop et j’ai fait toutes les étapes d’installation développeur en remplaçant le chemin gladys de PG par celui de @billona.
Alors ce matin, j’ai changé la ligne local host ,
localApiUrl: process.env.LOCAL_API_URL || ‹ http://IP_DU_RPI:1443 ›,
webSocketUrl: process.env.WEBSOCKET_URL || ‹ ws://IP_DU_RPI:1443 ›,
Et ça fonctionne!
j’ai fait /gladys/server $ npm start
J’ai eu une erreur:
npm WARN npm npm does not support Node.js v10.19.0
npm WARN npm You should probably upgrade to a newer version of node as we
npm WARN npm can't make any promises that npm will work with this version.
npm WARN npm Supported releases of Node.js are the latest release of 4, 6, 7, 8, 9.
npm WARN npm You can find the latest version at https://nodejs.org/
> gladys-server@ start /home/pi/gladys/server
> cross-env NODE_ENV=development nodemon index.js
[nodemon] 1.19.4
[nodemon] to restart at any time, enter `rs`
[nodemon] watching dir(s): *.*
[nodemon] watching extensions: js,mjs,json
[nodemon] starting `node index.js`
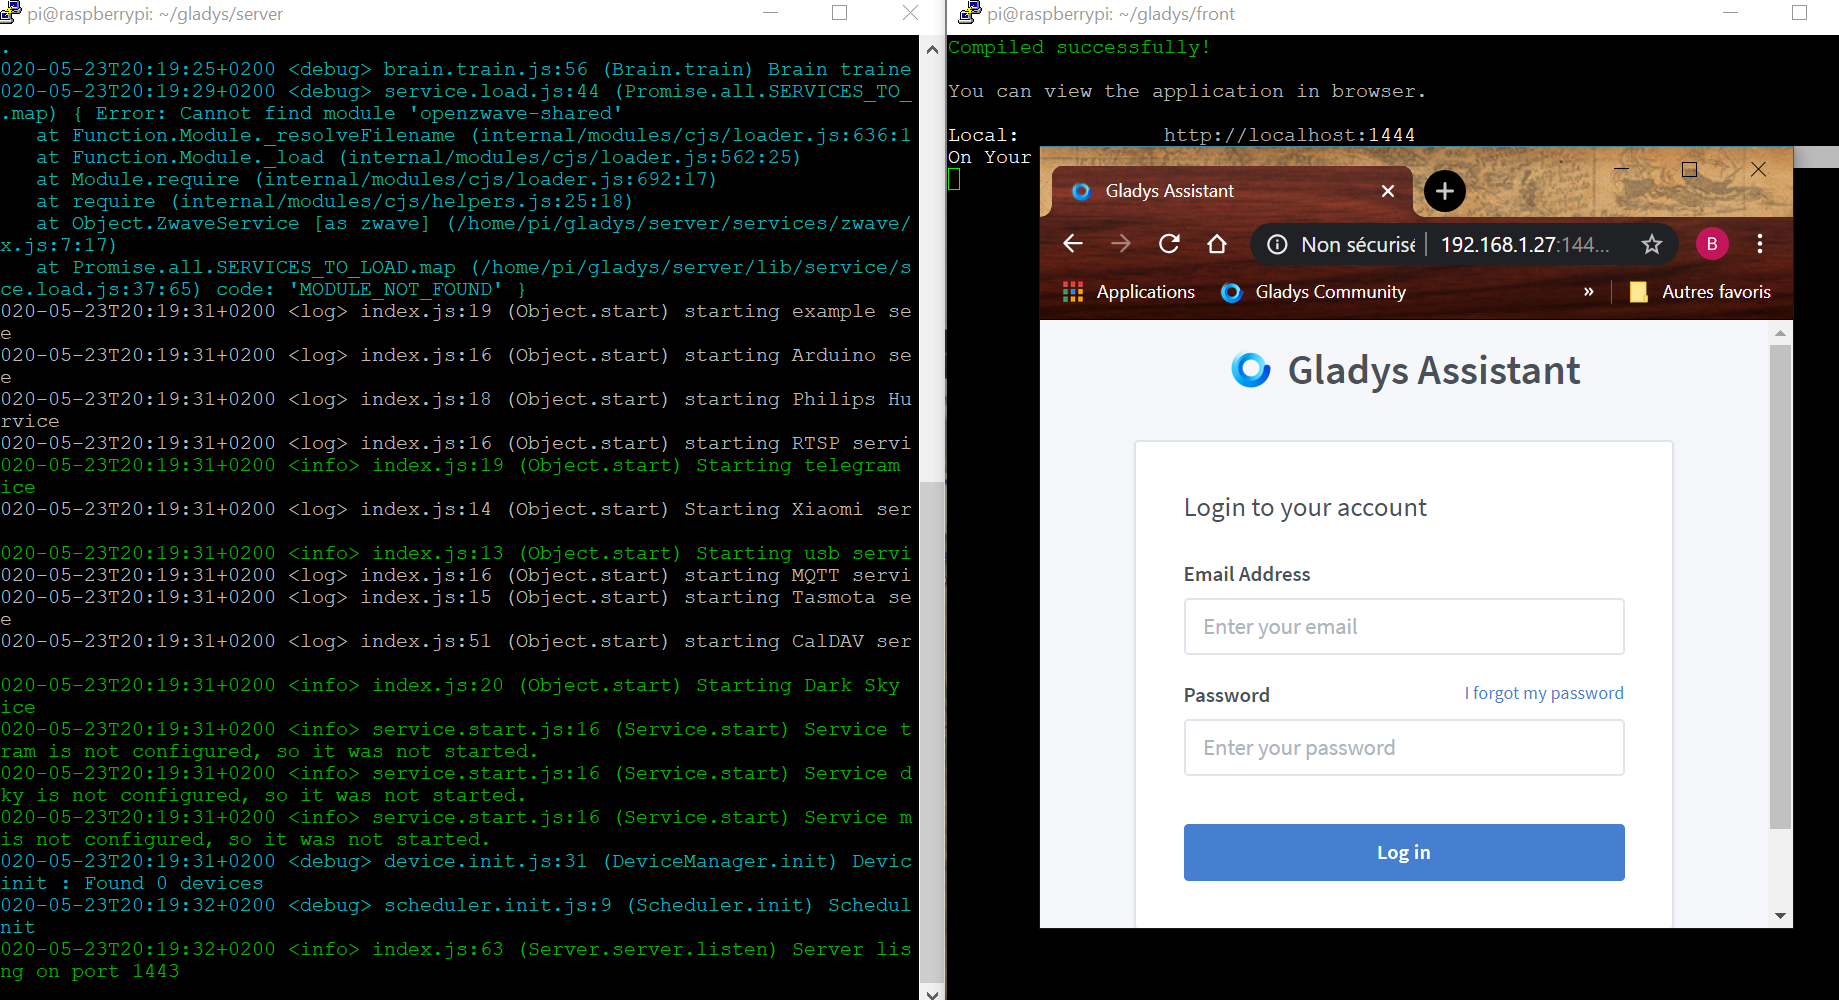
2020-05-24T10:41:45+0200 <info> system.init.js:31 (System.init) System.init: This system doesn't have a docker dameon available.
2020-05-24T10:41:46+0200 <debug> brain.train.js:54 (Brain.train) Training brain...
2020-05-24T10:41:46+0200 <debug> brain.train.js:56 (Brain.train) Brain trained!
2020-05-24T10:41:50+0200 <debug> service.load.js:44 (Promise.all.SERVICES_TO_LOAD.map) { Error: Cannot find module 'openzwave-shared'
at Function.Module._resolveFilename (internal/modules/cjs/loader.js:636:15)
at Function.Module._load (internal/modules/cjs/loader.js:562:25)
at Module.require (internal/modules/cjs/loader.js:692:17)
at require (internal/modules/cjs/helpers.js:25:18)
at Object.ZwaveService [as zwave] (/home/pi/gladys/server/services/zwave/index.js:7:17)
at Promise.all.SERVICES_TO_LOAD.map (/home/pi/gladys/server/lib/service/service.load.js:37:65) code: 'MODULE_NOT_FOUND' }
2020-05-24T10:41:50+0200 <log> index.js:19 (Object.start) starting example service
2020-05-24T10:41:50+0200 <log> index.js:16 (Object.start) starting Arduino service
2020-05-24T10:41:50+0200 <log> index.js:51 (Object.start) starting CalDAV service
2020-05-24T10:41:50+0200 <info> index.js:20 (Object.start) Starting Dark Sky service
2020-05-24T10:41:50+0200 <log> index.js:16 (Object.start) starting MQTT service
2020-05-24T10:41:50+0200 <log> index.js:18 (Object.start) starting Philips Hue service
2020-05-24T10:41:50+0200 <log> index.js:16 (Object.start) starting RTSP service
2020-05-24T10:41:50+0200 <info> index.js:19 (Object.start) Starting telegram service
2020-05-24T10:41:50+0200 <info> index.js:13 (Object.start) Starting usb service
2020-05-24T10:41:50+0200 <log> index.js:14 (Object.start) Starting Xiaomi service
2020-05-24T10:41:50+0200 <log> index.js:15 (Object.start) starting Tasmota service
2020-05-24T10:41:50+0200 <info> service.start.js:16 (Service.start) Service darksky is not configured, so it was not started.
2020-05-24T10:41:50+0200 <info> service.start.js:16 (Service.start) Service telegram is not configured, so it was not started.
2020-05-24T10:41:50+0200 <info> service.start.js:16 (Service.start) Service mqtt is not configured, so it was not started.
2020-05-24T10:41:51+0200 <debug> device.init.js:31 (DeviceManager.init) Device : init : Found 0 devices
2020-05-24T10:41:51+0200 <debug> scheduler.init.js:9 (Scheduler.init) Scheduler.init
events.js:174
throw er; // Unhandled 'error' event
^
Error: listen EADDRINUSE: address already in use :::1443
at Server.setupListenHandle [as _listen2] (net.js:1280:14)
at listenInCluster (net.js:1328:12)
at Server.listen (net.js:1415:7)
at Object.start (/home/pi/gladys/server/api/index.js:62:10)
at /home/pi/gladys/server/index.js:21:10
Emitted 'error' event at:
at Server.emit (events.js:198:13)
at emitErrorNT (net.js:1307:8)
at process._tickCallback (internal/process/next_tick.js:63:19)
[nodemon] app crashed - waiting for file changes before starting...
Puis, gladys/front/npm start
Compiled successfully!
@benPi, cette erreur signifie que le server est déjà lancé. Si tu souhaites revoir les logs, le mieux est de redémarrer ton RPi et de relancer le tout de la même manière. Suite à une déconnexion automatique du SSH, le serveur reste lancé mais pas le front.
Merci bcp je comprends mieux!
Au fait: est ce que depuis mon navigateur je peux faire une requête sur le server si le front n’est pas lancé? j’ai pas d’exemple de requête mais c’est pour mieux comprendre.
Quoi qu’il en soit, ça marche!
@billona Voilà mon premier retour. C’est super! ça marche tout seul!
J’ai des remarques mais c’est plus sur le paufinage et la compréhension. Pour moi ce qu’il faudrait impérativement, c’est pouvoir customiser ce qui sera envoyé à l’arduino (bouton customize comme l’exemple ci dessous).
J’ai fait exprès d’appuyer mon côté “newbie” pour que le maximum de choses soit ergonomiques et intuitifs.
Globalement, des étiquettes quand tu passes la souris sur un bouton permettraient de voir mieux en une phrase ce qui est attendu. Ca permet de comprendre mieux.
Setup :
Name of the card : on ne sait pas si on peut mettre ce qu’on veut où s’il faut recopier une référence. Un phrase pour préciser
Select the model of your Arduino: “You can find it here…” si tant est qu’il y ait un endroit
Select the USB port where your Arduino is connected: Ne sachant pas j’ai créé 2 arduinos avec 2 ports différent. Les 2 fonctionnentHors un des 2 arduinos devrait apparaitre «not connected, error, it’s not an arduino on dev/ttyAMA0 »
Upload Code : si j’ai bien compris ça téléverse un code dans l’arduino ?? Il y a peut être une sécurité arpès mais la j’ai peur de cliquer dessus car peur d’effacer mon propre code arduino. Une petite explication étiquette permettrait de rassurer ou de mettre en garde sur la manip « warning, you will lost your last code in your arduino. »
DEVICES :
Name : Il y a des noms partout (nom de carte, nom du sous-service, slug, TAG etc. …) j’imagine vu la suite que je dois mettre le nom de ma prise commandée. Mais ca prête un peu à confusion.
FONCTION :
Typiquement moi c’est un servomoteur que je souhaite bouger. Il faudrait pouvoir allier ton code tout fait très pratique et la possibilité de faire sa propre fonction. Exemple ma fonction serait :
SERVO (‘Position’ = ‘180’). La question se pose donc si j’envoie 181 et que c’est limité, il y a-t-il un retour d’erreur ? ou opter pour 100% = 180° ? (comme avec l’intensité des lumières)
Pour une appli ouverte, au même titre que je peux envoyer une requête sous forme IP/?servo=180 ou autre, on devrait pouvoir envoyer sa commande en brut. De plus ce sera plus simple pour le débuggage car je peux envoyer la même chose via ma console arduino lorsque je teste mon code .ino sur mon ordi.
Proposition (le must) : tu peux mettre quand tu cliques sur customize, ça t’affiche le code brut (comme les scripts) envoyé à l’arduino que tu peux alors customiser (aux risques que ça ne marche plus évidemment. )
DATAPIN : Attention certaines pins ne vont pas avec un type d’action
Y a til un « warning » si une PIN est sélectionnée 2 fois « Warning : data pin 7 is used twice, it may be a mistake and cause damage to your device”
EMIT IR: Si je souhaite modifier le “protocole” de l’émission IR, je dois pouvoir le faire.
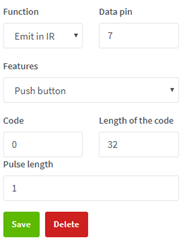
2 length différents peut prêter à confusion.
Pour les Arduino Devices : une liste déroulante serait intéressant pour contracter le setup de chaque device une fois paramétrés.
Impeccable si ça fonctionne ![]()
Je suis d’accord avec toi il y a encore pas mal de choses à modifier sur l’UI pour que tout soit explicite. Dans un premier temps je tiens à finir la partie réception avant de m’occuper de l’optimisation.
Est-ce que tu pourrais m’envoyer en MP le code Arduino que tu utilises pour contrôler ton Servo ? Je rajoute petit à petit les fonctionnalités dans le code. Par exemple la dernière update contient la récupération de données via DHT11.
C’est une super idée, je rajoute ça dans ma fiche de route. Dès que tout sera fini j’essaierai de travailler là dessus ![]()
Oui pour l’instant c’est juste du sendNEC, mais je rajouterai les autres protocoles par la suite.
@Terdious merci pour ton aide, j’ai modifié le code Arduino, je teste ça dans l’après midi.
Après, en fonction de ce que tu m’as proposé concernant les serialNumber, productID,… j’ai modifié l’API USB, et donc les paramètres de la carte stockés dans la DB. Si tu ne l’as pas déjà fait, je te conseille de repartir sur une nouvelle DB. Vu que je suis toujours en train de dev, c’est normal que les données de la DB changent en cours de route, mais si certaines données ne sont pas rentrées et que ton browser les attend, ça me paraît logique d’avoir des erreurs.
Vraiment étrange ça aussi. Peut-être est-ce dû aux changements récents de l’API et de la DB ?
Oui j’ai fait le choix que pour la réception en 433, le pin soit forcément 0 dans un premier temps. Ça évite que l’utilisateur ne saisisse un pin qui ne fonctionne pas. Je travaillerai là dessus plus tard.
En tout cas merci énormément pour tout ces retours ![]()
J’ai mis plus haut mon code arduino incluant capteur de luminosité capteur de mouvement et servo. J’ai du faire des morceaux de code par service dans setup et loop donc j’ai commenté pour bien baliser quel code fait partie de quel service.
Tu peux largement t’en inspirer c’est fait pour ça.
PS j’ai eu un petit bug avec les ports proposés. Si tu peux au lieu d’afficher port ttyUSB0 tu pourrais afficher le nom du port. (pour moi quinheng, ce qui s’affiche en faisant lsusb)
Y’a un exemple ici (je crois ![]() )
)