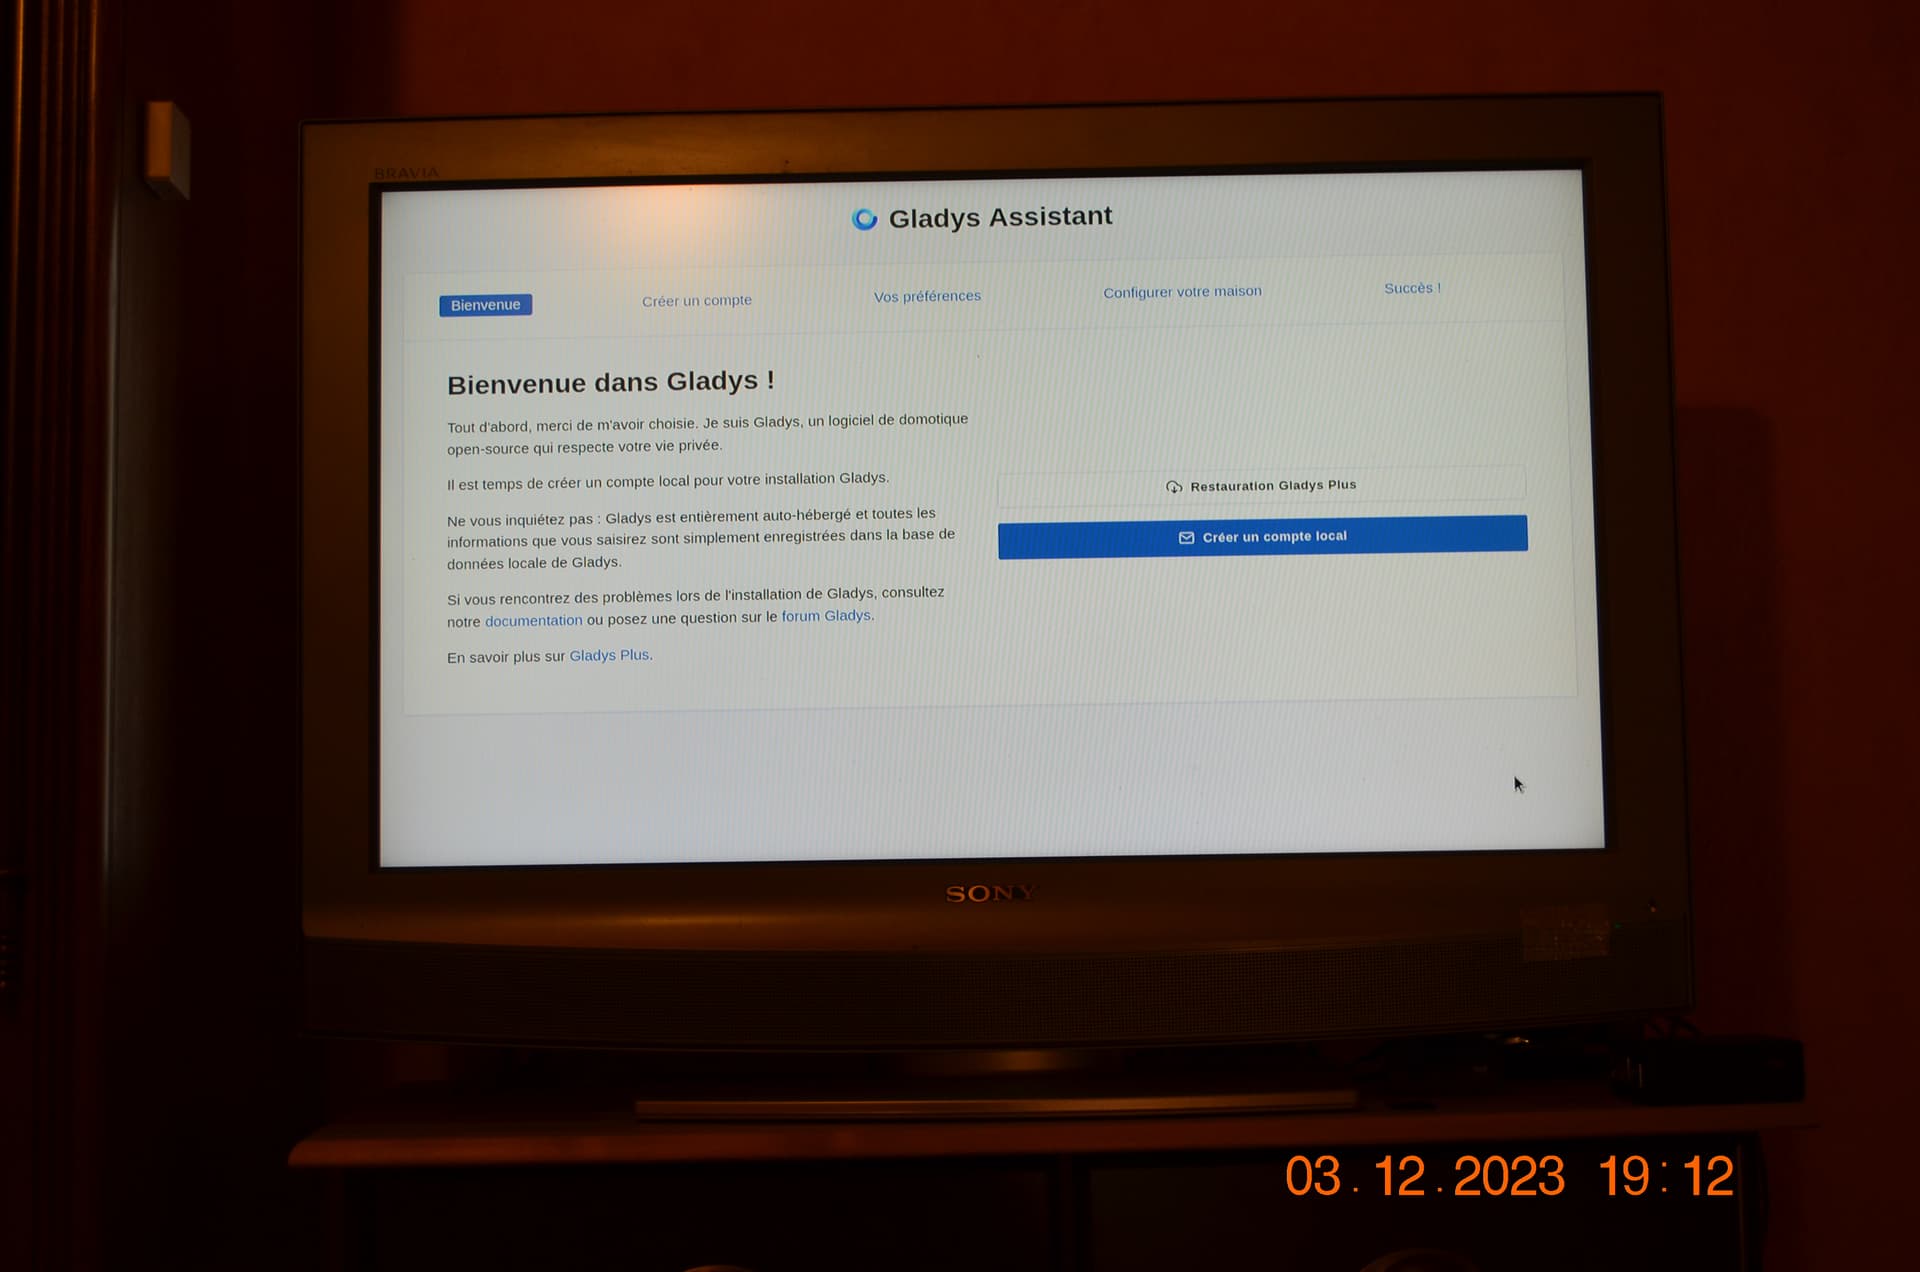
-
Installed the Gladys assistant image on the SD card
Connect an Ethernet cable to the Raspberry Pi 4.
Insert the SD card into the Raspberry Pi 4 and then plug it in.
Look in your internet box settings to see which IP Gladys assistant is connected to. -
Connect to Gladys assistant via SSH by entering in a Terminal or PuTTY:
```ssh pi@192.168.x.xx````
The x to be replaced according to the IP address -
Answer
yesto the question to know if you want to continue.
Then, when prompted for the password, type « raspberry »
You are asked to change the password, type « raspberry » again
Then enter your new password twice.
You get the message
passwd: password updated successfully
et the ssh connection is closed.
- Reconnect in ssh with your new password :
ssh pi@192.168.x.xx
You get the prompt pi@gladys:~ $
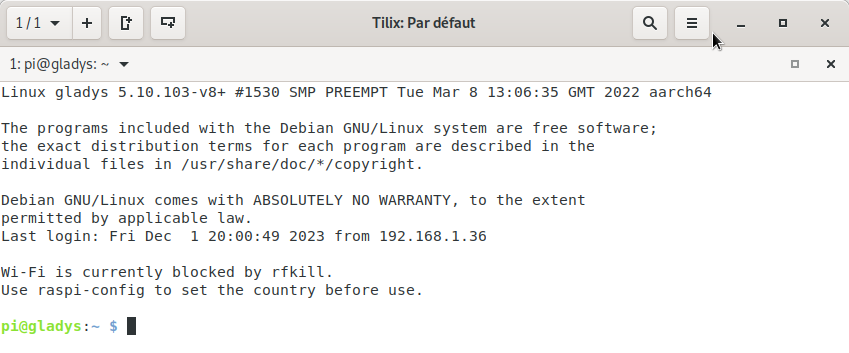
-
Enter
sudo raspi-config -
We are entering the Raspberry Pi configuration tool.
We use the up and down arrows on the keyboard to move and the tab key to go to < Select > (select) or < Back > (back).
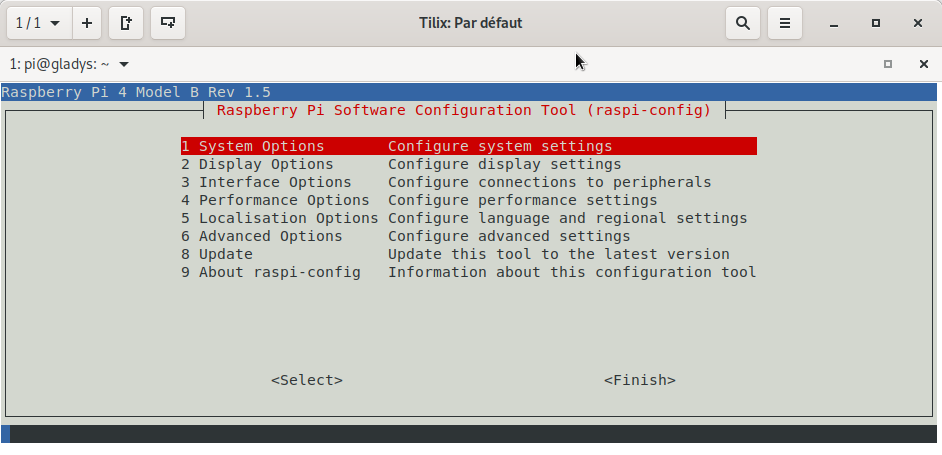
- Press Enter; we are going to change the password of the user pi.
Go down with the keyboard arrow to the 3rd line then Enter.
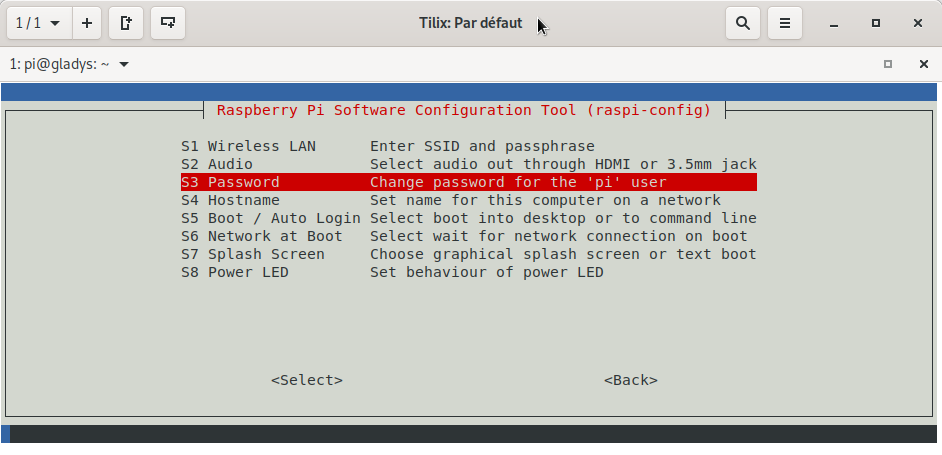
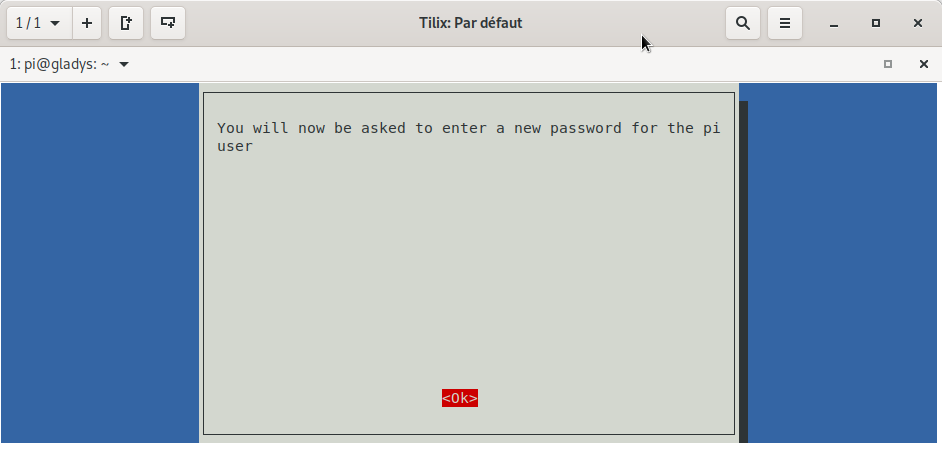
Enter again then enter your new password twice.
You get the confirmation of the password change.
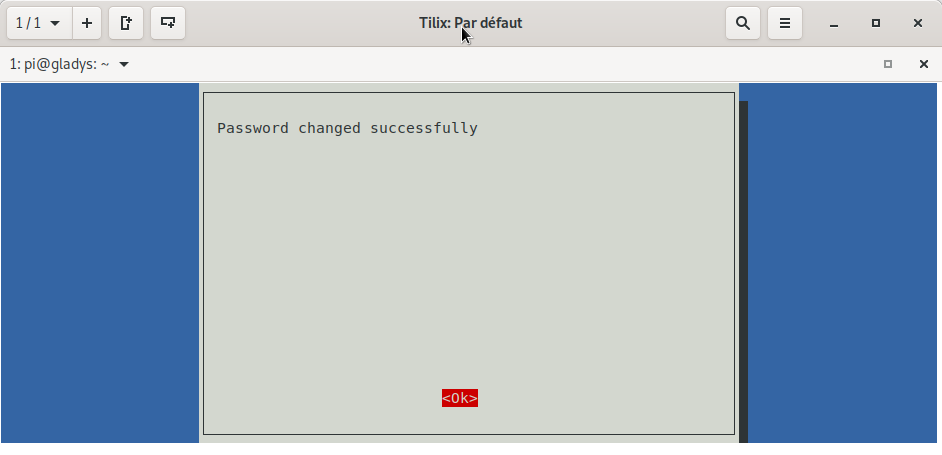
Enter again
- Now we are going to go to the 5th line (Localization options).
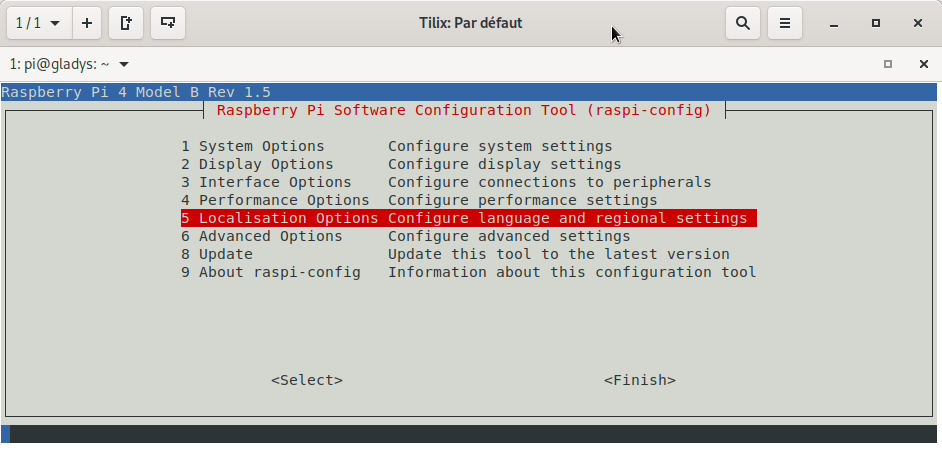
Then on (L1 Locale)
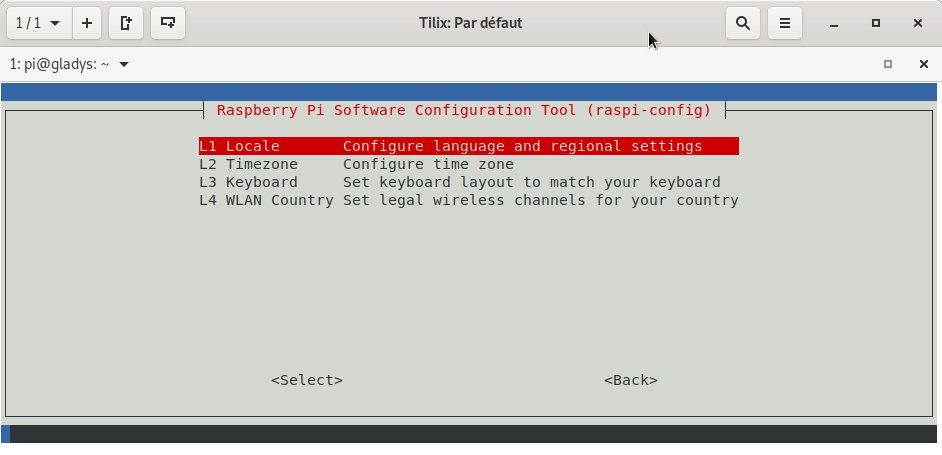
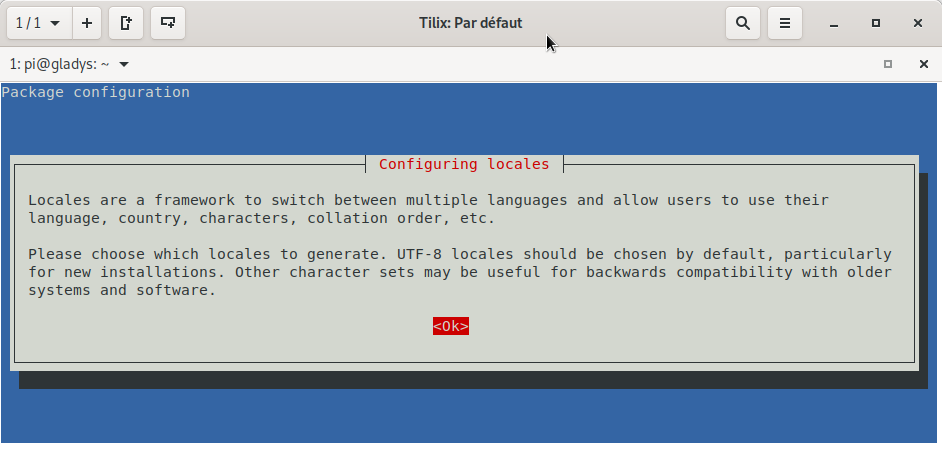
Enter
Go down with the arrow on fr_FR.UTF-8 UTF-8
Then check the box by pressing the « space » key on your keyboard
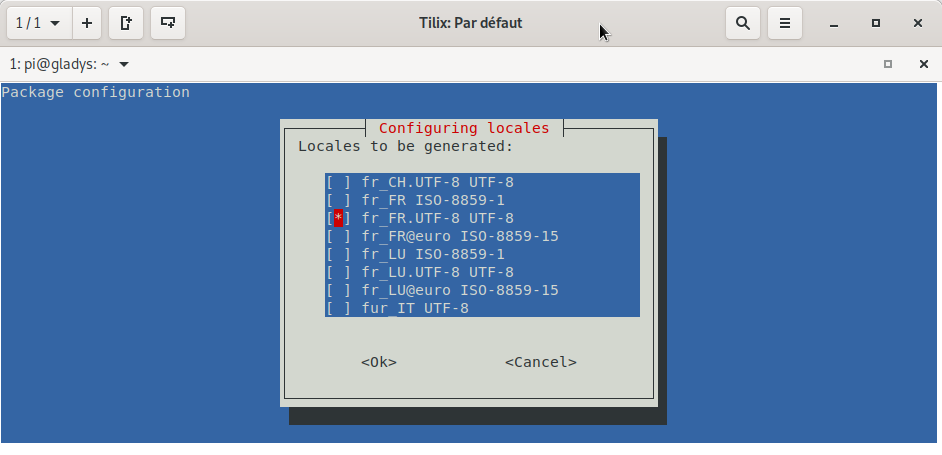
Tab key to go to < Ok > then Enter twice.
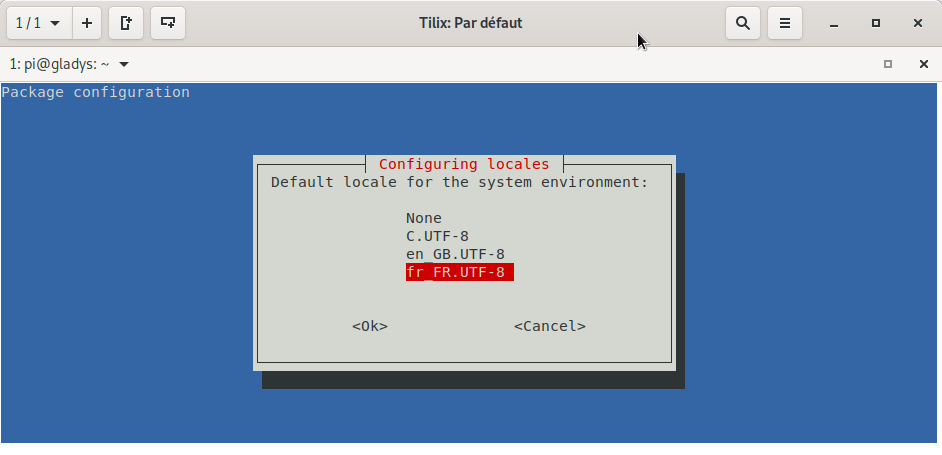
With the down arrow, select fr_FR.UTF-8 then tab for < Ok > and Enter
- Go back down to line 5 (Localization options).
Then line 2 (L2 Timezone)
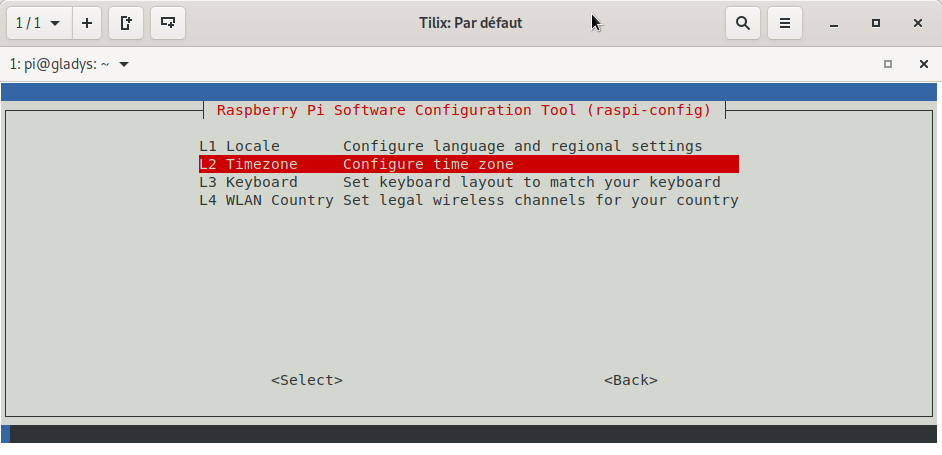
Europe < Ok > Paris < Ok >
- And we go back to line 5 (Localization options).
And line 4 (L4 WLAN Country)
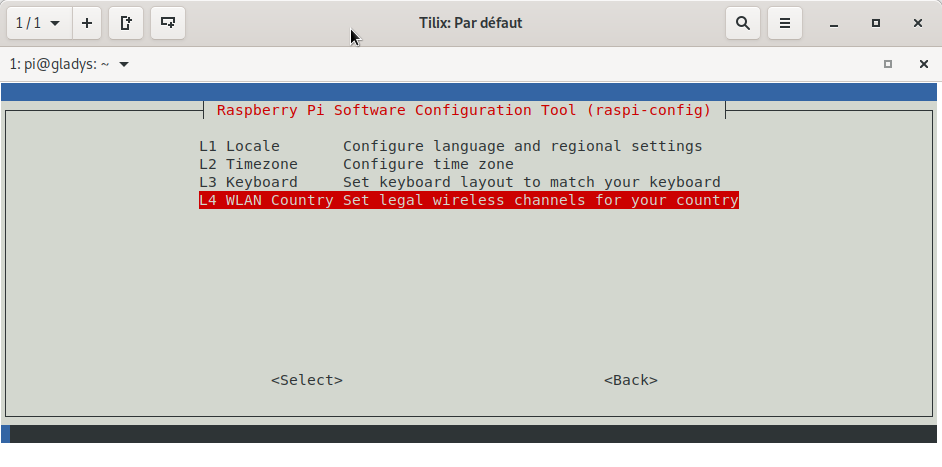
Go down to FR France
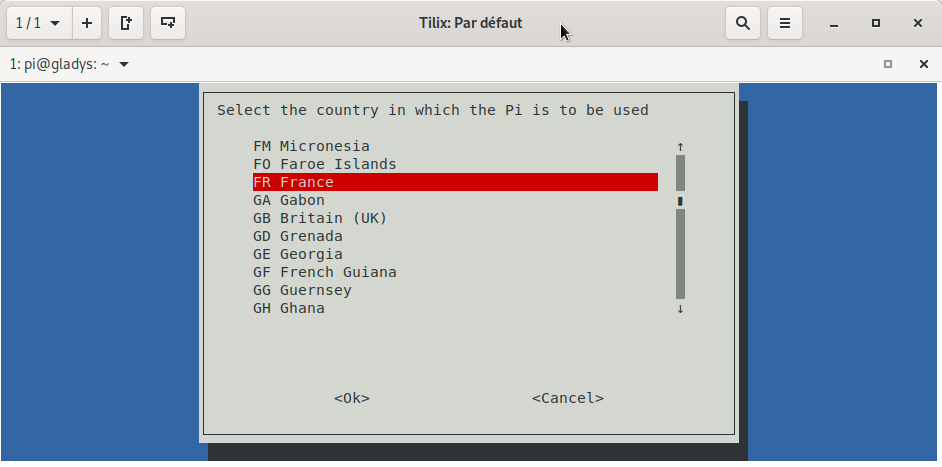
Then tab and < OK > then Enter twice
- This time we are going to go down to line 6 (Advanced Options)
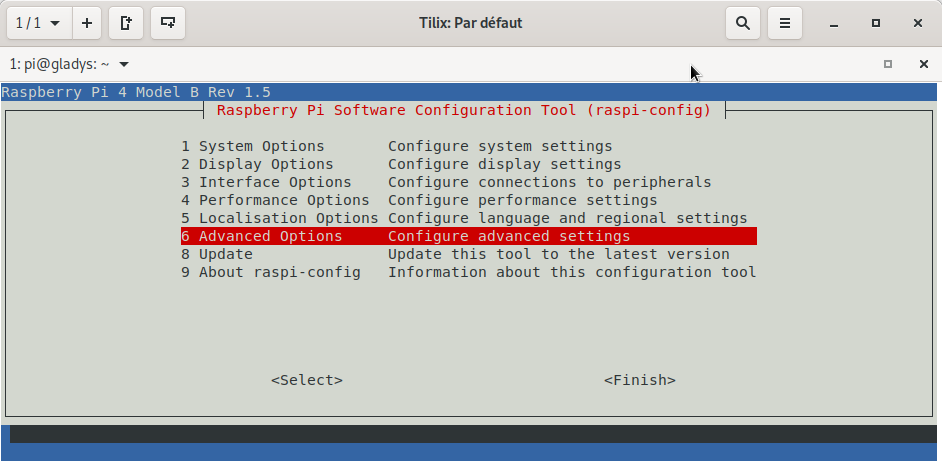
Then (A1 Expand Filesystem) to extend the partition over the entire capacity of the SD card
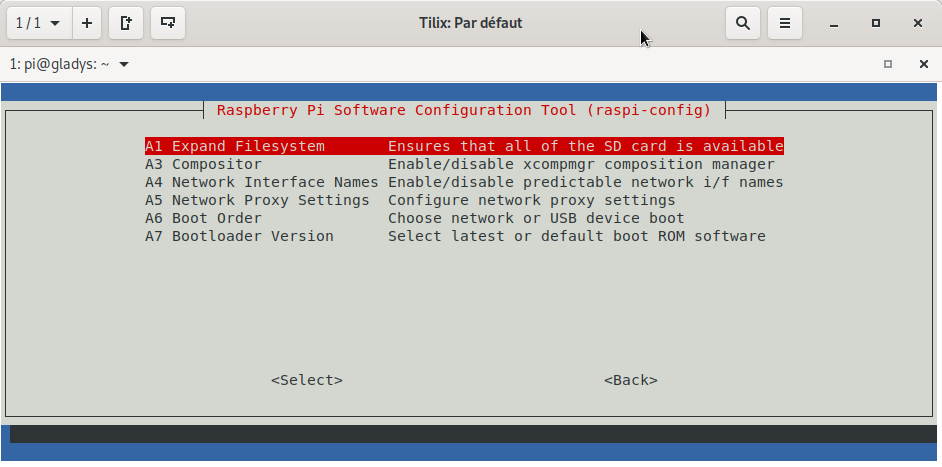
Enter
You get the info that it has been resized correctly and that you need to reboot the Raspberry Pi
Enter
Tab on < Finish > and Enter then < Yes > Enter
The Raspberry Pi reboots.
- Reconnect in ssh
ssh pi@192.168.x.xx
Now we are going to install the graphical interface on the Raspberry Pi, to use Gladys Assistant on the living room TV.
I used the method found here.
- Update the Raspberry Pi:
sudo apt update
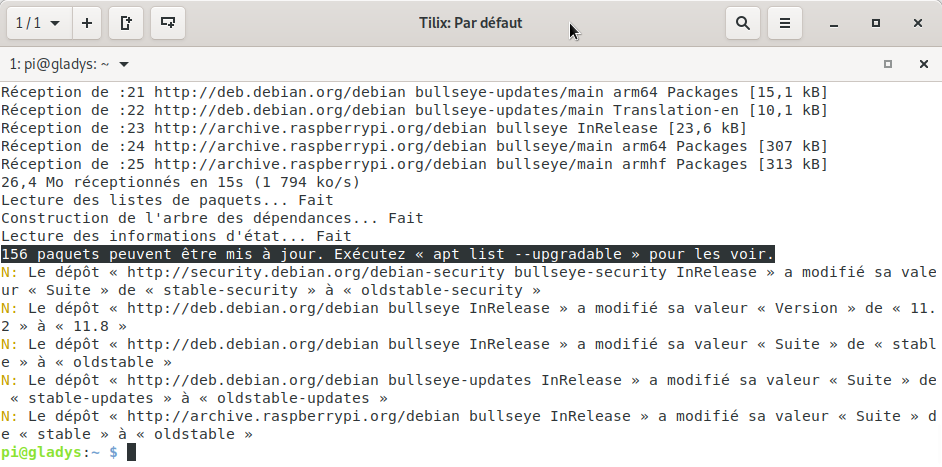
sudo apt upgrade
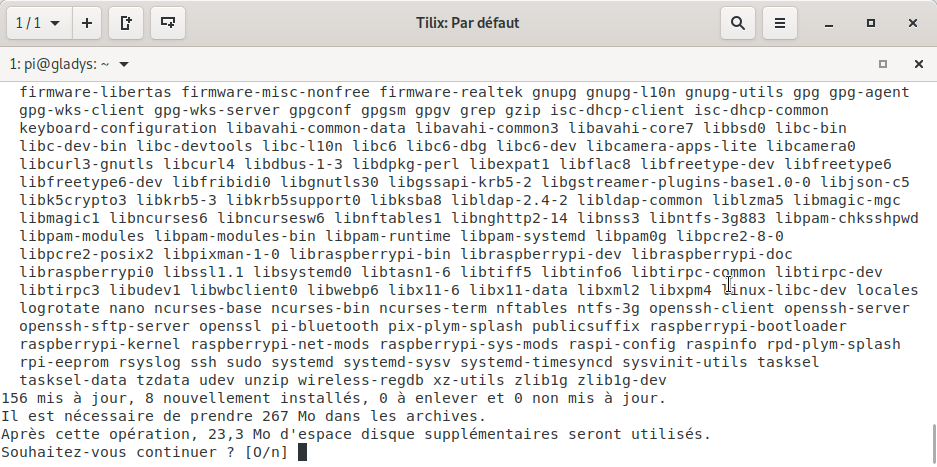
After a few minutes when all updates are installed; We will restart the Pi:
sudo reboot
- We are going to reconnect in ssh to install LXDE.
For this we will need to use Tasksel.
sudo tasksel
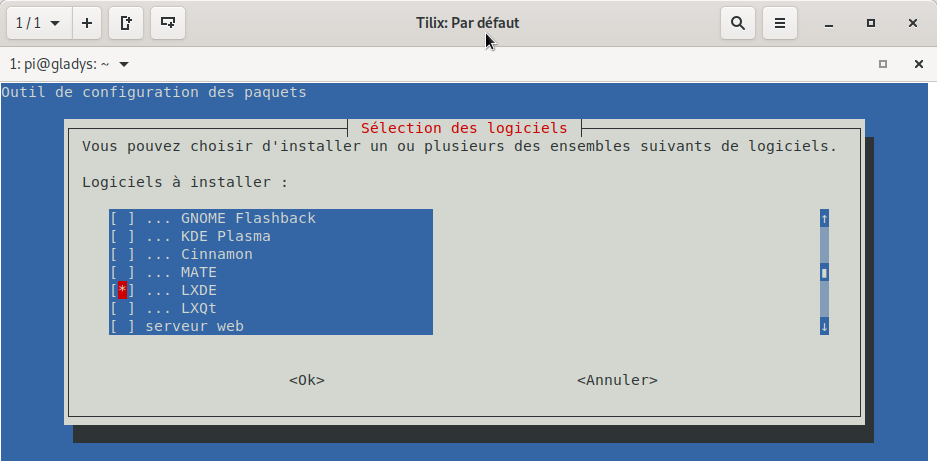
Go down to LXDE with the keyboard arrow, select with the Space key then tab to go to < Ok > and finally Enter
Downloading files
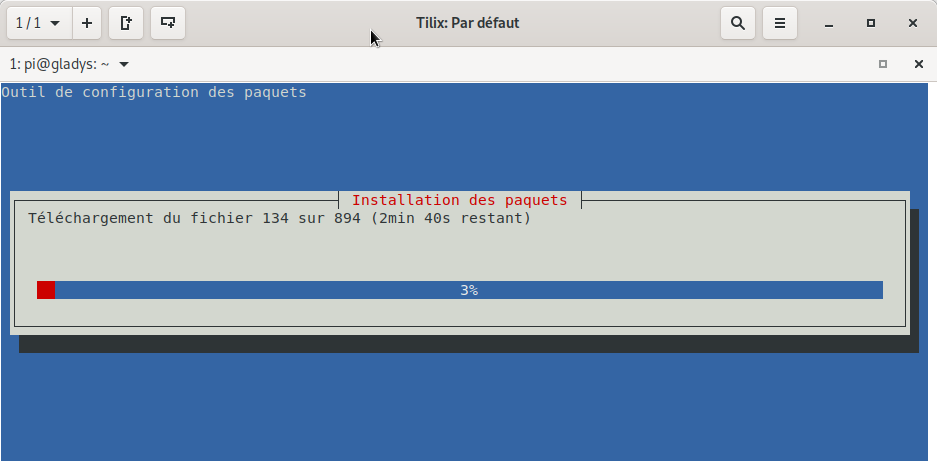
Installing files
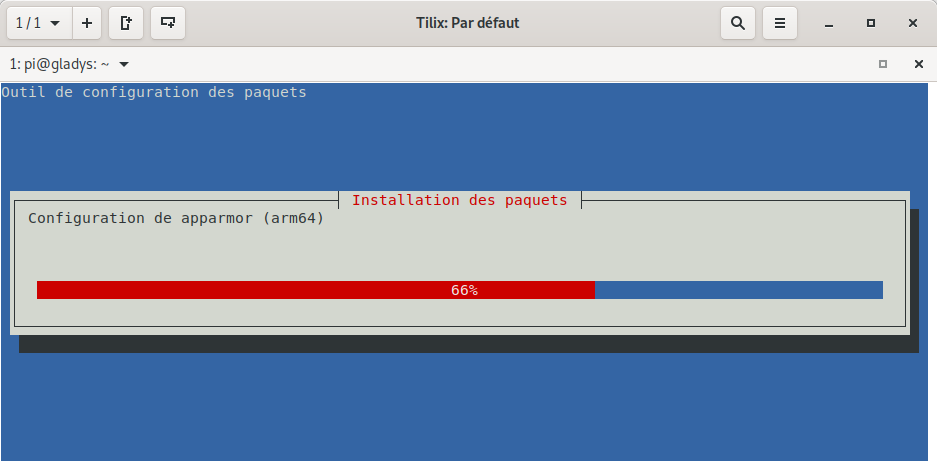
Do not reboot the Raspberry Pi right away, we must modify the Raspberry Pi startup procedure:
sudo raspi-config
Line 1 (System Options)
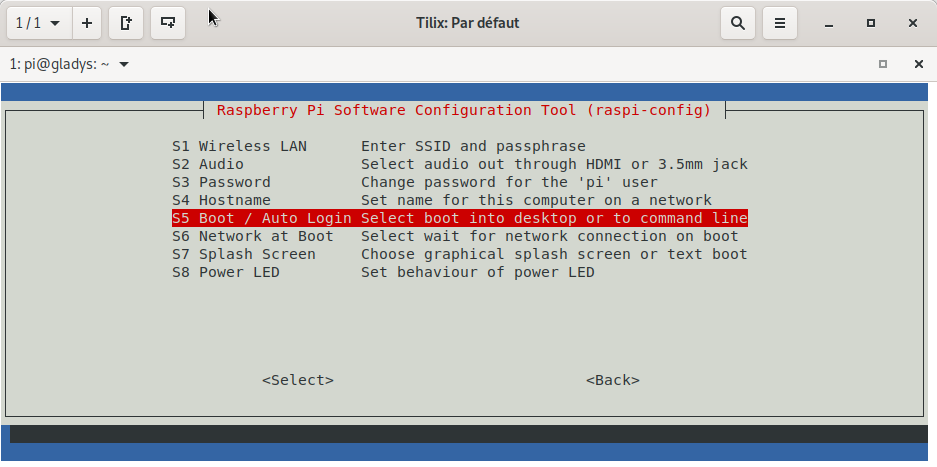
Then line 5 (S5 Boot / Auto Login)
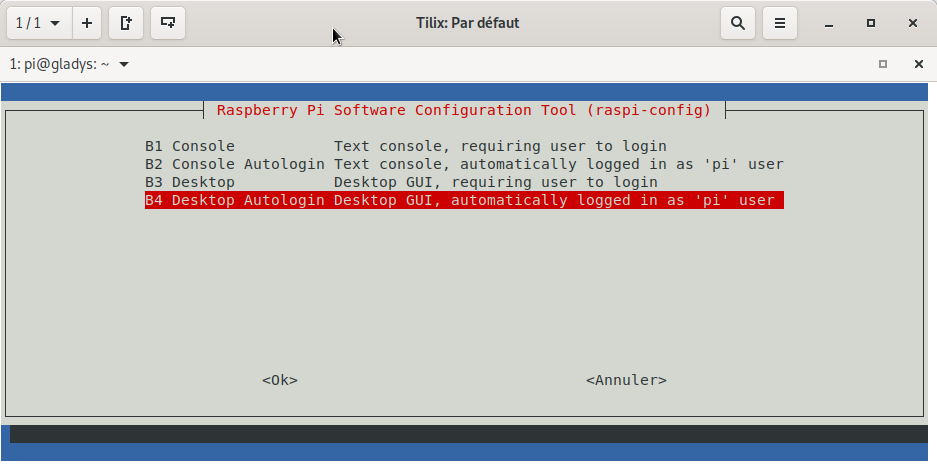
And finally line 4 (B4 Desktop Autologin)
Tab < Ok >
Tab < Finish >
Answer < Yes > to reboot Enter
You can now plug your HDMI cable into your TV if it is not already done and turn on the TV.
Maybe you will have to unplug and replug the Raspberry Pi to get the image, if your TV missed the initialization procedure at startup.
- Now we are going to fine-tune the settings.
Starting by putting Firefox-esr in French (this one is already installed with LXDE).
We reconnect in ssh:
ssh pi@192.168.x.xx
sudo apt install firefox-esr-l10n-fr hunspell
- Now we are going to switch to the TV screen.
Plug in your keyboard and mouse via USB.
Right-click on the desktop and select Desktop Preferences
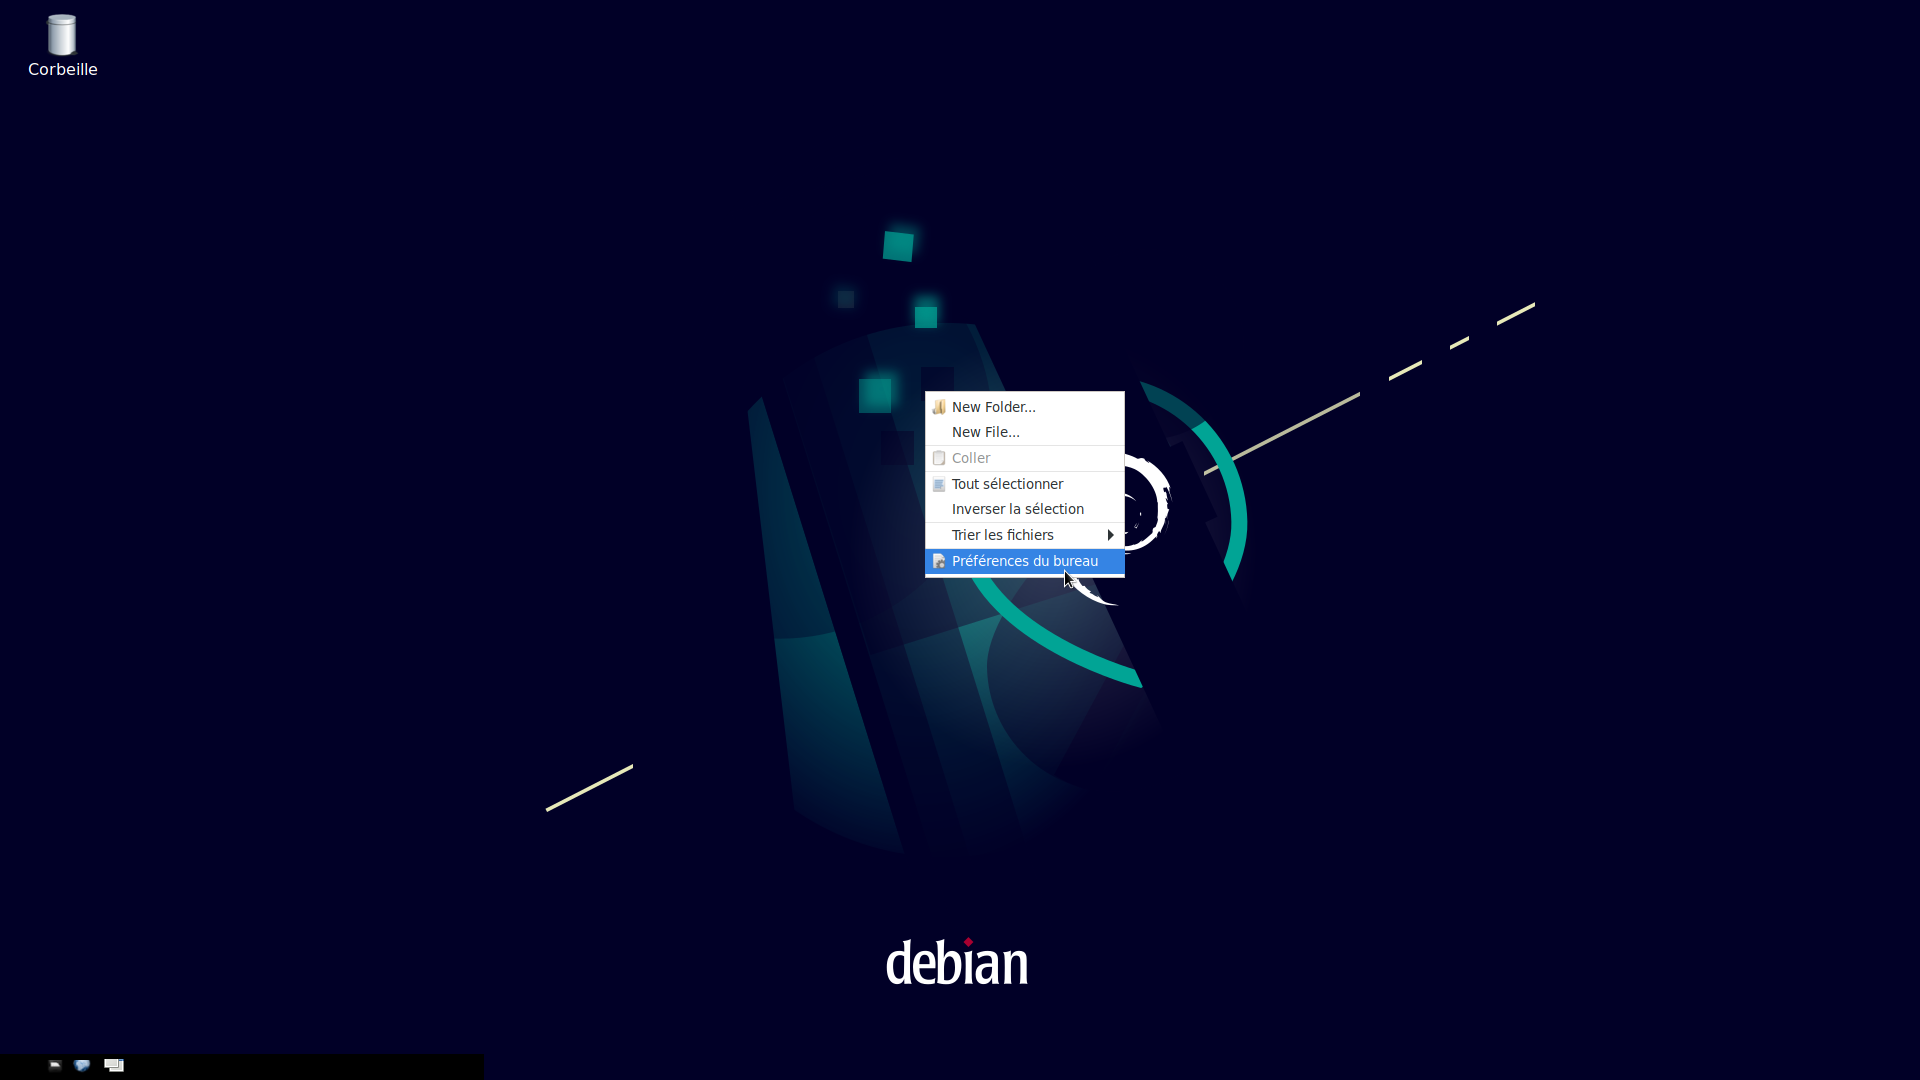
Click on Advanced and check Show the menu provided by the window manager when clicking on the desktop.
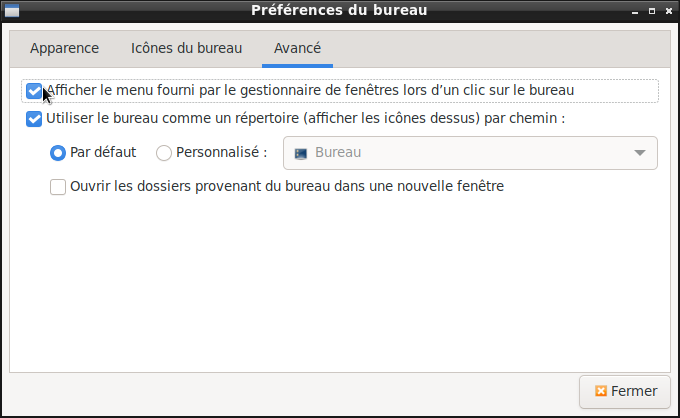
Close the window.
- New right-click on the desktop
Select Application > Setting > Monitor Settings
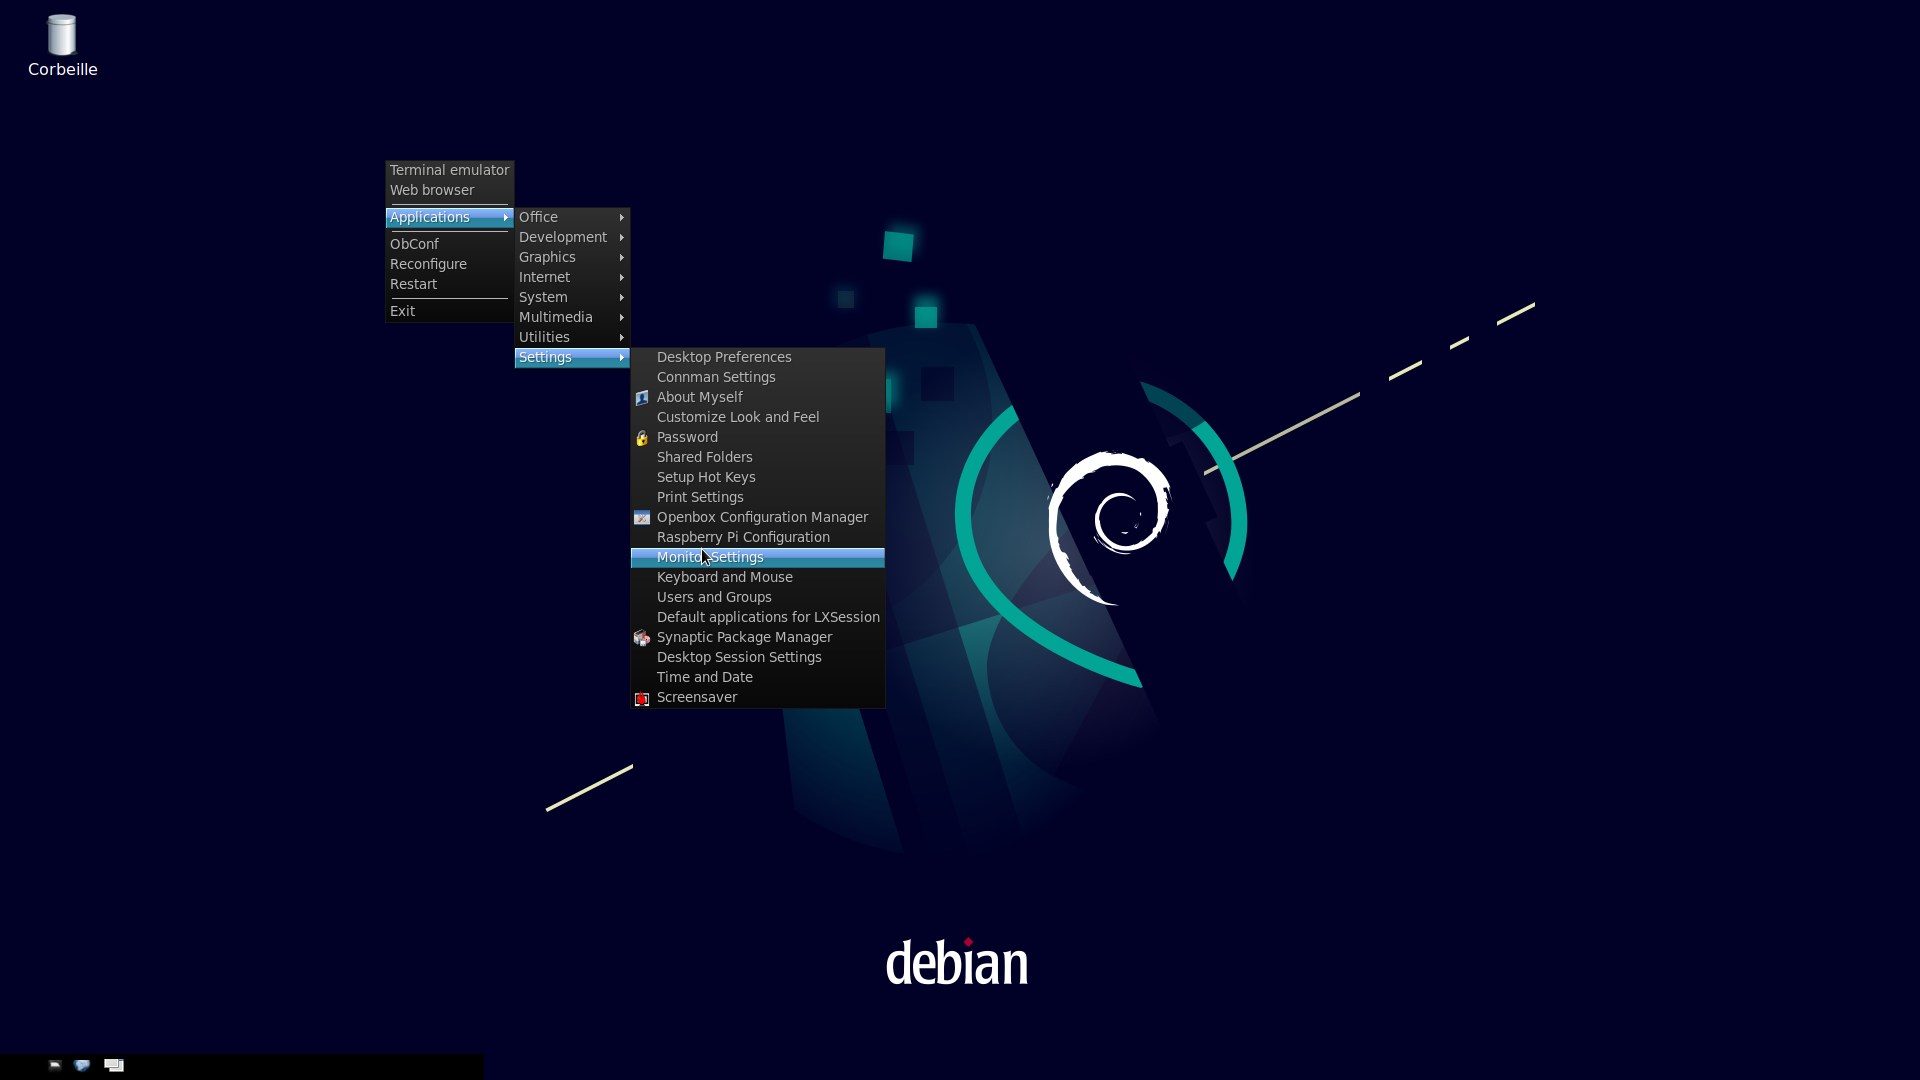
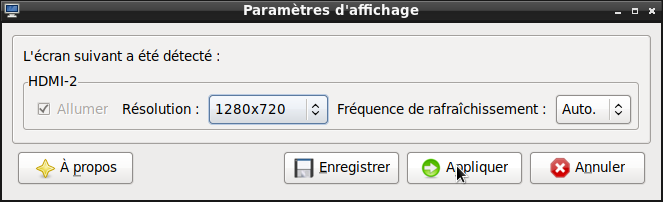
You can modify the screen resolution of your TV here.
For me it will be 1280X720 then click on Apply to test
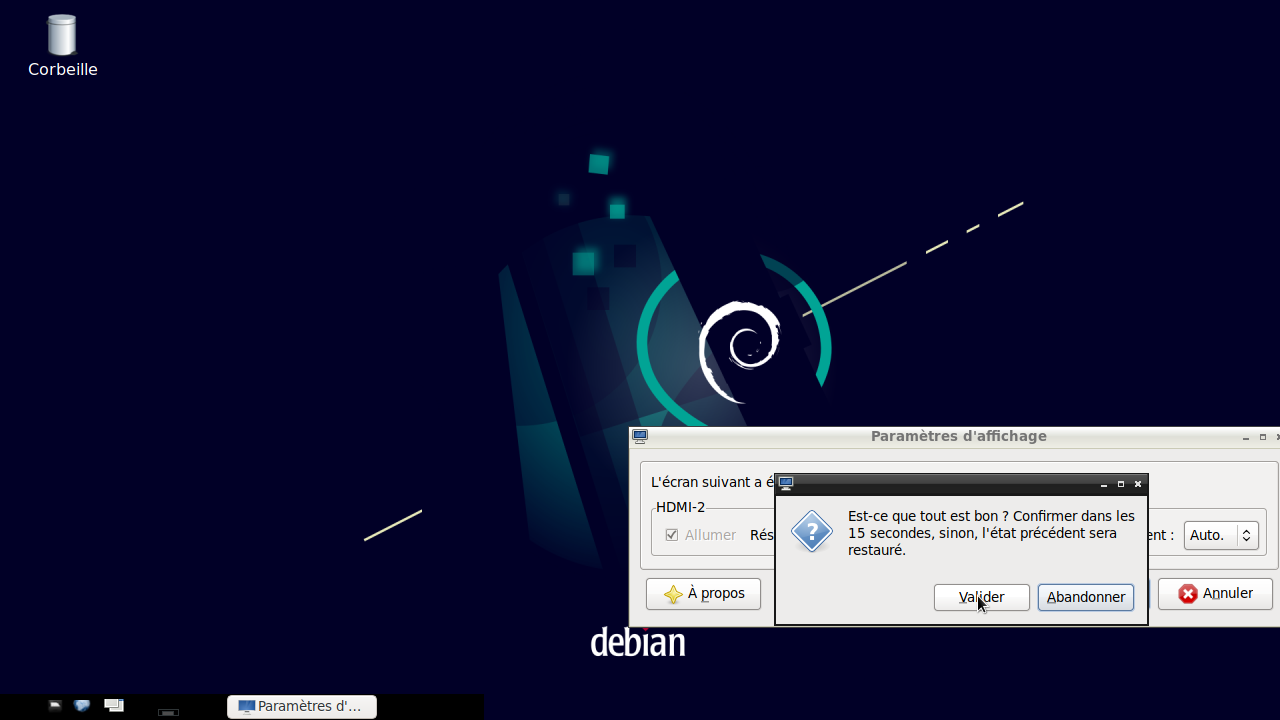
If it’s good click on Confirm then Save
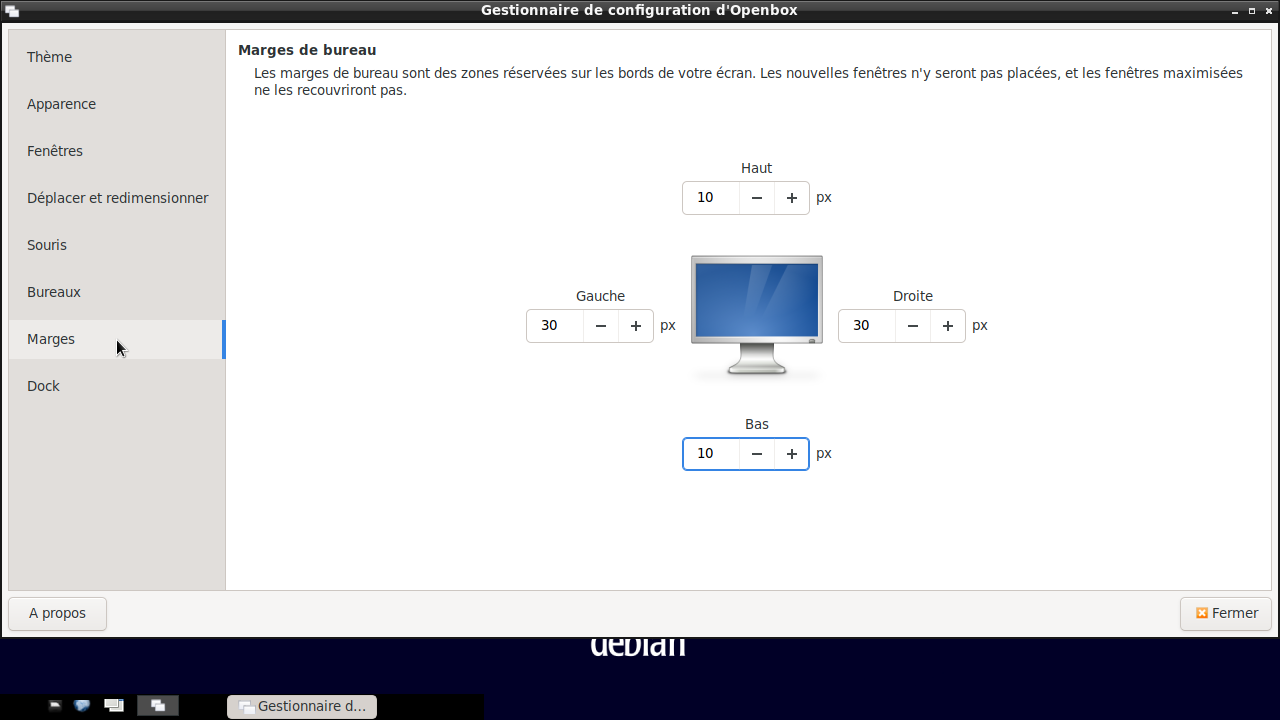
Depending on your TV, the image may still be cropped on the edges, we will use ObConf to fix this.
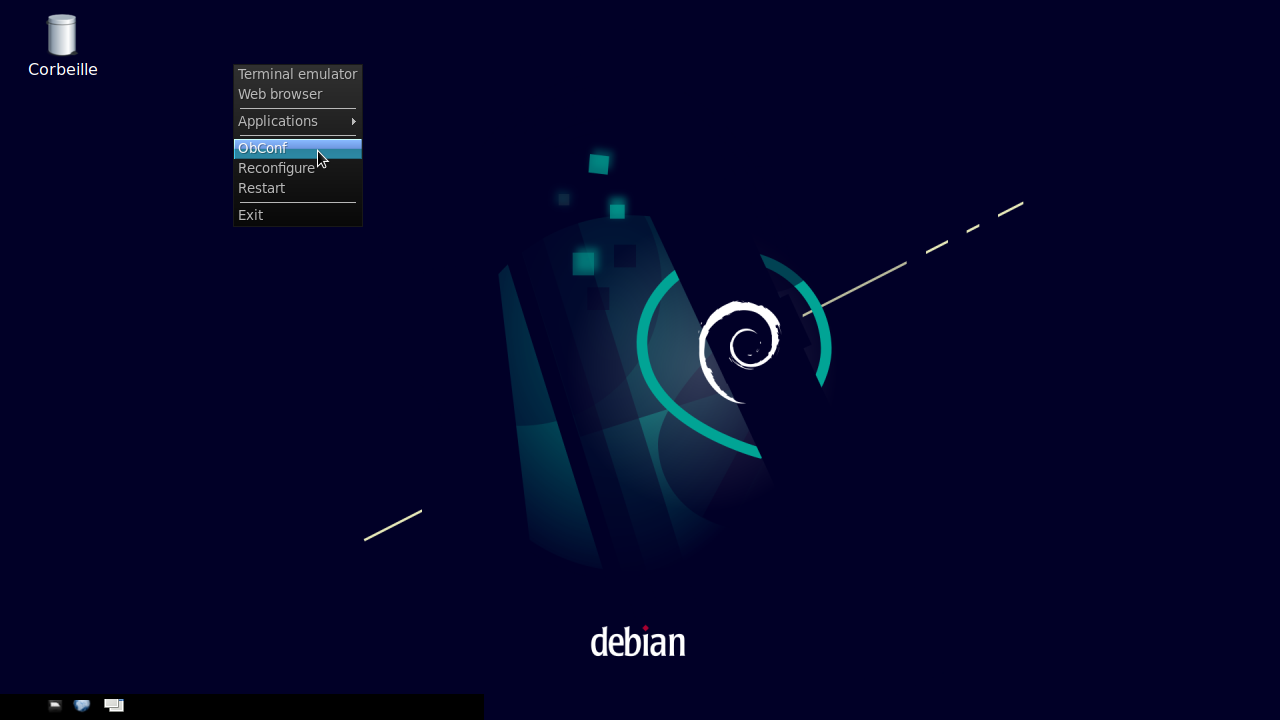
- Right-click on the desktop and select ObConf
Margins section
For me it will be 10 and 30
Close.
To test, right-click and select Web browser which will open Firefox.
Maximize the Firefox window (small square in the top right next to the cross in the top right) to see if the window fits the edges of the screen.
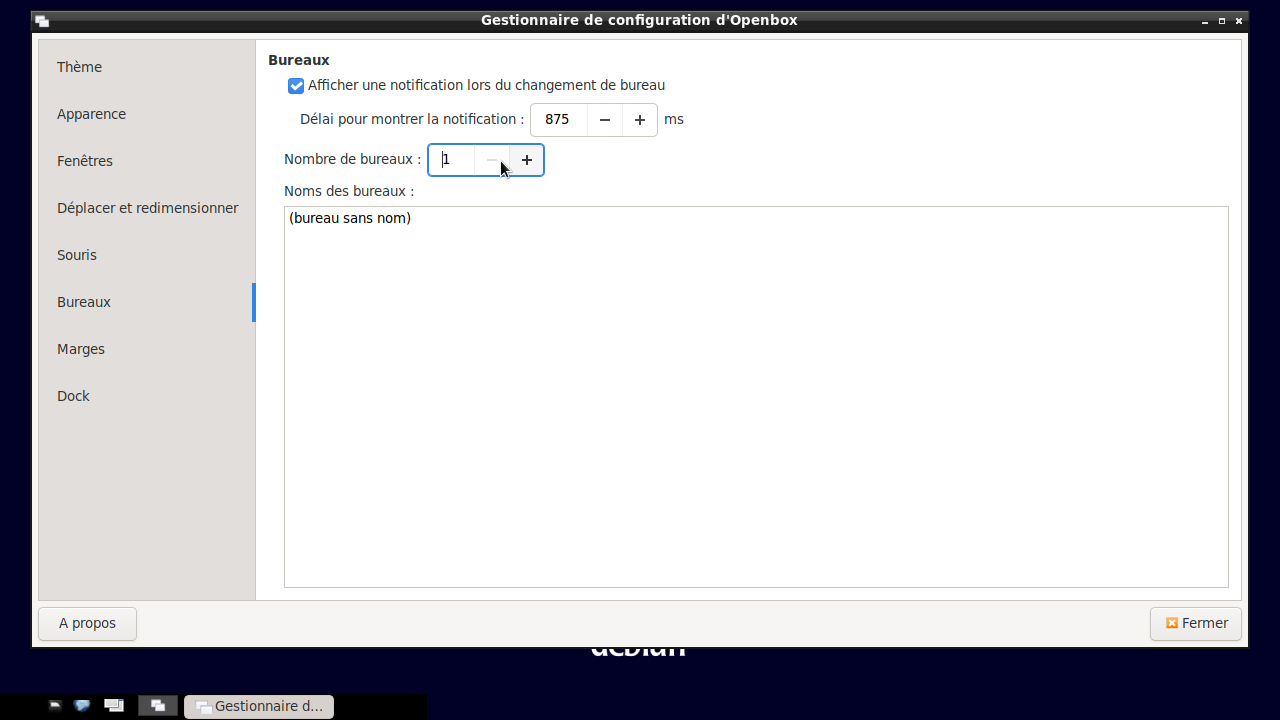
The Desktop section of ObConf allows you to manage the number of desktops, I put 1.
- Now we are going to manage the applications at startup.
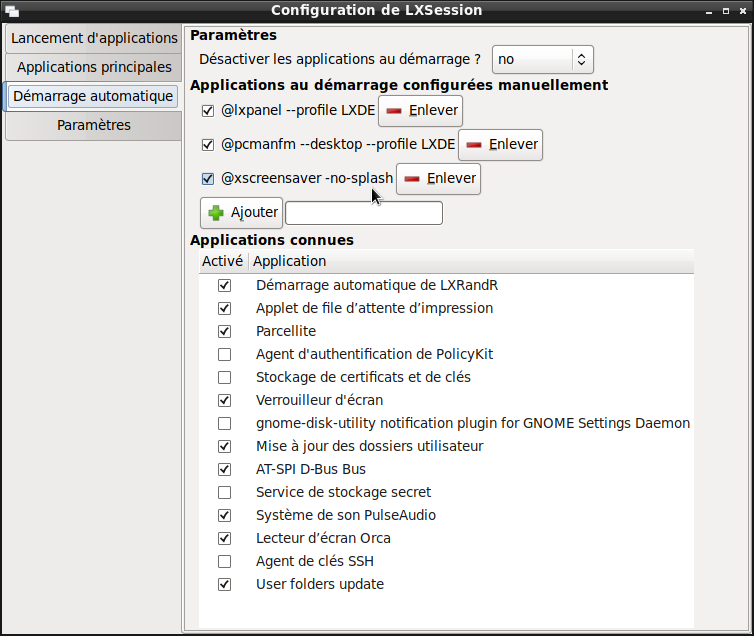
Right-click, select Application > Setting > Default applications for LXSession
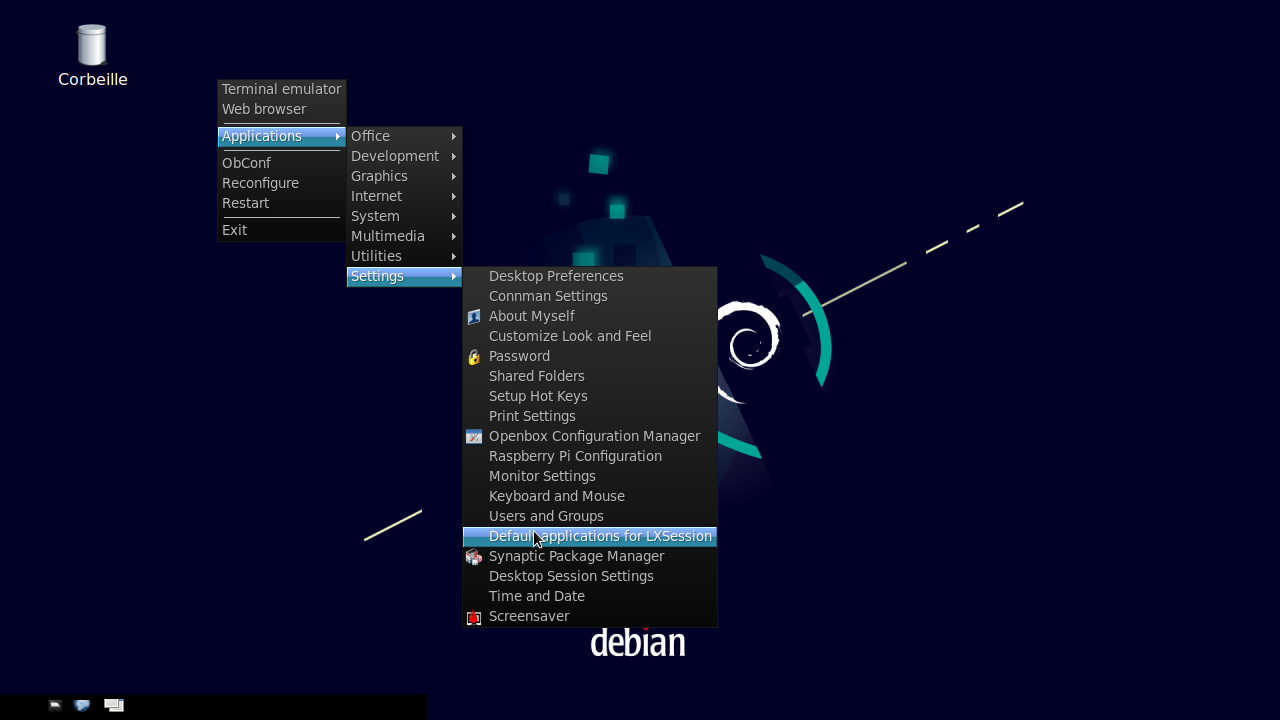
Go to Automatic startup.
-
Uncheck to reduce memory consumption and depending on your needs
-
@xscreensaver –no -splash (screensaver is no longer useful on flat screen)
-
Print queue applet.
-
Screen locker
-
Orca screen reader
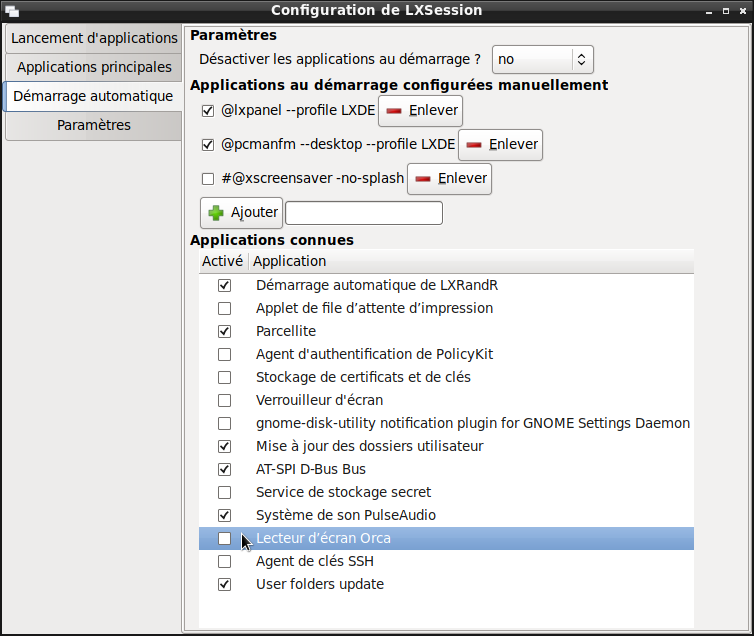
Close the window
- Restart the Raspberry Pi:
Right-click
Select Terminal emulator
Enter in the terminal
sudo reboot
You have surely noticed that the LibreOffice office suite is installed, that there are software to read music and videos, a calculator.
These software do not take up memory if they are not launched, but they take up space on the SD card, it’s up to you to see if you want to remove some of them.
sudo apt purge evince gpicview xsane libreoffice-common libreoffice-writer libreoffice-calc libreoffice-draw libreoffice-impress libreoffice-math xscreensaver galculator lxmusic smplayer orca

sudo apt autoremove

sudo reboot
I have chosen to keep them for now.
Now we will launch Gladys assistant in full screen at the Raspberry Pi startup.
When I say at startup, this will be with a 250-second delay, because we need to give Gladys assistant time to start before displaying it in Firefox, otherwise we get an unavailable page.
So back to SSH, it will be easier for you to copy and paste
ssh pi@192.168.x.xx
nano .config/autostart/firefox-autostart.desktop
and Paste the following with the mouse
[Desktop Entry]
Type=Application
Hidden=false
NoDisplay=false
Exec=sh -c "sleep 250 && (firefox --kiosk http://gladys.local &)"
X-GNOME-Autostart-enabled=true
Name=Firefox
We save the file with (Ctrl+o)
Then Enter
Then (Ctrl+x) to close
We restart the Raspberry Pi
Warning: if you already have Gladys assistant configured on the same network, Firefox will display the login page of that one and not the one installed on your new Raspberry Pi
To test the automatic startup of Firefox in full screen, you can temporarily disconnect your Ethernet cable and reboot from the TV terminal.
sudo reboot
et we wait 4 minutes 10 (a bit more)
Normally you should see the Gladys assistant configuration page.
Note: You will be able to close Firefox with the command (Alt+F4)
If your new Gladys assistant has to coexist on the same network with another already configured Gladys assistant, you will have to change in:
nano .config/autostart/firefox-autostart.desktop
The line
Exec=sh -c "sleep 250 && (firefox --kiosk http://gladys.local &)"
By the IP address of the new Raspberry Pi
Exec=sh -c "sleep 250 && (firefox --kiosk http://192.168.x.xx &)"
I am not going to make these changes, because I am going to configure a Wi-Fi access point on the Raspberry Pi to take Gladys assistant to my parents who do not have internet.
Configure a Wi-Fi Access Point on Gladys Assistant
Reconnect the Ethernet cable
Once again, I used the documentation from this website.
We reconnect via SSH
ssh pi@192.168.x.xx
We install network-manager
sudo apt install network-manager
then
sudo apt install network-manager-gnome
We restart the Raspberry Pi
sudo reboot
Reconnect via SSH
ssh pi@192.168.x.xx
- We reopen the Raspberry Pi configuration settings
sudo raspi-config
We go down to line 6 (Advanced Options) Enter
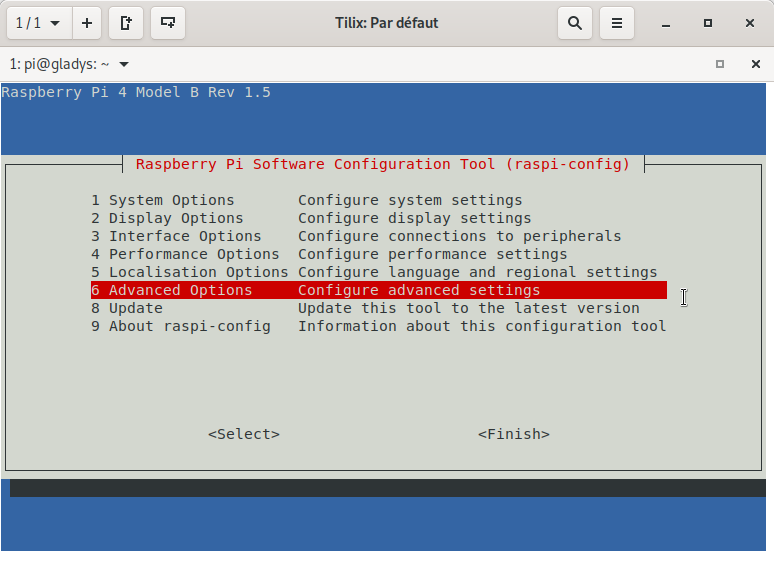
We go down to the last line (AA Network Config)
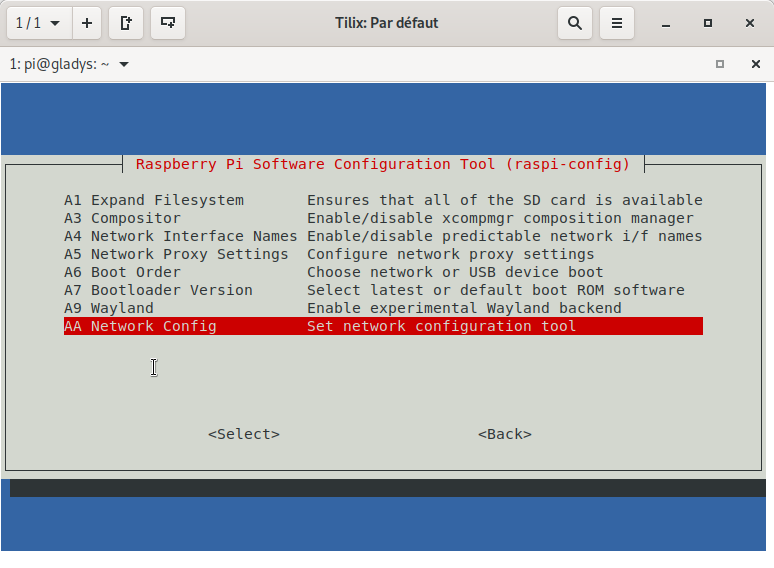
Enter
We select 2 NetworkManager
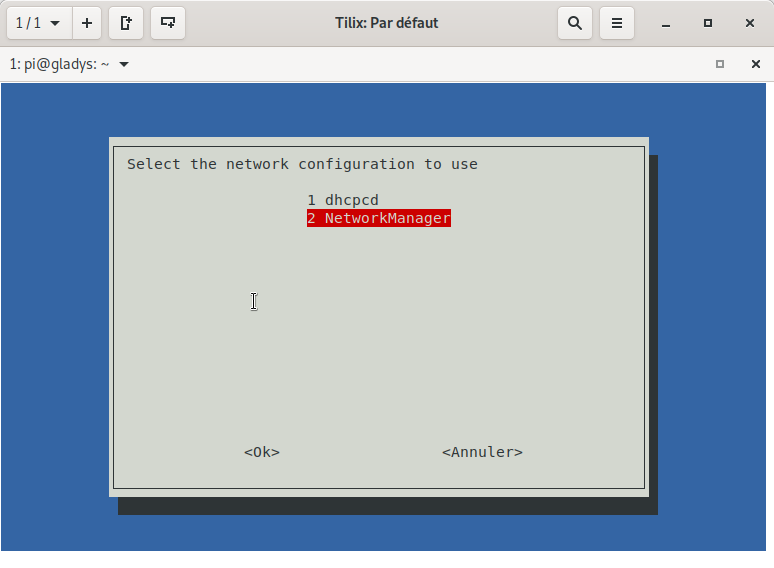
Tab key < Ok > Enter
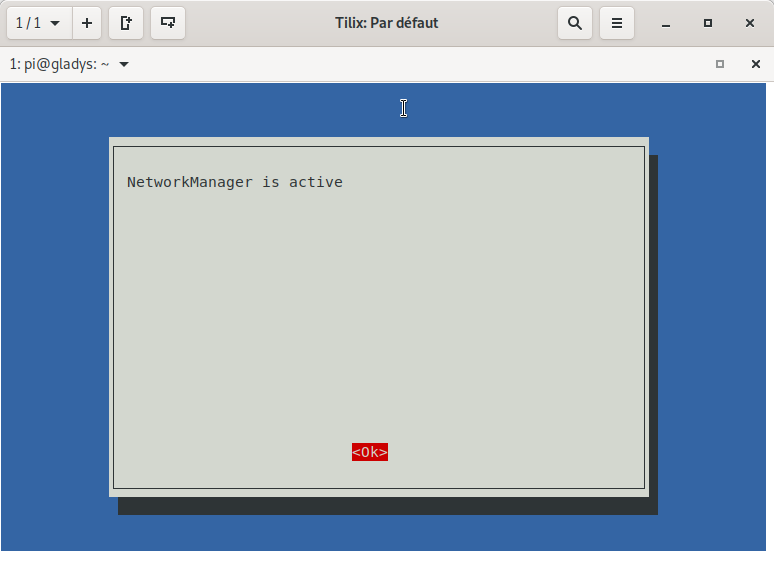
< Ok > Enter
Tab key < Finish >
reboot < yes >
Reconnect via SSH
ssh pi@192.168.x.xx
We remove the connman software that managed the internet connection before the installation of NetworkManager and which conflicts with it for the hotspot.
WARNING MAKE SURE TO HAVE ACTIVATED NETWORKMANAGER IN RASPI-CONFIG IN THE PREVIOUS STEP OTHERWISE YOU WILL NO LONGER HAVE AN INTERNET CONNECTION.
I recommend typing this command on the TV terminal; indeed if you do it via SSH you will lose the connection during the removal, this does not mean that the Raspberry Pi has stopped, but you no longer have any information.
sudo apt remove connman
sudo reboot
Reconnect via SSH
ssh pi@192.168.x.xx
If you have removed connman via SSH, we check that connman has been properly removed.
sudo apt remove connman
Then we finish the cleanup
sudo apt autoremove
- Now we can create the name of the Wi-Fi access point (ssid)
sudo nmcli con add con-name hotspot ifname wlan0 type wifi ssid "Raspberry-Wifi"
Note: change Raspberry-Wifi to whatever you want.
You get a response like this:
Connection « hotspot » (3b509341-1e62-4078-a9c4-fa54281f5cce) successfully added.
- Now we will define the type of security for the connection.
sudo nmcli con modify hotspot wifi-sec.key-mgmt wpa-psk
- Then define the password for the Wi-Fi connection
sudo nmcli con modify hotspot wifi-sec.psk "1234"
Note: change 1234 to whatever you want.
- And we finish with the following command:
sudo nmcli con modify hotspot 802-11-wireless.mode ap 802-11-wireless.band bg ipv4.method shared
sudo reboot
Note: After this operation, the new ssid did not appear in the network choices on my phones or computers.
I had to go back to
sudo raspi-config
Line 5 (Localization Options)
Line 4 (L4 WLAN Country)
And re-select France
To see the ssid appear.
This time you have a functional Wi-Fi access point for Gladys assistant.
Reconnect via SSH
ssh pi@192.168.x.xx
ip addr
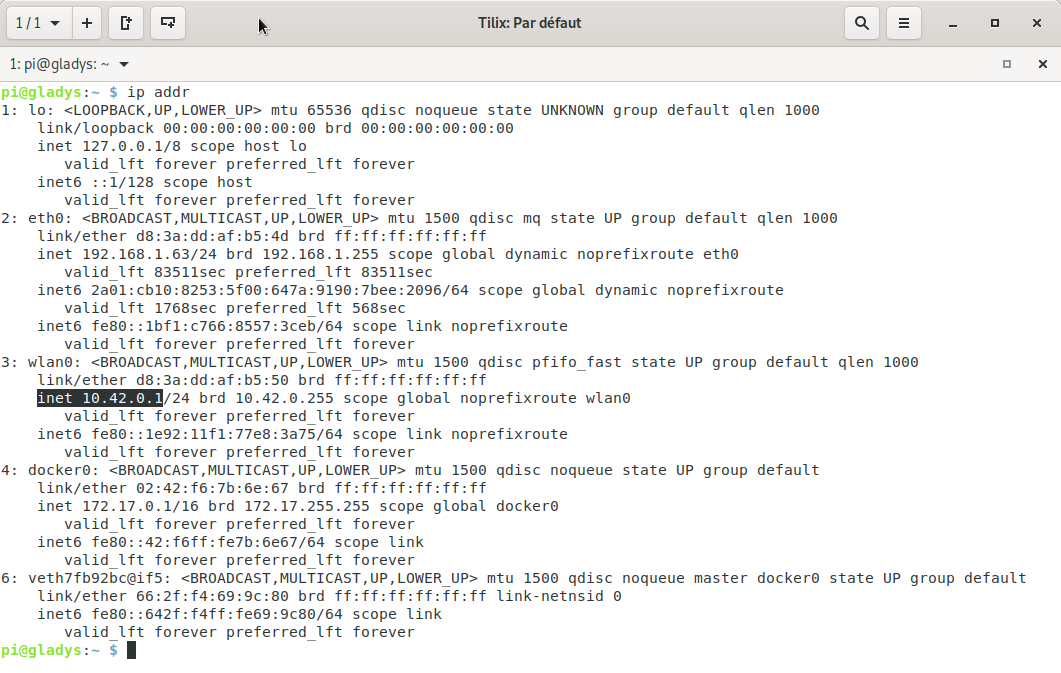
For me, the IP address of gladys assistant on the Raspberry Pi in Wi-Fi (wlan0) was http://10.42.0.1
Install and Configure a DS1307 Real-Time Clock Module with Battery for Your Raspberry Pi.
I bought this clock.
https://www.kubii.com/fr/modules-relais/1927-ds1307-horloge-en-temps-reel-avec-batterie-kubii-3272496008007.html
The documentation used is here:

Reconnect via SSH
ssh pi@192.168.x.xx
sudo raspi-config
Choice 3 Interface Options Configure connections to peripherals
Then
I5 I2C Enable/disable automatic loading of I2C kernel module
To the question « Would you like the ARM I2C interface to be enabled? »
Answer YES
Then < OK > and < Finish >
We will check if i2c-tools is already installed on the Raspberry Pi
dpkg -s i2c-tools | grep Status
If it is not installed, we install it:
sudo apt install i2c-tools libi2c-dev
Clock configuration:
sudo modprobe rtc-ds1307
sudo bash
Copy / Paste this line:
echo ds1307 0x68 > /sys/class/i2c-adapter/i2c-1/new_device
End with Enter then
exit
Read the date and time of the Raspberry Pi connected via Ethernet
Type:
date
Write the date in the clock
sudo hwclock -w
Check by reading the clock date
sudo hwclock -r
Modify the files:
sudo nano /etc/modules
At the end of the file add:
rtc-ds1307
We save the file
Ctrl+o Enter Ctrl+x
sudo nano /etc/rc.local
At the end of the file before the line exit 0
Copy / paste the following lines:
echo ds1307 0x68 > /sys/class/i2c-adapter/i2c-1/new_device
sudo hwclock -s
date
Note: You may have a message that it is dangerous to paste a sudo command from the internet
(validate)
We save the file
Ctrl+o Enter Ctrl+x