The node changes I’ve already tested it by telling it that 1 is equal to on and 0 to off but it doesn’t work.
I try a lot of things and look on the web but it doesn’t work but the advantage is that I learn as I go from my mistakes, on the other hand it really annoys me but well it’s part of the game
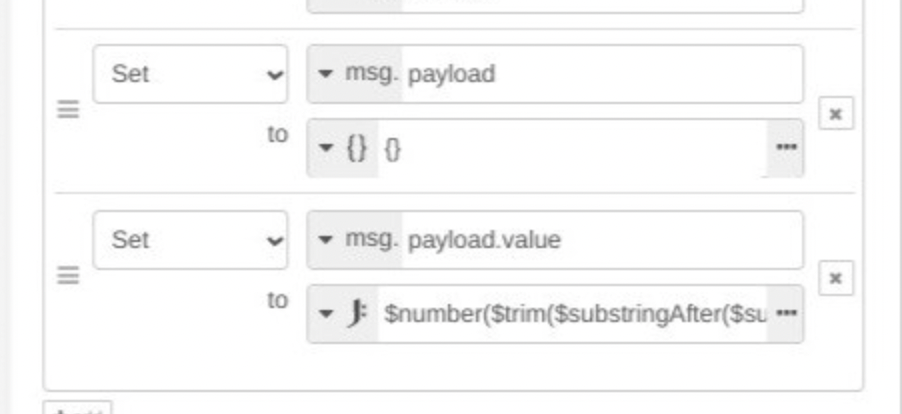
Can you send us a screenshot of what you’re doing in your Change block?
You are using the « Set » block, then the property title you put the title of the property expected by your input, and the value you put the expected value?
At this stage, your « payload » is probably a string, so when you try to assign a « channel_0 » property to a string, it doesn’t work (hence the error message)
You need to add a « Set » in this « change » box, before the set you created, where you initialize the payload to an empty object {}
Good evening Jérôme, and the community
I wrote a tutorial on controlling the Xiaomi Gateway, where I explain what I was able to do and also what I haven’t solved. But my limited skills in Js and NodeRed have not yet allowed me to find a solution to a certain point « the scope of values in a scope ». As Jérôme suggested to me, I share this tutorial.
How to publish 11 pages written on Word?
After that, once the missing solutions are found, I will write it with the modifications. Moreover, I think there will be other issues with the memorization of values (example my temperature sensor refreshes and I cannot make a history of more than one hour on the graph, while when it was defined in the Xiaomi integration, it worked correctly).
@Psoy your file doesn’t seem to be accessible. It says it has been deleted?
Regarding your 32GB SD cards, depending on the brand, they may not actually have 32GB of storage. This might be the issue. Have you checked the actual capacity on a PC?
Great tutorial, the Node-RED part is very well detailed, you must have spent a lot of time on it.
If I may offer some advice: it would be helpful to add the command lines so that other users can copy and paste them for the laziest ones.
To detail the Gladys part, which is the heart of the project. Simply the part of creating an object in MYQTT because the end user does not know if they should create one or more MQTT objects or an object with multiple features.
As Pierre-Gilles told me previously, you could add a possible spell checker.
After that, if you master it, you can create a tutorial on GitHub if you master it. I had tried on my side on a tutorial for a water level sensor for a rainwater collector.
Thank you for your feedback
For the proofreader, I passed it, but yesterday I finished at midnight, I must have had my eyes closed .
What do you mean by copying commands (are you talking about the lines of code in the nodes)?
And about the MQTT part?
For GitHub, I tested it yesterday, but it doesn’t take the images? I wanted to copy that into the « Read me ».
Yes, I am talking about the code lines in the nodes
to take back the MQTT part in gladys with screenshots on the creation of the object itself.
Integration - MQTT - creation - object name, topic name…
For the images via github I confirm it’s not simple, I also struggled. Pierre-gilles helped me after that if you look at the tutorial I made it was also very long
It’s perfect, I’ll send you a private message to refine a few things. I hope @pierre-gilles will read it if he has a bit of time to give his opinion, but great job.
I think this can also help the community understand Node-red.
After that, yes, you can publish it in the « tutorial » section.
Don’t hesitate to develop other topics via node-red if you want. (For my part, I think the arduino and rflink sections are topics expected by the community and that can be set up quite easily via node-red)
I’m back from vacation and I’m catching up on your messages.
@Psoy Indeed, it would be really cool to post this tutorial on the forum, especially so that this content is indexed by the forum and by Google, so it will allow new users to find this content through a search!
You create a new topic, and you copy and paste your text into it. You may need to do this in several messages, there may be a limit to the size of a message in Discourse (to be seen)
For the images, you can insert them one by one by dragging them into the text field
Of course, messages are editable so you can evolve your tutorial over time.