Feedback on migrating to SSD
- Gladys on Raspberry Pi 3B
- Personal computer running Linux
- SSD https://www.kubii.fr/support-de-stockage/3058-disque-dur-ssd-verbatim-vi550-3272496311510.html?search_query=SSD&results=21
- Case for Raspberry pi 3 Geekworm Raspberry Pi X820 V3.0 SSD & HDD SATA De Stockage Conseil Correspondant Boîtier Métallique/Boîtier + Commutateur De Commande De Puissance + Ventilateur de Refroidissement Kit : Amazon.fr: Informatique
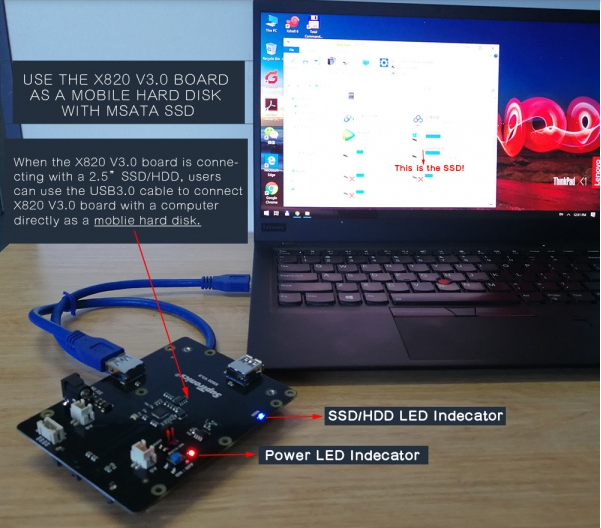
- Hard Disk Storage Expansion Board Geekworm Raspberry Pi 3 B + / 3B Carte d'extension de Stockage sur Disque Dur/SSD SATA, Module de Disque Dur Mobile X820 V3.0 USB 3.0 Compatible avec Disque Dur SATA 2,5 Pouces/Raspberry Pi : Amazon.fr: Informatique
- 5V 4A power supply/charger https://mafianumerique.com/alimentation-chargeur-5v-4a-embout-5-5-2-1mm-transformateur-adaptateur-secteur.html
1) Create a disk image of the Gladys SD card
Unplug your Raspberry Pi.
Remove the SD card and put it in your personal computer.
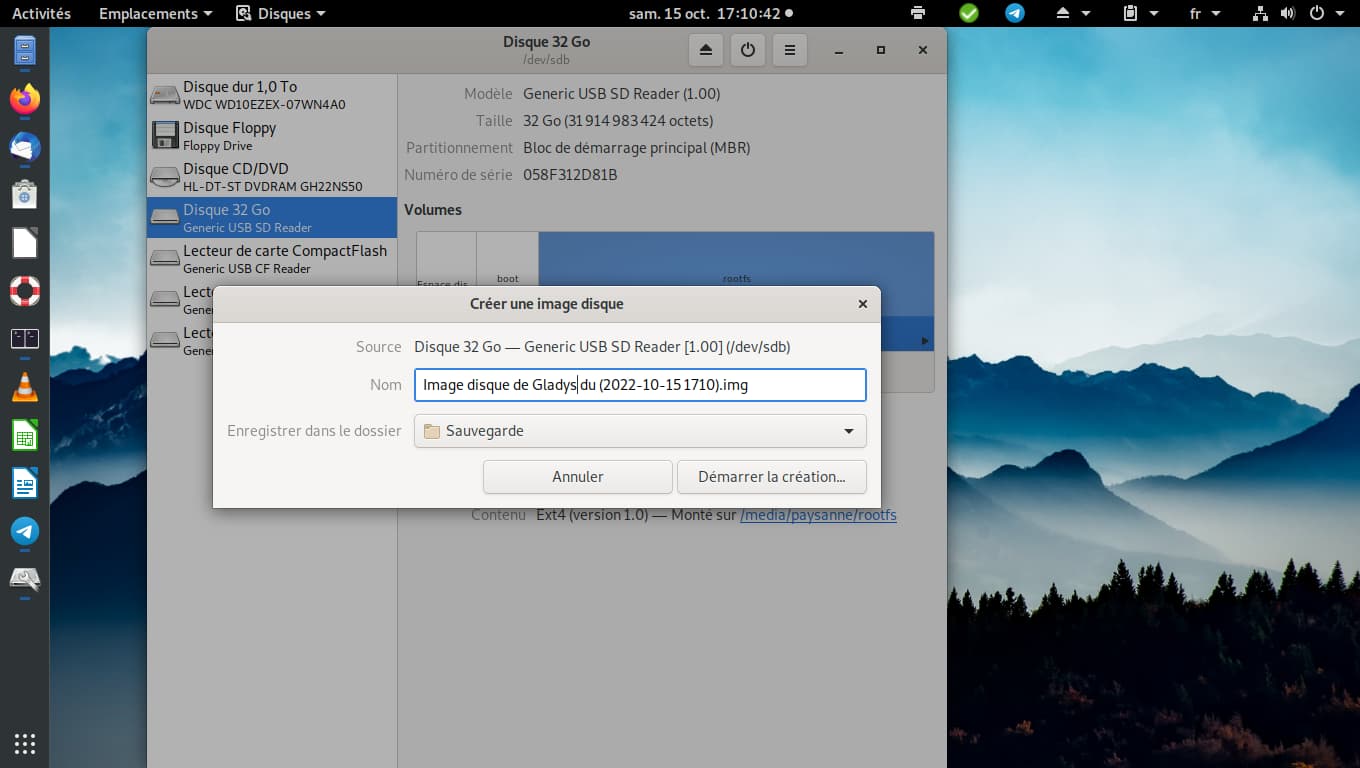
Launch the « Disks » application
Select your SD card then create a disk image
Save it on your computer.
(In my opinion Raspberry Pi Imager with the right options should also be able to perform this operation)

2) Copy the Gladys disk image to the SSD
After connecting the SSD to the Storage Expansion Board, connect it to your personal computer.
Restart the « Disks » application, select your hard drive then restore the disk image
Select the previously created Gladys image and start the restore.
Assemble your case with the Raspberry Pi and the SSD
3) Install USB boot
As @pascal_sapin said, booting with the SD card does not work.
So, like him, I created an SD with Raspberry Pi OS Lite using Raspberry Pi Imager; I had access to the options by clicking the gear icon. I enabled SSH and entered my password then created the SD card.
I disconnected power from my SSD, inserted the Raspberry Pi OS Lite SD card into the Raspberry Pi then powered it on.
I connect via SSH, enter the previously set password then copy the same commands given by @pascal_sapin or the expansion board documentation.
sudo apt-get update
sudo apt-get upgrade
echo program_usb_boot_mode=1 | sudo tee -a /boot/config.txt
sudo reboot
We check the changes
vcgencmd otp_dump | grep 17:
The response must contain 3020000a
We shut down the Raspberry Pi
sudo shutdown now
We remove the SD card, reconnect the SSD then start the Raspberry Pi
In my case it takes more than 2 minutes for Gladys to become functional.
4) Extend the partition to the entire SSD
Reconnect via SSH and run
sudo raspi-config
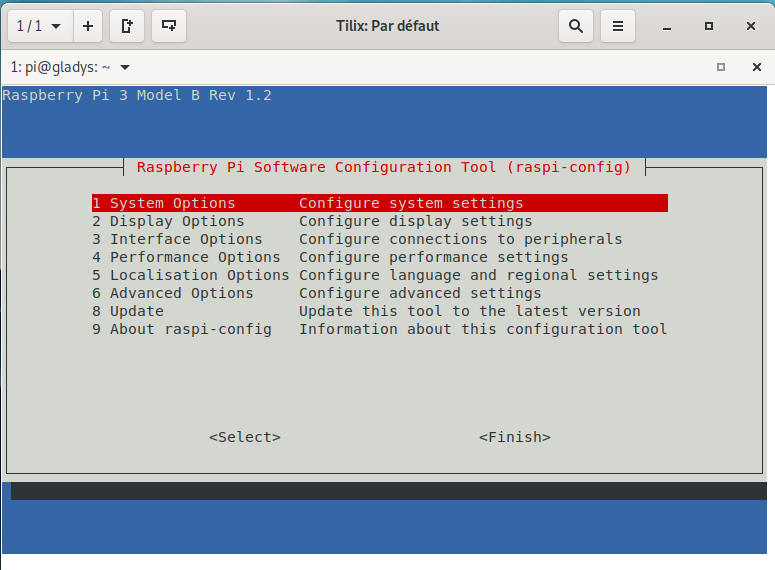
With the down arrow move to 6 Advanced Options
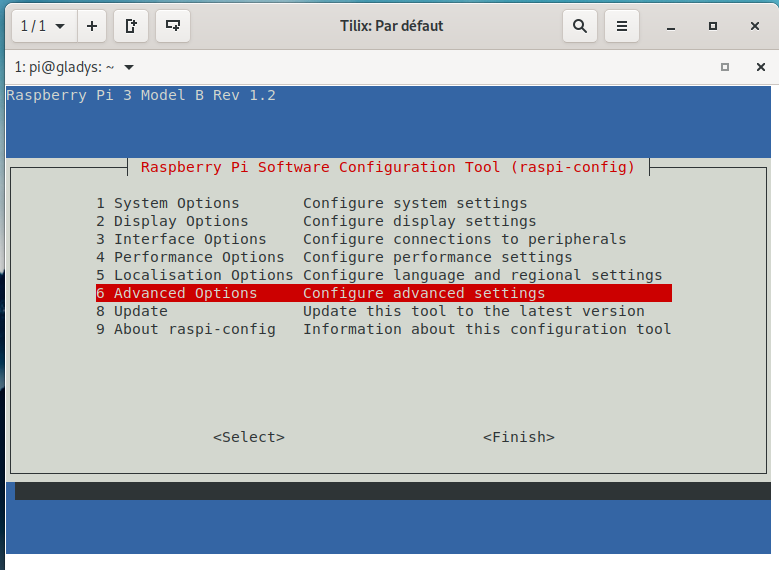
Then Enter
Go to A1 Expand Filesystem
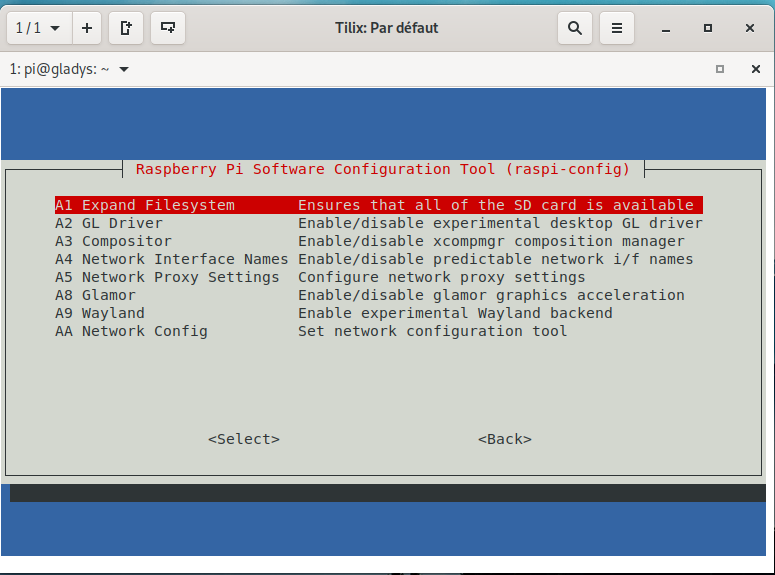
Then Enter
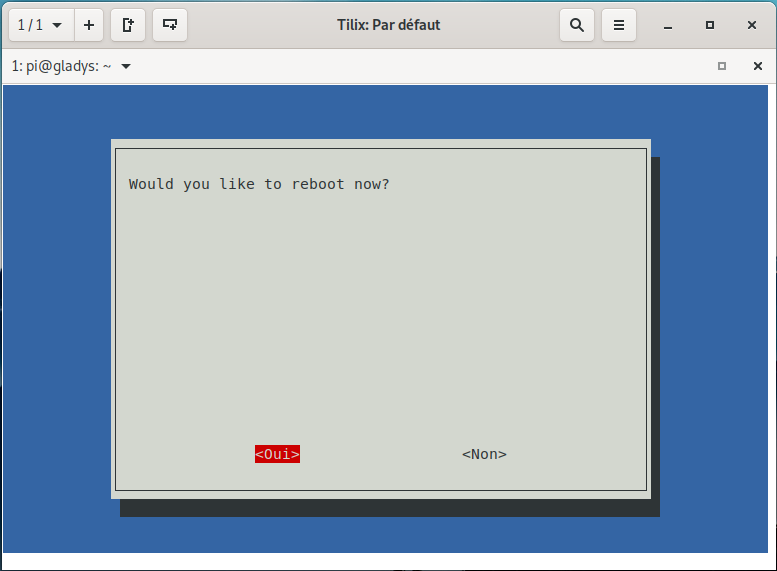
Finally you are informed that the resizing will take effect on next reboot.

Press Enter
Then use the Tab key to move to Finish
Press Enter
Answer Yes
There you go — you have Gladys on your SSD and you didn’t lose any configuration
- Node-red
- Zigbee2MQTT
Everything is working.