Here is the documentation with the information to use Tuya.
-
Create an account on http://iot.tuya.com
-
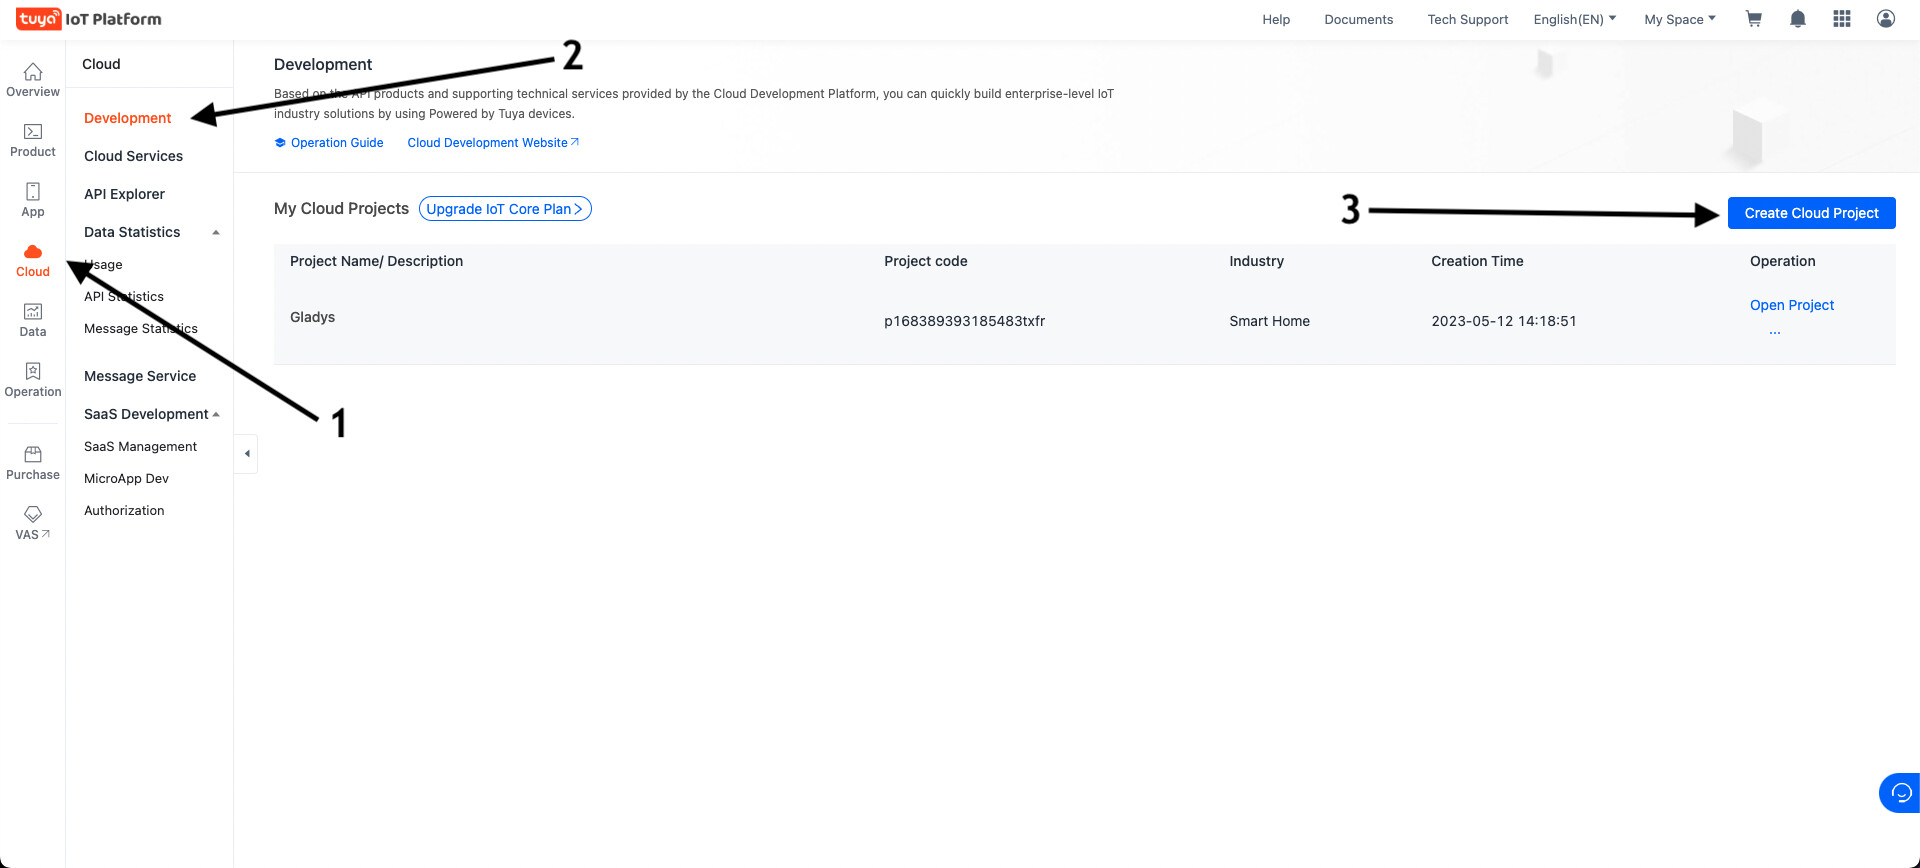
Create a cloud project in the « Cloud » → « Development » → « Create Cloud Project » section
-
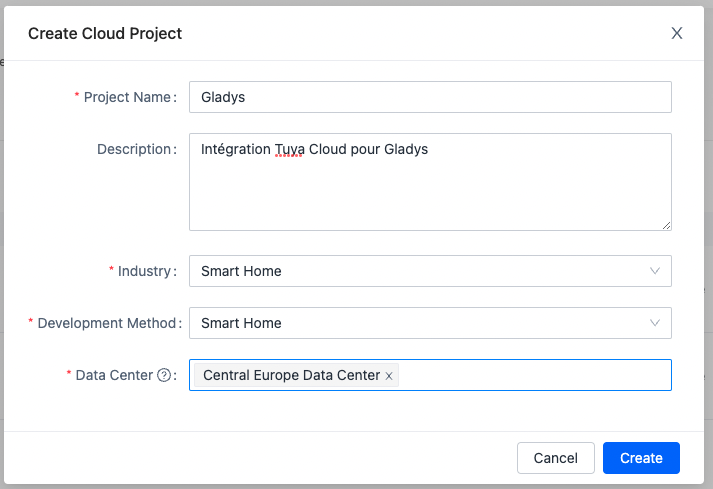
Choose a project name, fill in the different fields:
- Project Name : The name of your project (ex: Gladys)
- Industry : Smart Home;
- Development method : Smart Home;
- Data Center : Central Europe Data Center (even if you live in Western Europe, it’s better; otherwise select the data center nearest to you).
Click « Create ».
-
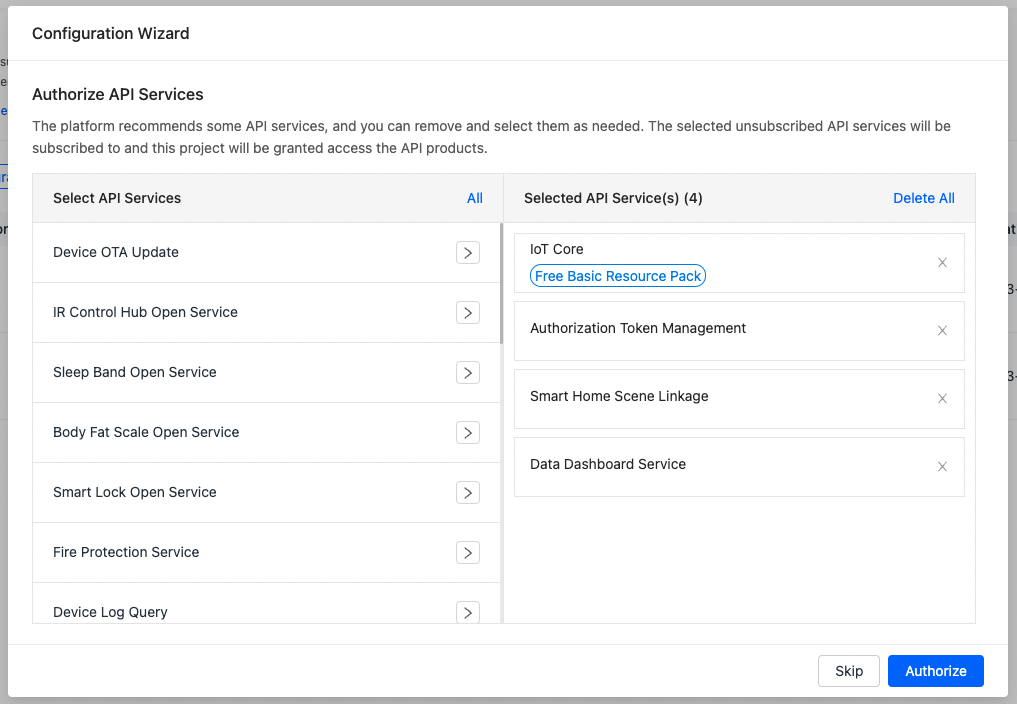
Authorize the following API services:
(They are normally selected by default)- IoT Core
- Authorization Token Management
- Smart Home Scene Linkage
- Data Dashboard Service
-
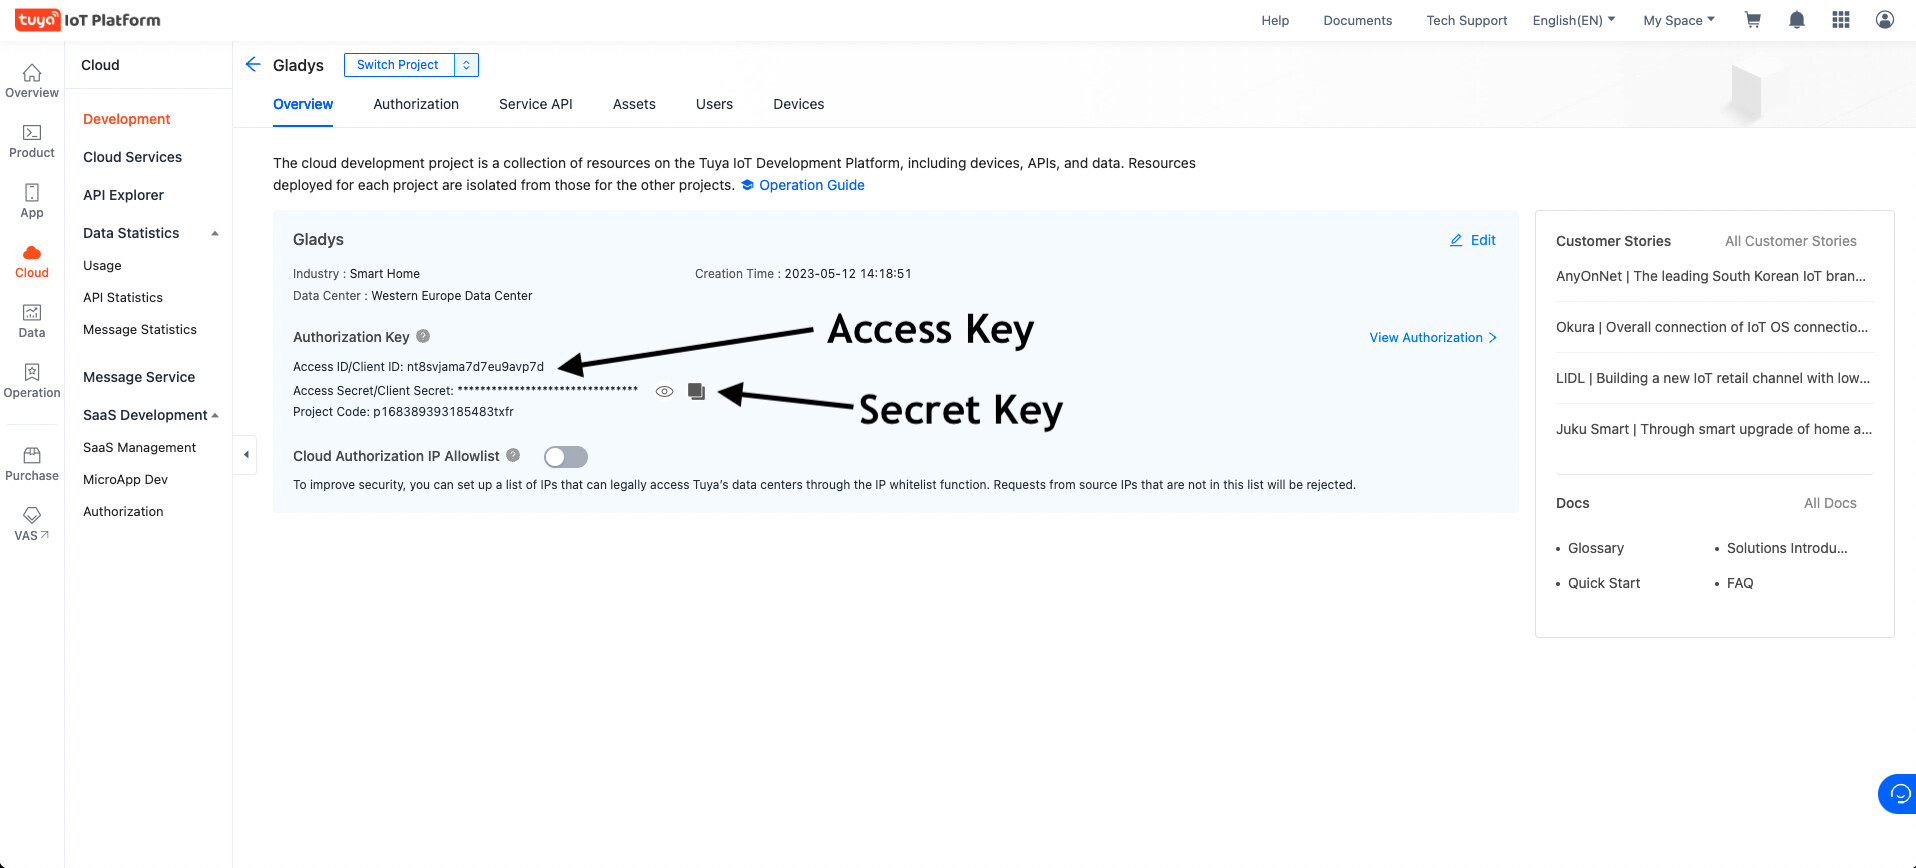
Copy the « Access key » and « Secret Key » information into Gladys
-
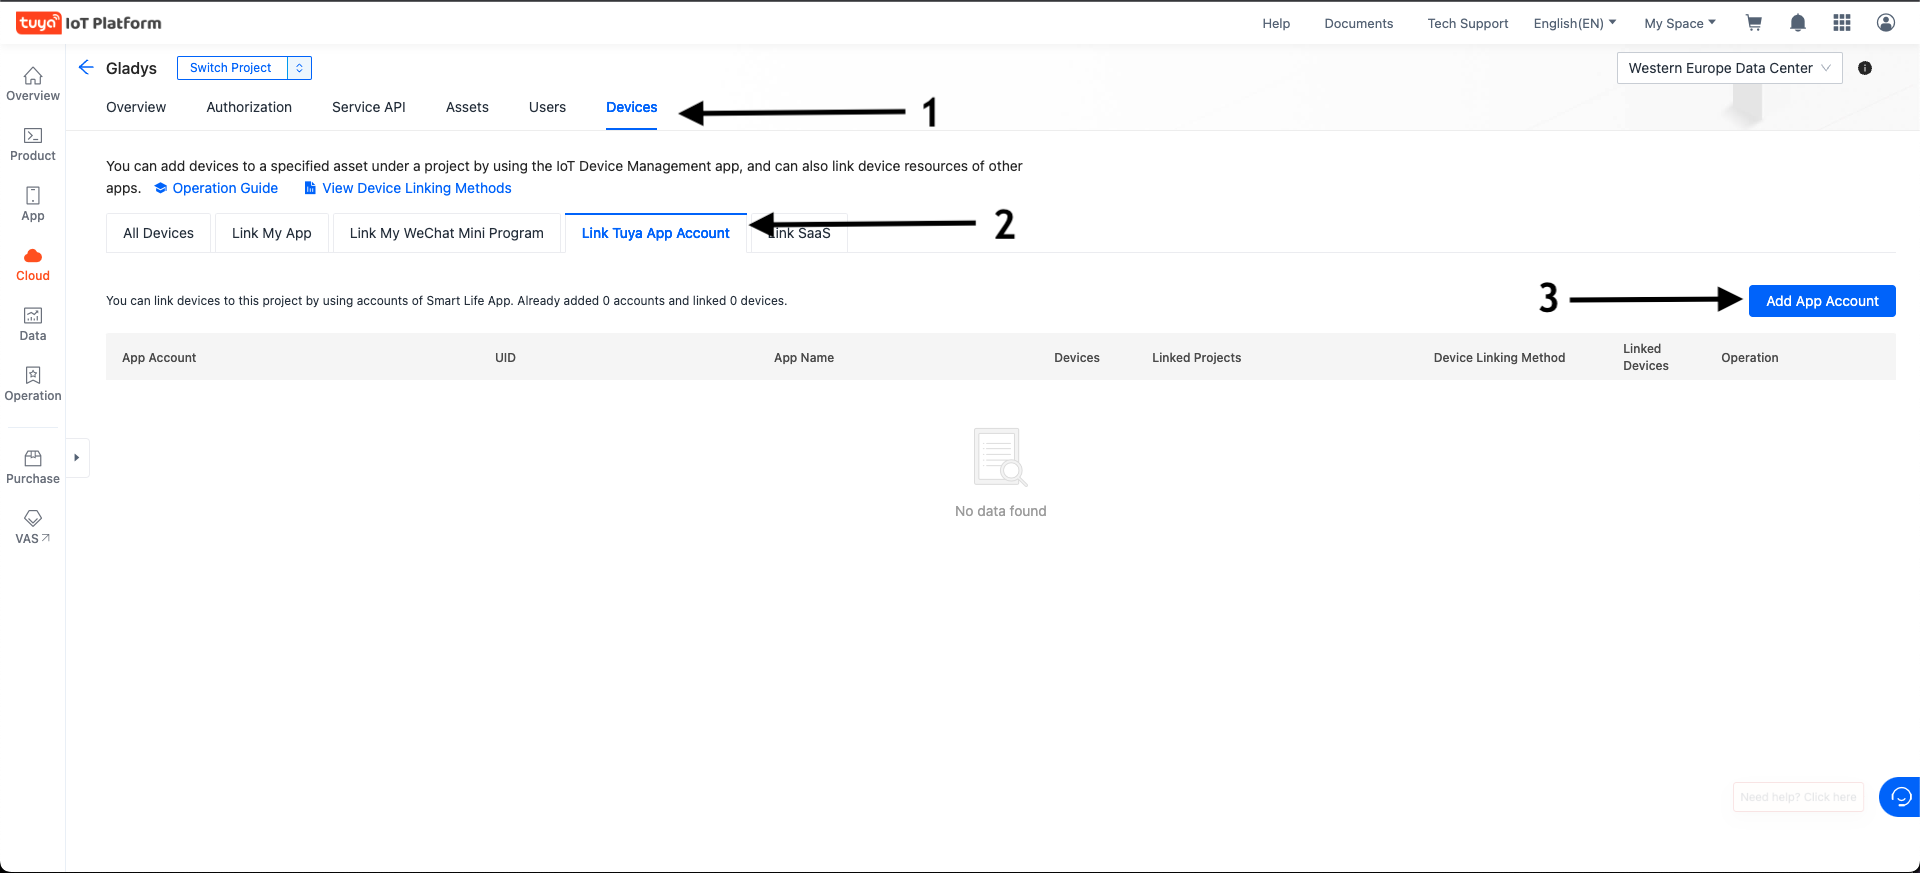
Go to the Devices tab then Link Tuya App Account and click the Add App Account button on the right.
-
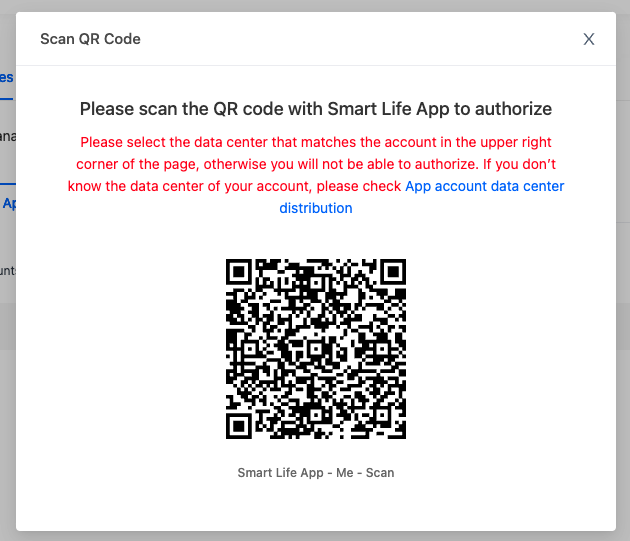
Scan the QR Code with your Smart Life app by going to Profile and then to the code scanner located in the top right.
-
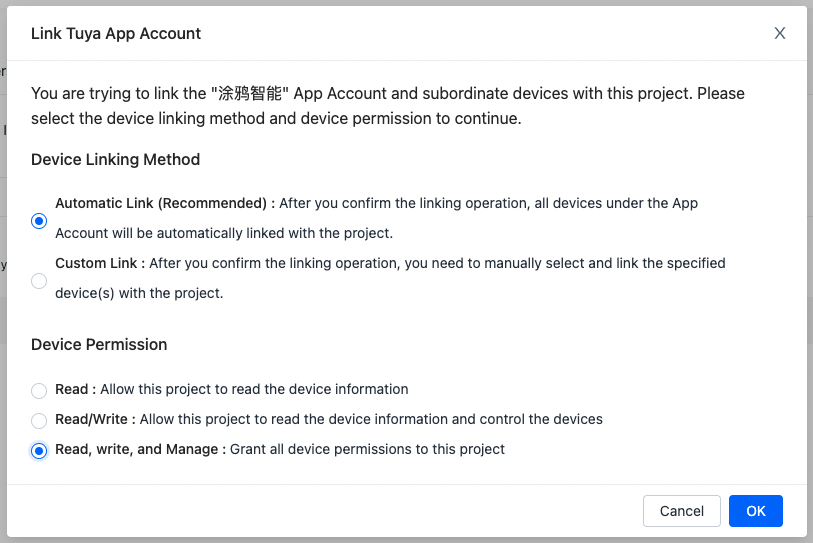
Select Automatic Link then Read, Write and Manage and confirm with OK.
-
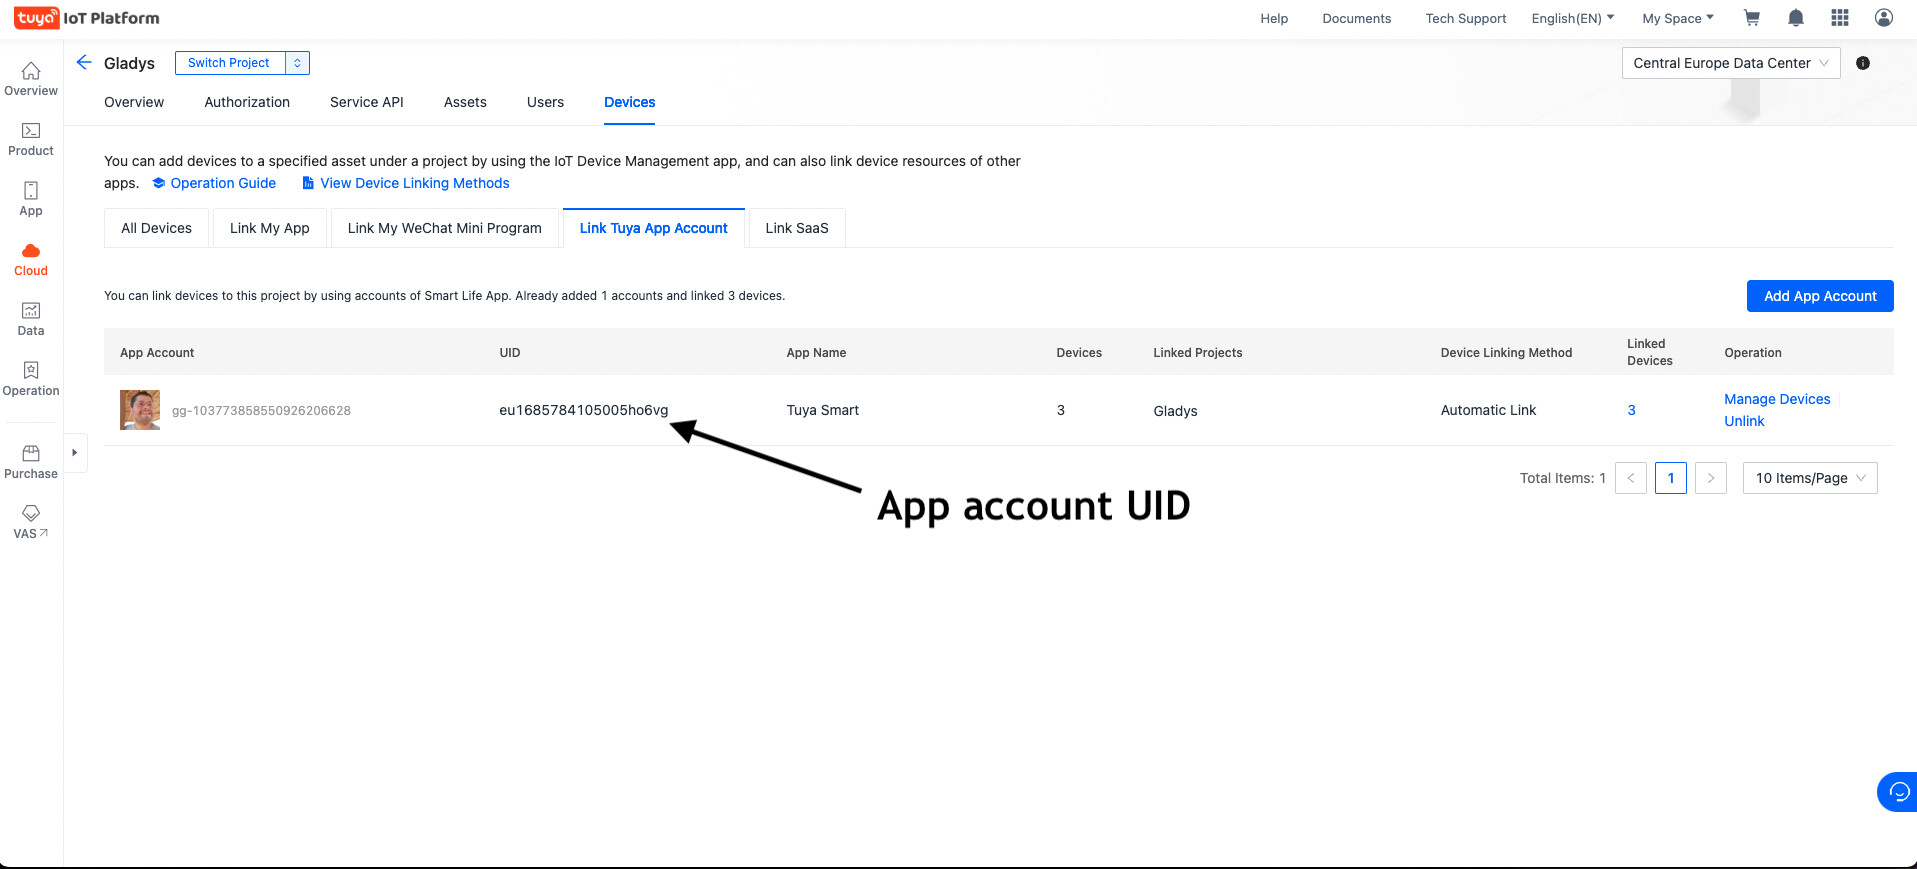
Copy the « App account UID » information into Gladys.
-
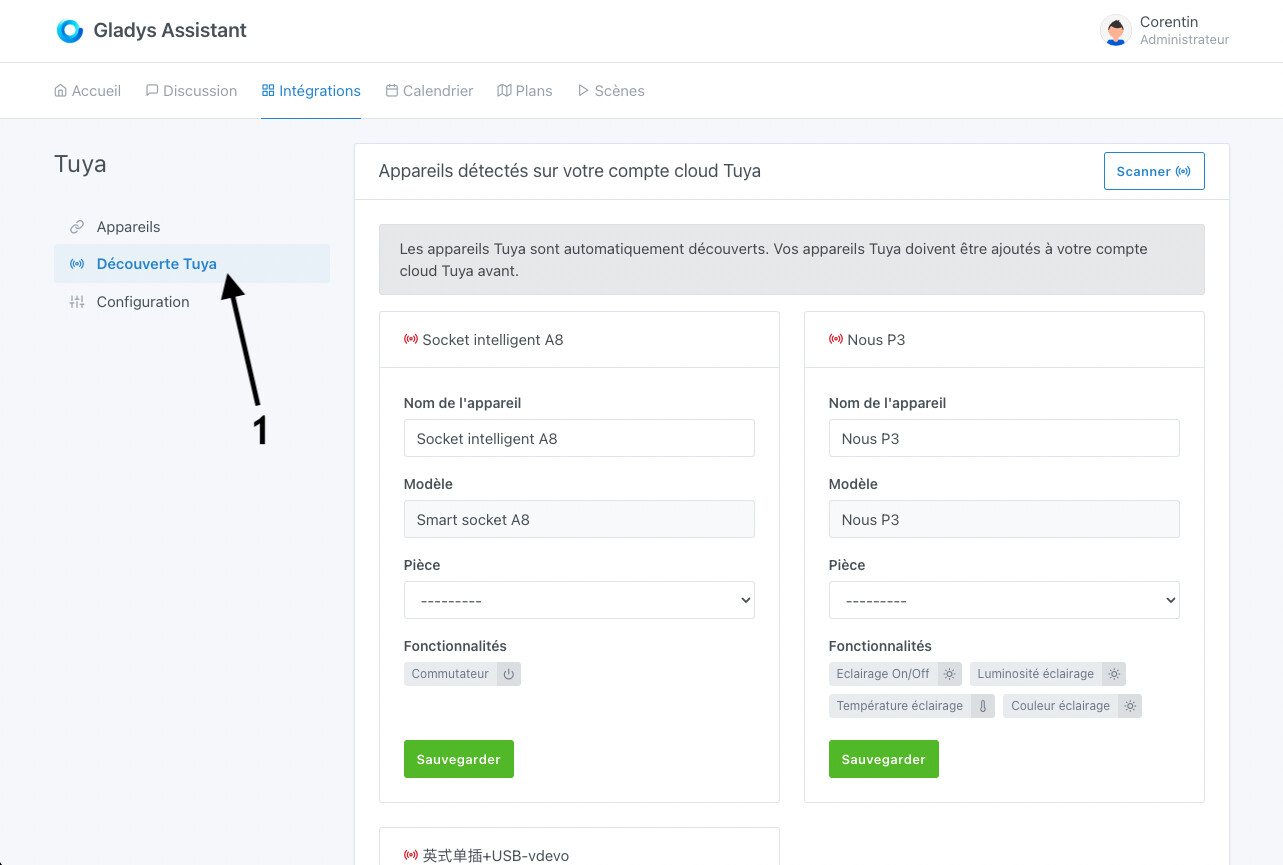
Save the configuration in Gladys, go to the « Tuya Discovery » tab and ta-da… your devices have appeared