| id | Title | sidebar_label |
|---|---|---|
| Remaining Tank Capacity | Remaining Tank Capacity | Remaining Tank Capacity |
Project: Remaining Tank Capacity
Hello community,
I present to you my project which is now functional to measure the remaining amount of water in my tank.
I had the idea for this project because my rainwater collection tank supplies my outdoor watering, my washing machine, and my toilets, and it was impossible for me to know, except by going outside to the tank, if there was any water left or not.
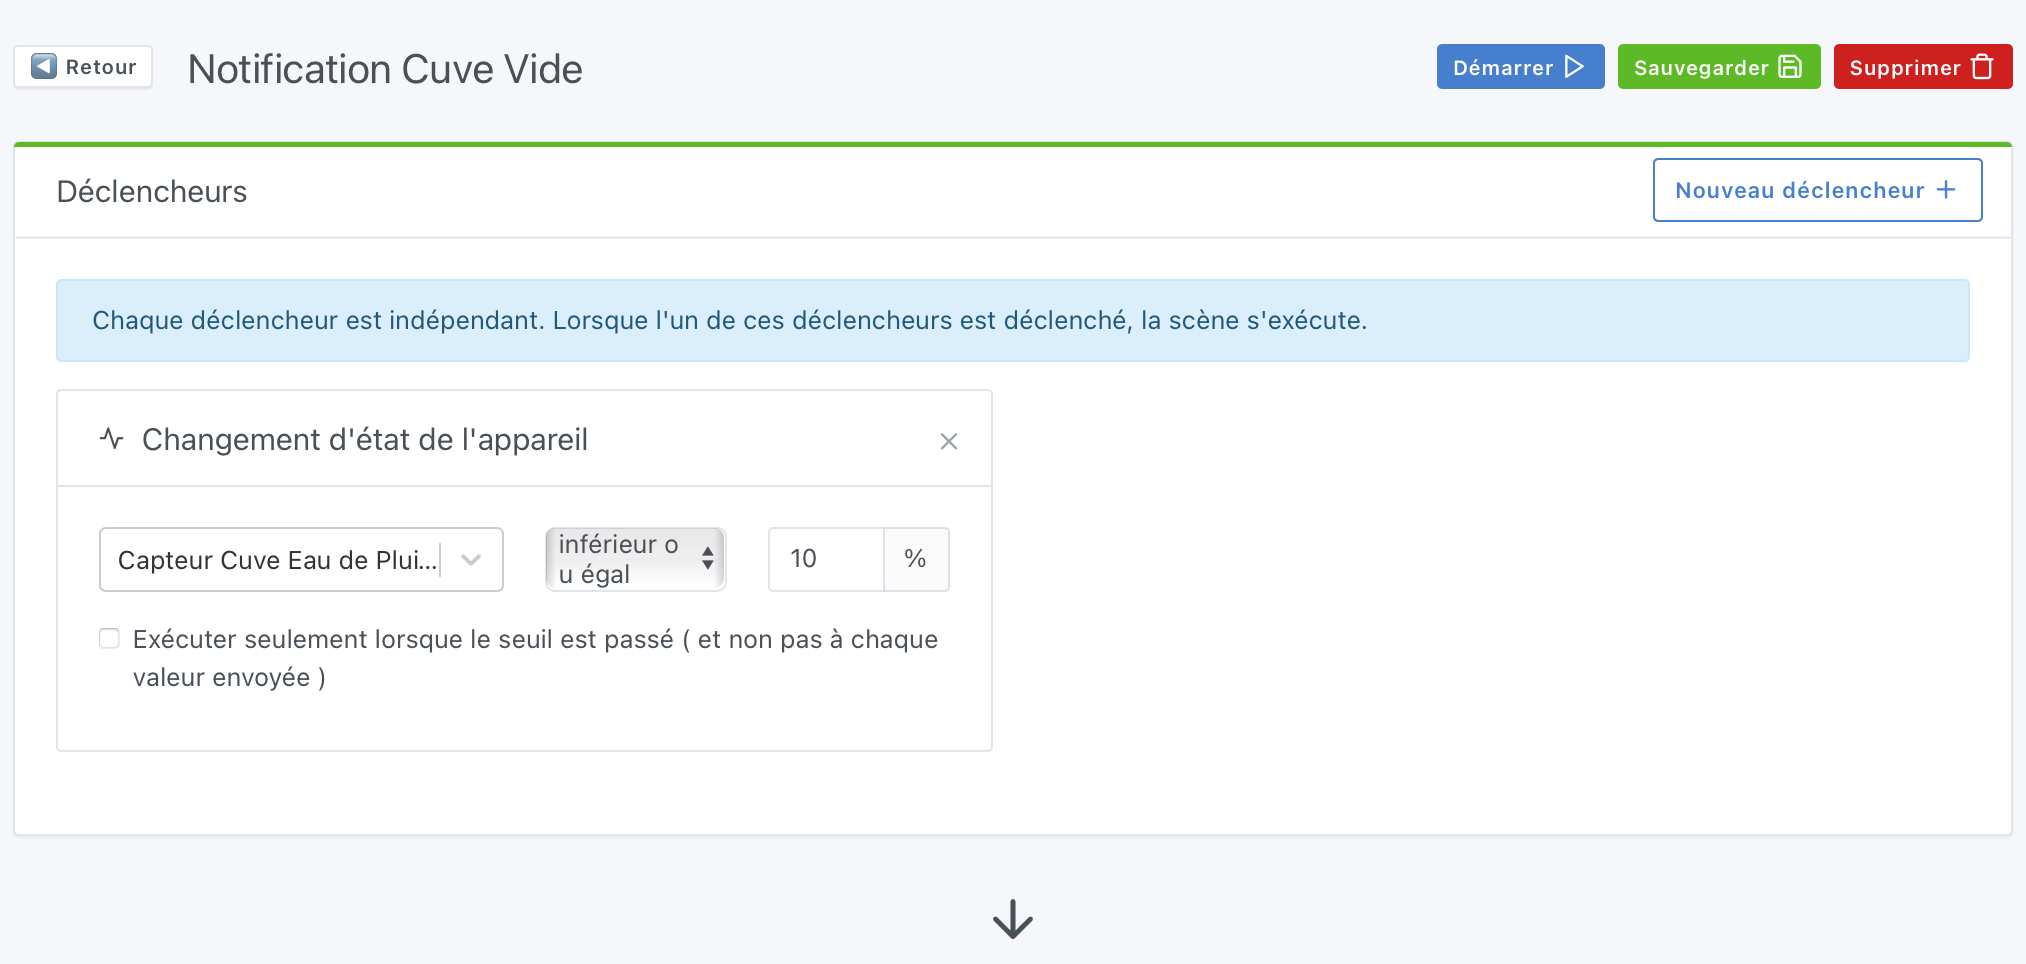
Gladys allows me to switch to city water if necessary more easily via a notification that indicates that the tank is almost empty.
For this project, if you are interested, you will need:
1x Wemos D1 mini (cost 2.63€ on AliExpress) strong points: small and Wi-Fi
1 Ultrasonic Sensor JSN-SR04T strong point: waterproof (cost 5.25€ on AliExpress)
1x Extension Cable 3.5m necessary for distances > 2.5m if you wish to connect it in the house or in a garage via USB (cost 4.08€ on AliExpress)
1 or 2 Waterproof Boxes depending on the chosen installation method (cost 2.40€ at a hardware store)
Total: 17.36€
Prerequisites:
- Arduino Software
- MQTT Integration in Gladys
First Step: Connecting the JSN-SR04T Sensor to the Wemos D1 mini
Diagram:

GND: GND

VCC: 5V

Echo: Pin D6

Trigger: Pin D7
Second Step: Integrating MQTT in Gladys
Follow the installation procedure in Gladys and once the configuration is complete, you need to create a new MQTT device with the elements below
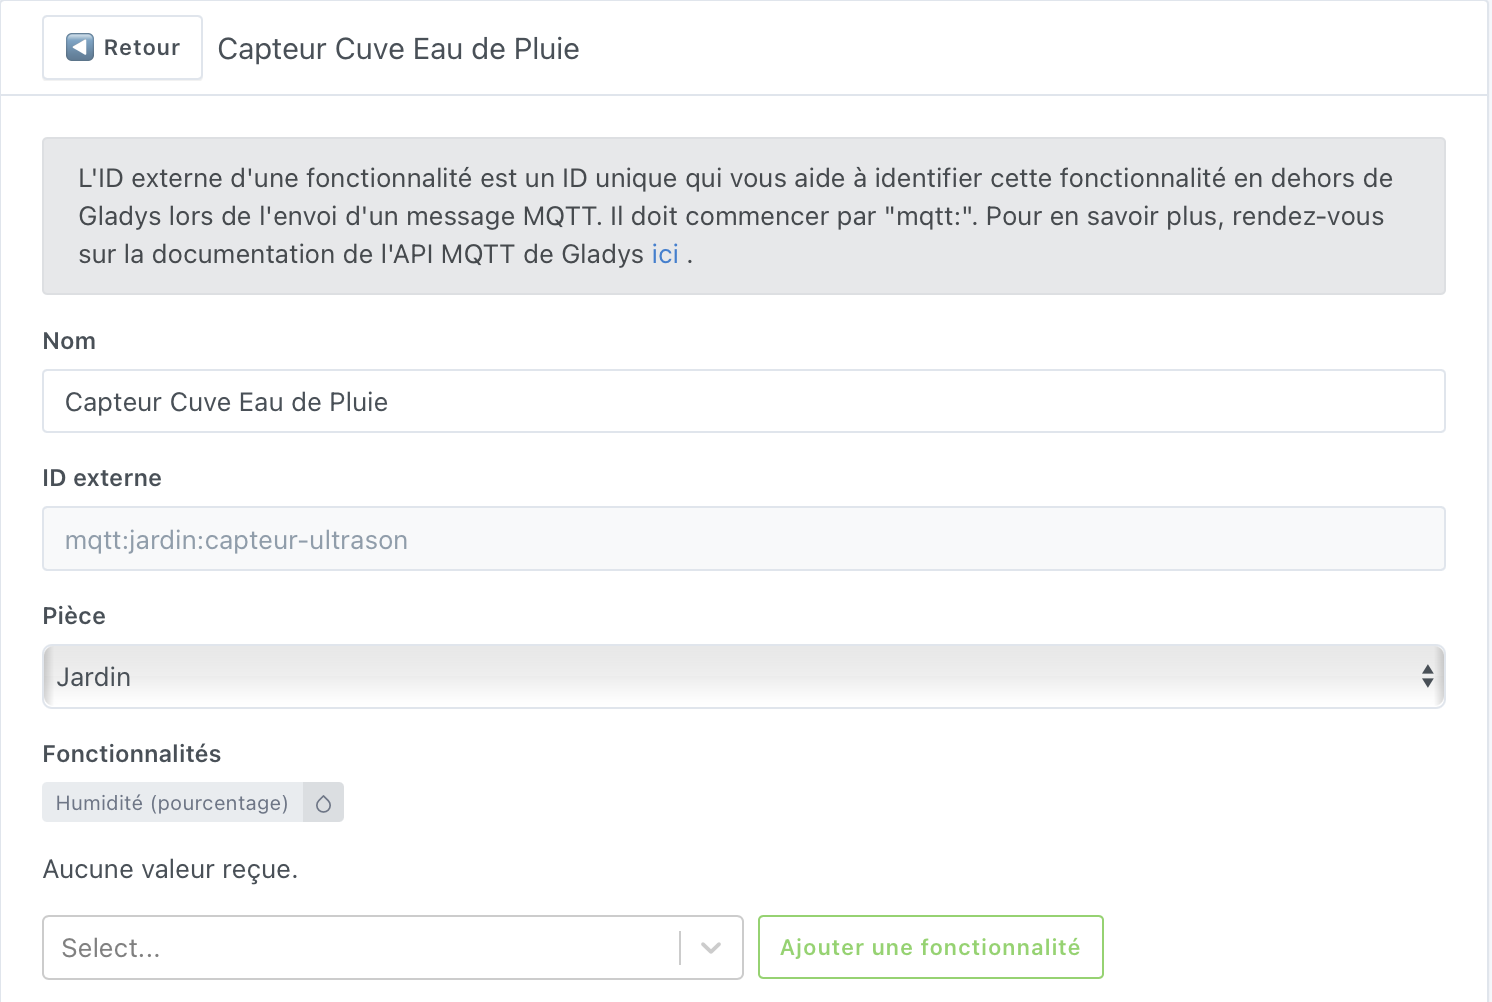

Then « Save »
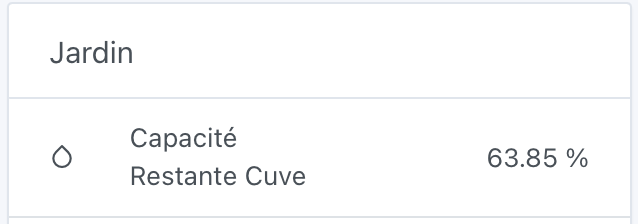
Finally, you can create the banner on the homepage to see the result at the end of the project
On the Dashboard, click on « Edit » → « Room Devices » → « Garden »
Third Step: The Arduino Code to Upload to the Wemos (Home Code to Refine or Improve)
For this, you will need to download and install the Arduino IDE from their website (available here)
The WEMOS D1 mini is not officially recognized by the Arduino IDE. You must therefore download the CH340/CH341 driver so that it is recognized and you can upload code to it. (Available here)
Connect your Wemos D1 mini then install the driver, then launch the Arduino software and go to « Preferences » and add the line below in the additional boards manager URLs
http://arduino.esp8266.com/stable/package_esp8266com_index.json

Then, go to « Tools » → « Board » → « Boards Manager » and search for « esp8266 » then click on « Install »

Finally, you can choose your board in « Tools » → « Board » and select « ESP8266board » then « LOLIN(Wemos) D1 R2 & mini »
And there you go, your Wemos card is ready to receive code 
Now, you need to download the libraries necessary for the code to work.
You need to go to the « Tools » → « Manage Libraries »
We will need:
- ESP8266Wifi
- PubSubClient
You can now copy/paste the code below, making sure to fill in your information in the MQTT, WIFI section and especially to modify the value of the depth of your tank in « float c = 2000 »
#include <ESP8266WiFi.h>
#include <PubSubClient.h>

/* WIFI */

#d#define wifi_ssid "*********" // your WiFi SSID
#define wifi_password "**************" // your WiFi password

/* MQTT */

#define mqtt_server "192.168.0.8"
#define mqtt_user "gladys"            // username
#define mqtt_password "************" // MQTT password
#define gladys_topic "gladys/master/device/mqtt:jardin:capteur-ultrason/feature/mqtt:jardin:capteur-ultrason:quantite/state"
#define mqtt_cuve "mqtt:jardin:capteur-ultrason"     // Tank sensor topic

/* Buffer to decode received MQTT messages */

char message_buff[100];

long lastMsg = 0;   // Timestamp of the last message published on MQTT
long lastRecu = 0;
bool debug = false;  // Displays on the console if True

/* Constants for the pins */

const byte TRIGGER_PIN = 7; // TRIGGER pin
const byte ECHO_PIN = 6;    // ECHO pin

/* Constants for the timeout */

const unsigned long MEASURE_TIMEOUT = 25000UL; // 25ms = ~8m at 340m/s

/* Speed of sound in air in mm/us */

const float SOUND_SPEED = 340.0 / 1000;

// Object creation

WiFiClient espClient;
PubSubClient client(espClient);

void setup() {

  /* Initialize the serial port */

  Serial.begin(9600);     // Optional for debugging

  /* Initialize the pins */

  pinMode(TRIGGER_PIN, OUTPUT);
  digitalWrite(TRIGGER_PIN, LOW); // The TRIGGER pin must be LOW at rest
  pinMode(ECHO_PIN, INPUT);

  setup_wifi();           // Connect to the WiFi network
  client.setServer(mqtt_server, 1883);    // Configure the connection to the MQTT server
}

// WiFi network connection
void setup_wifi() {
  delay(10);
  Serial.println();
  Serial.print("Connecting to ");
  Serial.println(wifi_ssid);

  WiFi.begin(wifi_ssid, wifi_password);

  while (WiFi.status() != WL_CONNECTED) {
    delay(500);
    Serial.print(".");
  }

  Serial.println("");
  Serial.println("WiFi connection established");
  Serial.print("=> IP Address: ");
  Serial.print(WiFi.localIP());
}

// Reconnection
void reconnect() {
  // Loop until reconnection is obtained
  while (!client.connected()) {
    Serial.print("Connecting to MQTT server...");
    if (client.connect("ESP8266Client", mqtt_user, mqtt_password)) {
      Serial.println("OK");
    } else {
      Serial.print("Failed, error: ");
      Serial.print(client.state());
      Serial.println(" Waiting 5 seconds before retrying");
      delay(5000);
    }
  }
}

void loop() {
  if (!client.connected()) {
    reconnect();
  }
  client.loop();

  long now = millis();

  /* Send a message every minute */

  if (now - lastMsg > 1000 * 60) {
    lastMsg = now;

    /* 1. Start a distance measurement by sending a HIGH pulse of 10µs on the TRIGGER pin */

    digitalWrite(TRIGGER_PIN, HIGH);
    delayMicroseconds(10);
    digitalWrite(TRIGGER_PIN, LOW);

    /* 2. Measure the time between the sending of the ultrasonic pulse and its echo (if it exists) */

    long measure = pulseIn(ECHO_PIN, HIGH, MEASURE_TIMEOUT);

    /* 3. Calculate the distance from the measured time */

    int distance_mm = measure / 2.0 * SOUND_SPEED;
    float c = 2000 - distance_mm; // VERY IMPORTANT Replace 2000 with the height of your tank
    c = c / 2000;
    c = c * 100;

    // No need to go any further if the sensor returns nothing
    if ( isnan(c)) {
      Serial.println("Reading failed! Check your HRC-04 sensor");
      return;
    }

    if ( debug ) {
      Serial.print("Tank: ");
      Serial.print(c);
    }
    client.publish(gladys_topic, String(c).c_str(), true);   // Publishes the % of the tank on the topic in gladys
  }
}
Once the code is uploaded, you can connect the cables with the diagram above and perform a test with the Arduino IDE and the serial monitor to see the result. If it works correctly, you can then install your hardware in watertight boxes to protect your sensor and your Wemos.
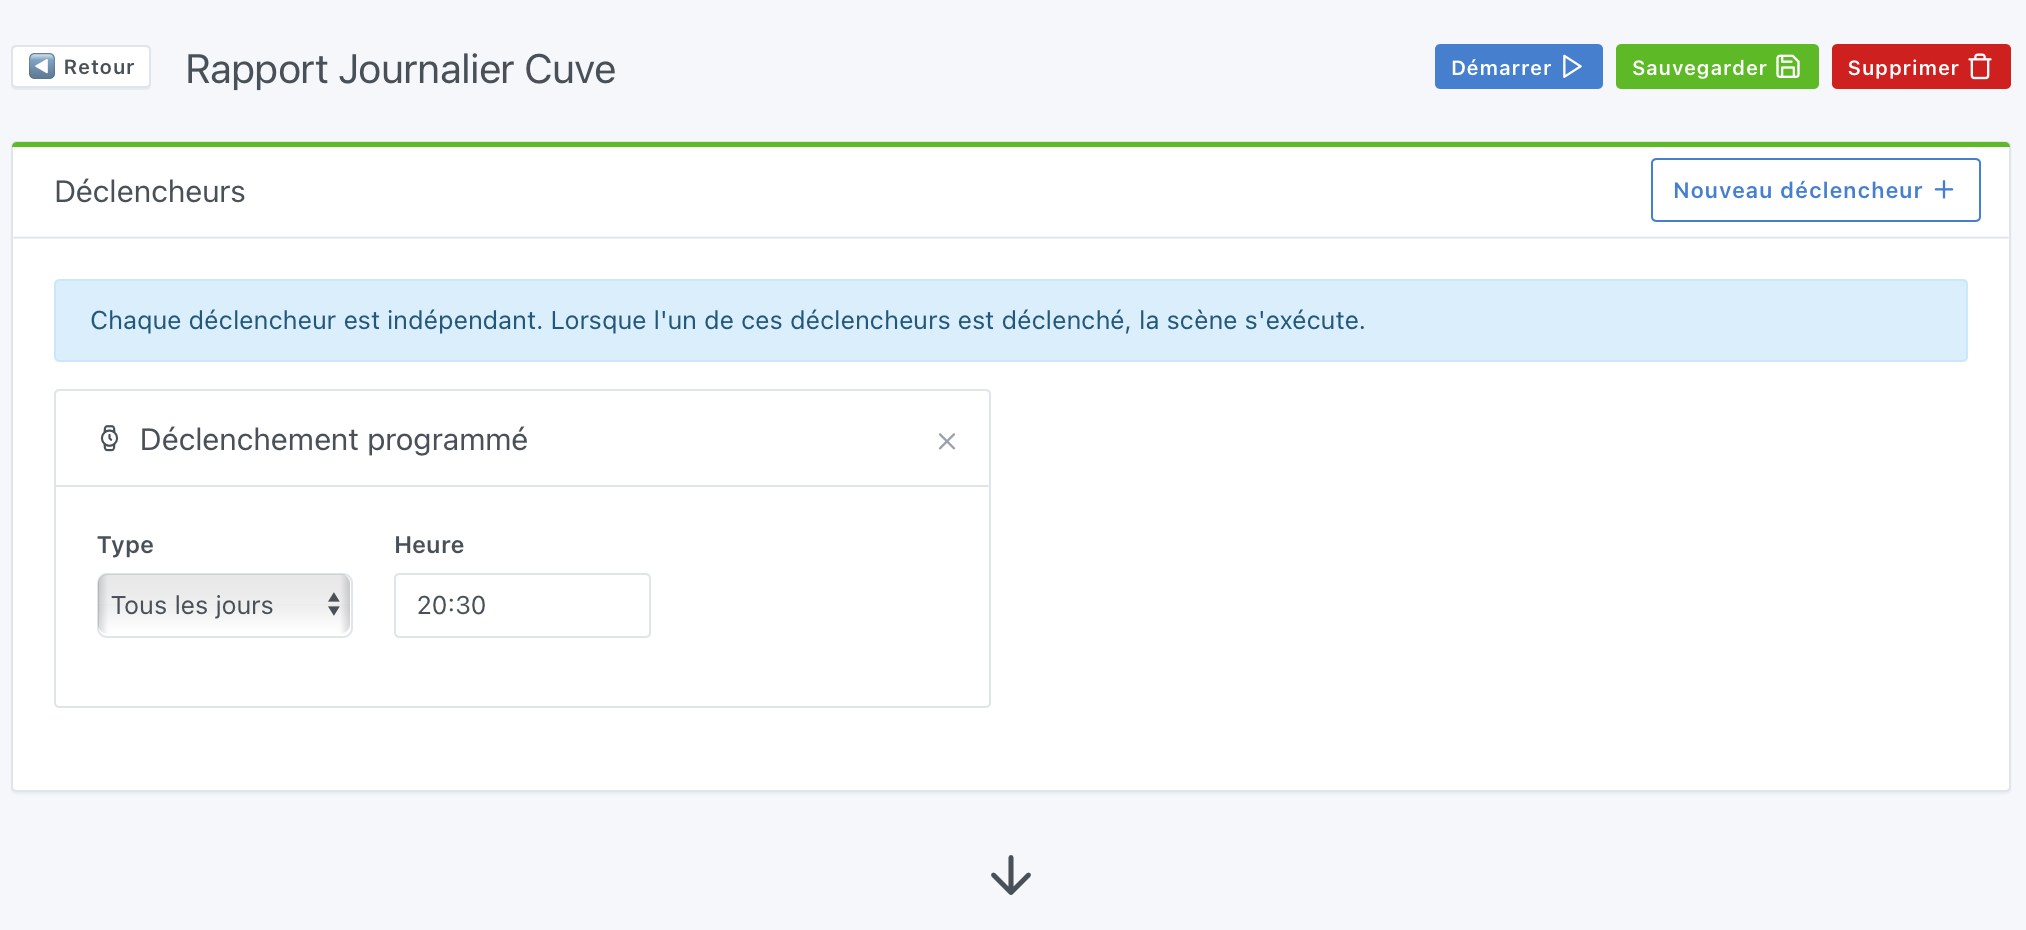
You can create different scenes and, for example, notify you if the tank is almost empty or send you a daily report of the remaining capacity.

First Scene: Empty Tank Notification

Second Scene: Daily Tank Report
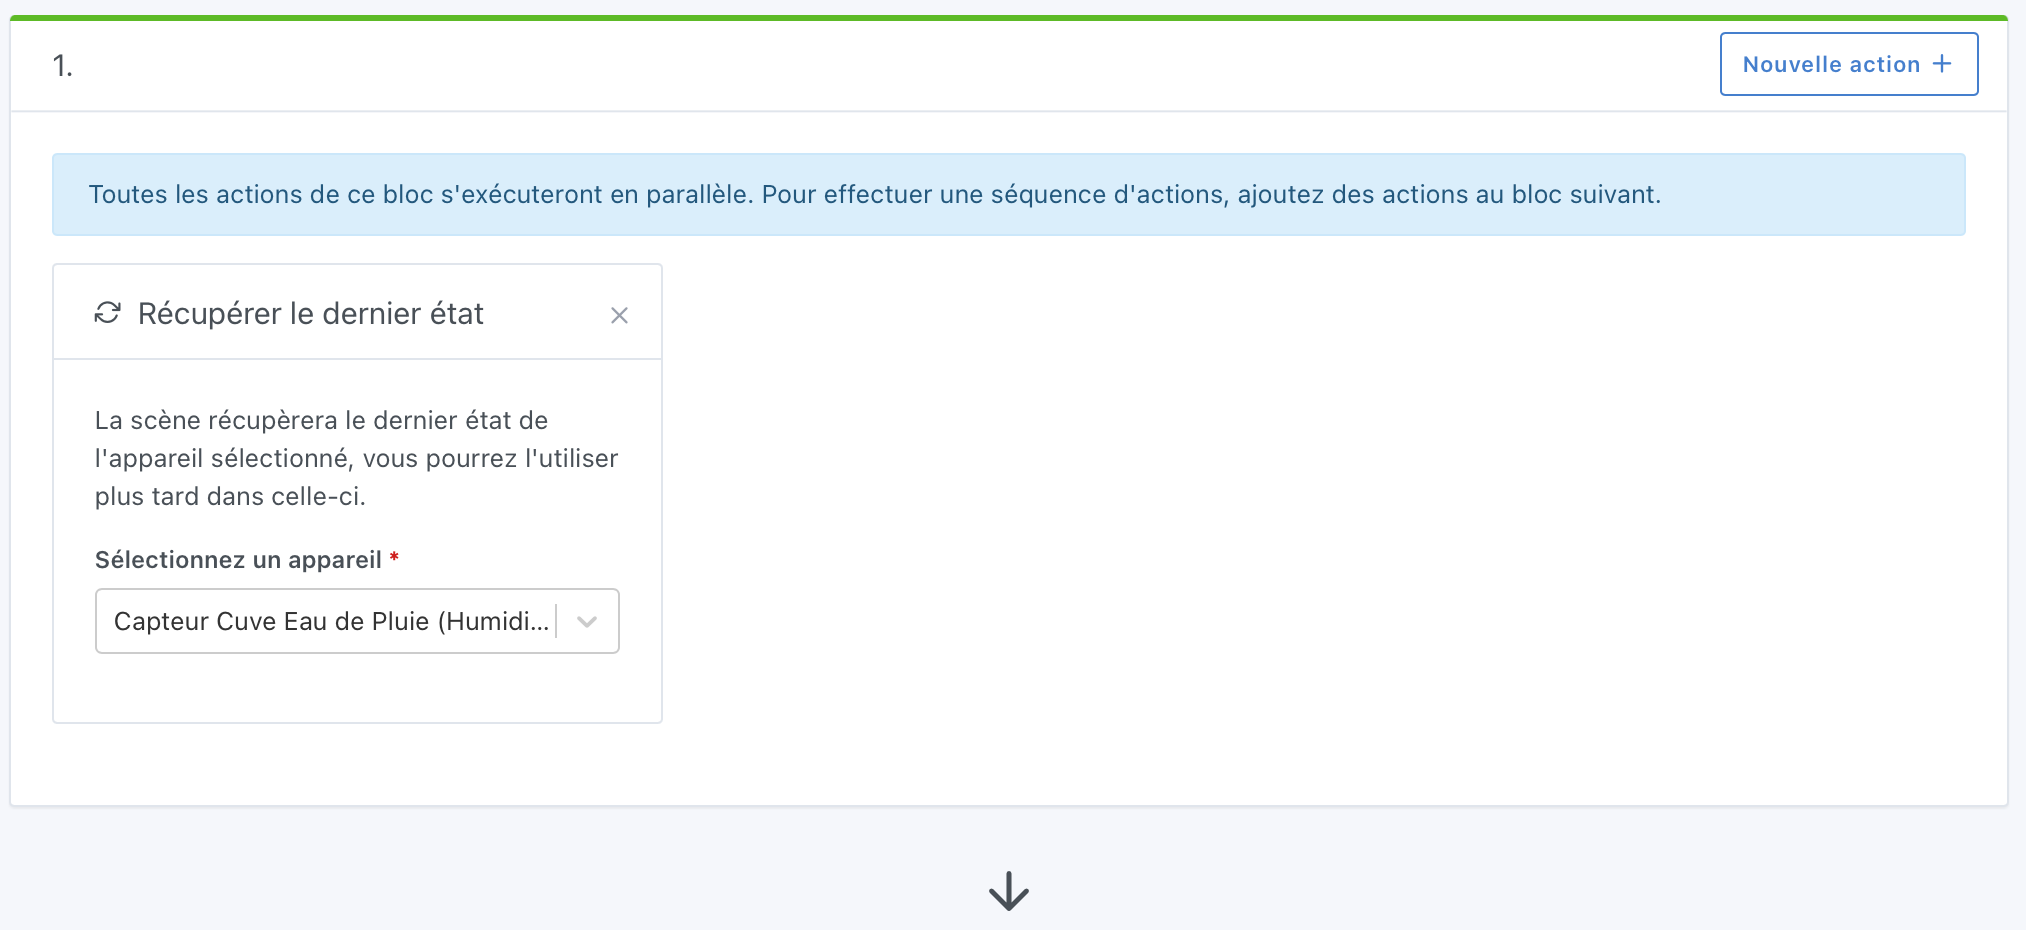

You can install the Telegram application to receive your notifications now.
A few photos of my installation
 , well spotted!
